Can You Clean a MAP Sensor? A Practical Guide
Learn whether you can safely clean a MAP sensor, how to identify grime, and step-by-step methods to clean or replace it. Cleaning Tips guides homeowners with practical, safe automotive maintenance.

You can clean a MAP sensor when grime is the root cause, but proceed with care. The process involves safely disconnecting power, using electronics-safe cleaner, and avoiding moisture on electrical pins. If the sensor is damaged or codes persist after cleaning, replacement is the safer option. This guide outlines safe steps, necessary tools, and testing checks.
What is a MAP Sensor and Why Clean It?
The MAP sensor, or manifold absolute pressure sensor, measures intake manifold pressure and feeds data to the ECU to help manage air-fuel mixture. Dirt, oil, or carbon buildup can skew readings, causing idle instability, hesitation, and reduced fuel economy. The question many homeowners ask is: can you clean a map sensor? In many cases, yes—careful cleaning can restore accuracy without replacing the part. This guidance from Cleaning Tips emphasizes practical, safety-first steps, how to assess cleanliness, and how to verify results after reassembly. Start with a visual inspection to confirm grime is the culprit, then proceed with targeted cleaning and testing. Remember: moisture near electrical pins is the primary risk, so keep cleaners away from those connections.
Quick diagnosis and context
If your engine runs roughly, idles inconsistently, or you notice worse fuel economy, grime on the MAP sensor might be a factor. Use a scan tool to check live data when available; if readings drift with engine load, a dirty sensor is plausible. However, contamination is not the same as sensor failure. Cleaning Tips stresses that dirt is often the easiest fix, but mechanical damage, bent pins, or failed wiring require different repairs.
How cleanliness affects performance and safety
A clean MAP sensor can restore accurate pressure readings, improving fuel trims and throttle response. On the flip side, aggressive cleaning or solvent intrusion can damage sensor elements or connectors, resulting in more problems. The goal is to remove surface grime without saturating the sensor or soaking the electronics. If there is any sign of damage, don’t push ahead—replacement is safer. This approach aligns with best practices highlighted by Cleaning Tips.
Preparation: Safety and setup
Before touching the MAP sensor, create a clean workspace and gather tools. Disconnect the negative battery cable to prevent shorts and lay out screws in a tray. Work in a well-ventilated area and wear eye protection and gloves. Review your vehicle’s service manual for location and model-specific cautions. Having a plan reduces the risk of missteps and makes the procedure smoother. According to Cleaning Tips, preparedness helps ensure you don’t miss fragile connectors or misplace fasteners.
Inspecting the MAP sensor
Carefully inspect the sensor face, vacuum port, and electrical connector for grime, oil, varnish, or corrosion. Check for bent pins, cracked housings, or melted insulation. If you see damage, stop and replace the sensor rather than risk further harm. A quick test can be done by inspecting the pins for cleanliness and verifying the wiring harness shows no signs of oil intrusion. In many cases, contamination is isolated to the sensor surface rather than the entire harness.
Cleaning Methods: Electronics cleaner vs cleaning additives
Choose electronics-safe cleaner designed for sensors and electronics. Lightly spray a lint-free cloth or brush—never spray directly onto the sensor—then wipe the exposed surfaces and ports. Use a soft brush to loosen stubborn grime around the sensor face and passages. Allow the sensor to dry completely before reinstalling. Avoid carburetor, brake, or other harsh cleaners that can degrade plastic or seals. Cleaning Tips emphasizes minimal solvent use to avoid downstream damage.
Reinstallation and testing
Reinstall the MAP sensor into the intake manifold and reconnect the electrical connector. Reconnect the battery, clear any diagnostic codes, and start the engine. Listen for vacuum leaks around the sensor housing and hoses, and monitor idle and throttle response. If available, use a scan tool to confirm MAP readings change sensibly with engine load. If readings remain erratic after cleaning, recheck connections and consider replacement. The goal is reliable data rather than a quick fix.
Common mistakes and safety warnings
Common pitfalls include spraying solvent directly onto pins, using too much cleaner, or rinsing with running engine nearby. Always work with the engine off and cool, and allow the sensor to dry completely before reassembly. Keep cleaners away from open electrical connections and avoid magnetized tools near the sensor. If you’re uncertain, consult a professional; improper cleaning can cause poor performance or sensor failure. Cleaning Tips recommends following model-specific guidance when available.
Maintenance to prevent contamination
Preventive care reduces future buildup: replace the air filter regularly, use high-quality fuel, and avoid short trips that allow varnish formation. Inspect vacuum hoses for leaks and keep the engine bay clean of oil spills. Regularly check with a scan tool to catch drifting readings early. A proactive maintenance routine helps keep MAP sensors in good shape and minimizes disruptive codes.
Authority Sources
For deeper guidance on MAP sensors and engine maintenance, see credible references such as: - National Highway Traffic Safety Administration (NHTSA) — https://www.nhtsa.gov - U.S. DOE Fuel Economy (Fueleconomy.gov) — https://www.fueleconomy.gov - SAE International — https://www.sae.org
Tools & Materials
- Safety goggles(Protect eyes from solvent spray and debris)
- Nitrile gloves(Protect skin from cleaners and oils)
- Digital multimeter(Test reference voltage and sensor response if applicable)
- Electronics cleaner (no-residue)(Spray onto cloth/brush; avoid directly spraying pins)
- Lint-free microfiber cloth(Wipe and dry sensor surfaces)
- Soft-bristled brush(Gently loosen grime from face and ports)
- Small screwdriver set (Phillips/Torx)(Remove sensor and disconnectors)
- Magnetic/holding tray(Keep fasteners organized)
- Compressed air (optional)(Blow out dust after cleaning; avoid moisture buildup)
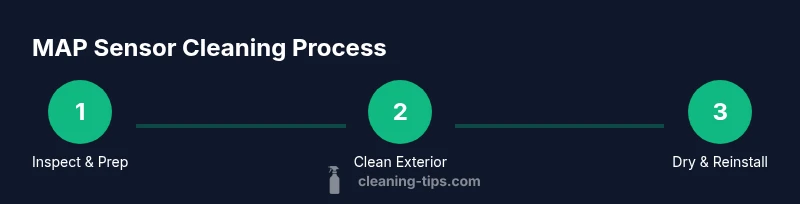
Steps
Estimated time: Total time: 30-60 minutes
- 1
Disconnect power and locate MAP sensor
Begin by turning off the engine and disconnecting the negative battery terminal to prevent shorts. Locate the MAP sensor on the intake manifold and identify its electrical connector and vacuum port. This preparation minimizes the risk of electrical damage during cleaning.
Tip: Take a quick photo of connectors before removal to aid reassembly. - 2
Remove the MAP sensor
Using the appropriate screwdriver, detach the MAP sensor from its mounting and disconnect the electrical plug. Keep screws in a labeled tray to avoid loss and ensure you don’t force any connectors. Be careful not to twist wiring harnesses.
Tip: Handle the sensor gently to avoid cracking the housing. - 3
Inspect the sensor and harness
Visually inspect the sensor face, vacuum port, and connector for grime, corrosion, or damage. If you see bent pins or cracked insulation, stop and consider replacement. A quick pin-cleaning test (if accessible) helps determine whether to proceed with cleaning.
Tip: If you see damage, replace rather than attempt a risky cleaning. - 4
Apply cleaner to the sensor exterior
Lightly spray electronics cleaner onto a lint-free cloth or brush, then wipe the sensor face and port areas. Avoid soaking internal passages; we want surface cleanliness without penetrating sensitive internals.
Tip: Never spray cleaner directly onto the pins or into the vacuum port. - 5
Gently scrub stubborn grime
Use a soft brush to loosen caked grime around the sensor face and passages. Wipe away residues, then re-check for any remaining varnish or buildup. Allow any solvent residue to evaporate fully before reassessment.
Tip: Patience beats aggressive scrubbing which can damage seals. - 6
Dry and reattach
Let the sensor air-dry completely in a dust-free area. Reconnect the electrical plug and mount the sensor back onto the intake manifold with the correct torque. Reattach any hoses and vacuum lines as they were.
Tip: Do not force connectors; ensure a clean, proper mating alignment. - 7
Reconnect power and test
Reconnect the negative battery terminal. Clear any diagnostic codes with a scan tool, then start the engine. Observe idle quality and throttle response. If available, monitor live MAP data to confirm readings respond correctly to engine load.
Tip: If codes reappear, recheck connections or consider replacement. - 8
Inspect for leaks
Listen for vacuum leaks around the sensor and related hoses after reassembly. A small leak can affect MAP readings and engine performance. Tighten clamps if necessary and replace cracked hoses.
Tip: Vacuum leaks can mimic sensor failure; verify with a diagnostic tool. - 9
Document results and plan
Record the steps taken, parts inspected, and observed readings. This helps when monitoring performance over time and informs future maintenance decisions. If symptoms persist, a sensor replacement may be indicated.
Tip: Keep your notes handy for future maintenance or warranty claims. - 10
Follow-up maintenance
Schedule regular air filter maintenance and periodic sensor checks to prevent grime buildup. A clean intake and healthy MAP sensor contribute to stable idle and efficient fuel utilization.
Tip: Combine MAP sensor care with routine engine bay cleaning for best results.
Questions & Answers
Can you clean a MAP sensor without removing it from the intake manifold?
In some vehicles you can perform a surface cleaning without removing the sensor, but a full cleaning and inspection often requires removal. Always follow your vehicle’s service manual and safety precautions. If in doubt, consult a professional.
You can sometimes clean it without removing, but full cleaning usually needs removal per the manual.
Will cleaning a MAP sensor fix engine codes caused by sensor failure?
Cleaning may improve readings if grime was causing inaccurate data, but it won’t fix codes that indicate sensor failure or wiring issues. Re-scan after cleaning to verify.
Cleaning can help if grime was to blame, but it won’t fix codes from a failed sensor.
Is it safe to use regular carb cleaner on a MAP sensor?
No. Use electronics-safe cleaner designed for sensors. Avoid carb cleaners which can damage sensor housings and internal components.
No—use electronics-safe cleaner, not carburetor cleaner.
How can I tell if my MAP sensor is dirty?
Rough idle, hesitation, and reduced fuel economy are common signs. If available, check live data to confirm unstable MAP readings.
Look for rough idle and poor fuel economy, and verify with live data.
Do I need to replace the MAP sensor after cleaning?
Not always. If cleaning restores proper readings and there’s no physical damage, replacement may not be needed. Replace if tests fail or damage is evident.
Not necessarily—only replace if cleaning doesn’t help or damage exists.
How should I test the MAP sensor after cleaning?
Use a scan tool to view live MAP data and compare with engine load. A healthy sensor will show smooth voltage changes with throttle and vacuum variations. Refer to the service manual for exact specs.
Test with a scan tool to confirm readings and response.
Watch Video
The Essentials
- Assess whether grime is the root cause before cleaning
- Use electronics-safe cleaners and avoid direct spraying on pins
- Inspect for damage and replace if necessary
- Test readings after cleaning to confirm improvements
- Maintain the air intake system to prevent future contamination