Can You Vacuum Shattered Glass? A Safe Step-by-Step Guide
Learn how to safely vacuum shattered glass with a practical, step-by-step approach, protective gear, and surface-specific tips from Cleaning Tips to reduce injury and cleanup time.

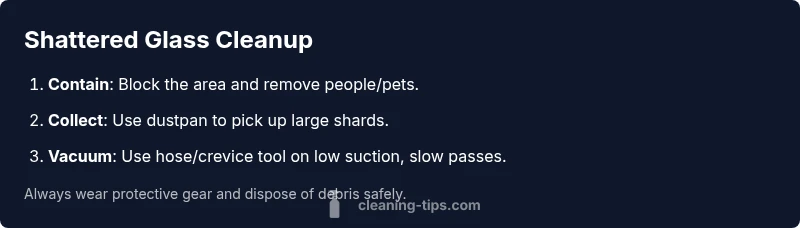
Yes. You can vacuum shattered glass safely by following careful steps: secure the area, wear closed-toe shoes, and use the right attachment. Avoid loose shards with a dustpan for larger pieces, then vacuum slowly, using a gentler setting or a hose attachment. Finally, inspect and sweep the area for tiny splinters.
Safety and containment: your first moves after a break
According to Cleaning Tips, the fastest way to stay safe after glass breaks is to contain the area, protect yourself, and plan the cleanup. Start by clearing people and pets from the room and preventing condensation or airflow that could spread shards. Wear proper footwear with closed toes and sturdy gloves, and avoid walking barefoot or with socks that could catch tiny splinters. If the break happened on a hard floor, you’ll still want to be mindful of cut points and avoid rushing. A calm, deliberate approach reduces risk and makes the subsequent steps more effective.
Containment also means preventing spread via air currents or rug fibers. Close doors to adjacent rooms, wipe off any moisture on nearby surfaces, and place a bright light on the spill to reveal hidden shards. This initial safety checkpoint is essential because even tiny fragments can cause injuries when stepped on or handled. Cleaning Tips emphasizes containment as the anchor of any shattered-glass cleanup, and your first moments set the tone for the entire process.
Tools and protective gear you’ll want on hand
Before you touch the debris, assemble the right tools and wear the proper gear. A vacuum cleaner with a hose or crevice attachment is essential for reaching tight corners and along baseboards. A dustpan and stiff brush help capture larger shards with minimal dispersal, reducing the chance of pushing shards into other areas. Thick gloves and closed-toe shoes protect your hands and feet from hidden slivers. A bright flashlight helps you spot micro shards that reflection or glare can hide, especially along edges and under furniture. Optional but helpful items include tape or a damp cloth to trap tiny fragments and a sturdy trash container for disposal. Taking the time to prepare minimizes injury risk and speeds up the actual cleanup.
Having the right tools on hand keeps you organized and reduces the chance of making the problem worse. If you’re cleaning on carpet, you’ll want to be especially careful with suction strength and avoid aggressive sweeping that can push shards deeper into fibers. Clean tools after use to prevent re-collection of any shard residue in other areas of the home.
Step 1: Stop the spread and establish a clean zone
Step 1 is all about safety demarcation. Immediately clear people and pets from the room and turn off nearby electrical devices if the break involved outlets or appliances to minimize shock risk. Create a clean, visible boundary using tape or a towel along the spill edge so you don’t cross into the contaminated area. If the glass is on a hard surface, you can start by placing a shallow dustpan beside the main spill to contain larger pieces before you approach with your vacuum. Time spent setting the boundary saves you from missing shards and reduces the chance of injuries.
Pro tip: keep wrists and hands out of the line of debris and use tools—never pick up glass with bare hands. This is where a steady, methodical approach pays off and reduces the chance of cutting yourself during later steps.
Step 2: Pick up large shards safely
Use the dustpan and stiff brush to lift larger shards into a trash container. Work slowly and methodically, sweeping pieces toward the pan rather than churning them across the floor. If a shard seems stubborn, pick it up with gloved fingers and transfer it to the bin using the dustpan as a guide. This step minimizes the risk of scattering pieces that could cause injuries or damage vacuum filters.
Pro tip: always sweep away from your body and keep your feet clear of the immediate debris zone. This reduces the chance of accidentally stepping on a shard that wasn’t visible at first glance.
Step 3: Vacuum strategically and avoid dispersal
Attach the crevice tool or hose attachment to your vacuum. Begin with the edges and corners where shards accumulate, moving slowly in straight, overlapping passes. Do not rush; angled sweeps can push shards under furniture or into crevices you can’t reach. If you’re cleaning a hard floor, set suction to a lower level to avoid dispersing shards as you pull the vacuum over the spill. On carpet, you may opt for a gentle pass and then switch to a handheld tool for stubborn bits near baseboards.
Pro tip: keep the nozzle close to the surface without pressing hard to minimize outward flicking of fragments. Slow, deliberate passes improve capture and prevent scattering that can happen with fast, broad strokes.
Step 4: Double-check for tiny fragments and edges
After the initial pass, inspect the area with a bright flashlight. Tiny shards can reflect light and appear as tiny glints on the floor or rug fibers. Roving the tool slowly again along the baseboards and under furniture helps catch what you missed. If you see a piece, pick it up with gloves and place it in the disposal container before re-vacuuming.
Pro tip: use a piece of transparent tape to lift micro shards that cling to the floor. This technique is especially effective along the edges where vacuum suction is weaker.
Step 5: Dispose, sanitize, and finish
Seal all debris and the vacuum bag or canister contents in a sturdy container or thick bag before disposing of it outside the home. Wipe the cleaned area with a damp cloth or paper towel to trap the last particles, then wipe down the vacuum brush and hose exterior to prevent transfer of shards. Finally, re-check the area with your flashlight and perform a quick light pass with the vacuum again if you notice any glints. Proper disposal prevents recontamination and ensures the space is truly safe to use again.
Common mistakes and safety reminders
Common mistakes include using a broom on carpet or using too aggressive suction on hard floors, both of which can disperse shards. Never vacuum a wet surface or a liquid spill that contains glass, as the water can cause glass fragments to smear and slip. Do not reuse spoiled filters or bags with shards inside—dispose of them promptly in a secure bin. If you’re unsure about a spill’s size, err on the side of caution, and consider wearing cut-resistant gloves for extra protection when handling larger pieces.
Pro tip: always unplug the vacuum before removing the canister or bag to avoid an accidental pinch or cut. Safety first keeps cleanup efficient and reduces risk of injury.
Tools & Materials
- Vacuum cleaner with hose/crevice attachment(Prefer a canister or handheld unit for better control on edges and under furniture.)
- Dustpan and stiff brush(Use to safely lift larger shards before vacuuming.)
- Thick gloves(Protect hands from hidden slivers.)
- Closed-toe shoes(Protect feet from stepping on sharp glass.)
- Flashlight(Reveals tiny shards hidden in shadows.)
- Damp cloth or tape(Capture micro fragments and wipe surfaces.)
- Sturdy trash bag or metal container(Securely dispose debris.)
Steps
Estimated time: 20-35 minutes
- 1
Prepare and secure area
Clear the room of people and pets. Put on closed-toe shoes and gloves. Establish a visible boundary around the spill and turn off nearby electrical devices if needed.
Tip: Establish a safe perimeter before approaching the shards. - 2
Collect large shards with dustpan
Carefully scoop larger pieces into the trash container using the dustpan. Sweep pieces toward the pan, not across the floor, to minimize dispersal.
Tip: Do not pick up large shards with bare hands. - 3
Vacuum along edges with attachment
Attach the crevice tool or hose and vacuum slowly along walls, baseboards, and under furniture. Use straight passes and avoid aggressive sweeping.
Tip: Keep the nozzle close to the surface without pressing hard. - 4
Inspect for micro shards
Use a flashlight to scan the area for tiny fragments. Vacuum again on low power if needed and pick any remaining shards with gloved hands or tape.
Tip: Tiny shards hide in cracks and along seam lines. - 5
Dispose and sanitize tools
Seal debris in a sturdy bag or container and dispose outside. Wipe down the tools and area to remove any remaining particles.
Tip: Label the bag if you store it for any reason.
Questions & Answers
Can vacuuming shattered glass cause micro-splinters to disperse if done incorrectly?
Yes, improper technique can push shards and create airborne splinters. Contain the area, start with larger pieces, and use controlled, straight passes with the right attachment to minimize scatter.
If you’re not careful, vacuuming can push shards around. Start slow and use the attachment to guide pieces into the vacuum.
Should I vacuum up glass on carpet?
Carpet complicates cleanup. Start with picking up visible pieces with a dustpan, then vacuum using a low-suction setting and a crevice tool to reach edges. Check for remaining shards with a flashlight.
Carpet adds risk of hiding shards. Use careful, slow passes and check with a flashlight after vacuuming.
What should I do with the vacuum after cleaning glass?
Empty the canister or bag outside and wipe down the exterior and attachments to prevent recontamination. Check the filter for any shards and replace if needed.
Empty outside and wipe down the vacuum to prevent any glass from lingering in the machine.
Is a lint roller or tape useful for tiny shards after vacuuming?
Yes. Use clear tape or a lint roller to lift micro shards from carpet fibers or smooth surfaces where the vacuum may miss them.
Tape can grab shards that the vacuum misses, especially along edges and seams.
How can I prevent glass breakage in the first place?
Use tempered or laminated glass for high-traffic areas and place fragile items in secure spots. Consider mats or trays on countertops to reduce impact risk.
Preventing breakage is about better placement and stronger materials.
Watch Video
The Essentials
- Contain the spill before cleaning
- Use the right tools and protective gear
- Vacuum slowly with the correct attachment
- Double-check with light for tiny shards
- The Cleaning Tips team recommends following these steps for safe cleanup