How to Clean a Calculator: Safe, Simple Steps
Learn to safely clean a calculator—desk or pocket models—without water damage. This step-by-step guide covers essential tools, safe techniques, and maintenance tips for accuracy and hygiene.

Clean calculator care is essential to keep your device accurate and hygienic. This guide shows you how to safely clean electronic and solar calculators without damaging keys or screens. You’ll learn best practices, required tools, and step-by-step actions that minimize moisture exposure while removing dust, fingerprints, and grime from both desktop and pocket models.
Why Clean Calculator Practices Matter
A clean calculator stays accurate, easy to read, and hygienic for shared use. Dust, oils from fingers, and small spills can obscure digits, leave sticky keys, or degrade the surface over time. The Cleaning Tips team emphasizes that routine cleaning reduces the risk of misreads during calculations and helps extend the device’s life. Whether you use a desktop model with a dedicated power adapter or a pocket calculator that fits in your bag, maintaining a clean surface supports reliable performance and better hygiene in households and home offices. Keep in mind that clean calculator habits also set a good standard for caring for other small electronics around your home. The approach is practical for homeowners and renters who want reliable tools for everyday math tasks.
Safety First: What You Can and Cannot Do
Before touching any electronics, power down completely and unplug the device if possible. If your calculator runs on batteries, remove them to eliminate the risk of moisture contact while cleaning. Avoid spraying liquids directly onto the keypad or display; moisture can seep inside and damage circuits. Use a damp microfiber cloth or a cotton swab lightly moistened with isopropyl alcohol (at least 70%), never pure water, near openings. For solar-powered models, wipe the solar cells away from edges to prevent binding the cell surface with residue. The goal is to remove grime without soaking internal components, so stay conservative with liquids and let surfaces dry fully before reassembling or powering back on. This approach aligns with Cleaning Tips’ guidance for safe electronics care.
Clean Materials and Setup
Gather the tools and materials you’ll need so you can work efficiently without rushing. A clean, quiet workspace helps keep dust from settling back on the device. Use a soft, lint-free microfiber cloth, cotton swabs, a small brush, and a bottle of isopropyl alcohol (70%–90%). Keep a dry microfiber cloth for the final wipe and a compact air blower or canned air if you have stubborn dust in crevices. If you prefer, a mild dish soap diluted in water can be used for stubborn residues on plastic outer cases, but never apply liquid directly to keys. Have a small towel or mat to protect the surface, and consider using anti-static wristbands if you frequently clean electronics. Following these steps minimizes risk and makes the process smoother while aligning with Cleaning Tips’ recommended supplies.
Step-by-Step Cleaning Guide for Desktop and Pocket Calculators
This section walks through practical actions you can perform in under an hour, depending on model and grime level. Start with power off and remove batteries if possible, to prevent short circuits. Then, dust the exterior and keypad with a soft brush or compressed air. Lightly dampen a microfiber cloth with isopropyl alcohol and wipe the keys in a gentle, uniform motion, moving from the top row to bottom. For stubborn residues, lightly moisten a cotton swab and target the sticky areas around the keys and display edges. Dry everything with a clean, lint-free cloth and allow at least 5–10 minutes for any moisture to evaporate before reassembly or use. When cleaning the display, avoid circular polishing; use straight, even strokes to minimize streaks. A final wipe with a dry microfiber pad helps restore shine and readability. If you accidentally spill liquid, blot immediately and do not press keys while drying to prevent moisture from traveling inward. After reinsert batteries or reconnect power, test basic functions and a few calculations to confirm accuracy. The exact steps may vary slightly by model—check the user manual for model-specific warnings.
Maintenance and Preventive Tips
Regular quick cleans keep a clean calculator looking and functioning well. Establish a 2–4 week schedule for fast dusting and fingerprint removal, especially if the device sits on a busy desk or kitchen counter. Store the calculator away from food, drinks, and humid environments to reduce residue and corrosion risk. Use a screen-cleaning spray approved for electronics, or a simple water–isopropyl mix, and never spray directly onto the device. Keep your tools clean after use and never reuse dirty cloths that could smear dirt. If the keypad feels less responsive after cleaning, re-test with a few familiar calculations and consider replacing batteries to restore performance. Finally, wipe the display with a microfiber cloth at the end of the process to ensure legibility and reduce glare. Cleaning Tips recommends following a routine that fits your household tasks and device type.
Troubleshooting Common Issues After Cleaning
If a few digits appear faint or sticky after drying, re-check moisture levels and wipe again with a lightly dampened cloth. Residue around the display can cause glare or misreads; wipe in straight lines rather than circular motions. If the keypad sticks, use a dry cotton swab to lift residue from under the keys and reseat the batteries or power source. In rare cases, moisture could have entered the case; power the device off and let it air-dry for several hours in a warm, low-humidity area. If problems persist, consult the user manual or contact the manufacturer’s support line. Remember that aggressive cleaning or excessive moisture can cause more harm than good, so err on the side of caution and repeat gentle steps instead of a full teardown. The Cleaning Tips team advises patience and careful drying to prevent future issues.
Common Mistakes and How to Avoid Them
Avoid using household cleaners not labeled for electronics, which can leave residues or cause chemical damage. Do not rush the drying process; give surfaces time to air out completely before powering on. Never disassemble internal components unless you’re trained; electronics can store residual charge, and opening cases may void warranties. Use only alcohol-based solutions on electronics, and never soak any part of the device. Finally, store cleaning supplies out of reach of children and pets to prevent accidents around curious hands.
Choosing Cleaners for Different Calculator Materials
Most calculators use plastic housings and rubberized keycaps. For plastic bodies, a diluted soap solution followed by a damp microfiber wipe works well, as long as you avoid saturating the unit. Rubberized keys often trap oils; a cotton swab dampened with isopropyl alcohol can lift grime without soaking through. For displays, stick to isopropyl-alcohol wipes in light passes to avoid streaks and color fading. Always finish with a dry cloth to remove any last moisture and restore a clean, matte finish.
Safe Disposal and Replacements after Cleaning
If you notice corrosion, sticky circuits, or malfunction after cleaning, discontinue use and seek professional assessment. Do not attempt to repair complex internal damage yourself. When the device finally reaches the end of its life, dispose of it according to local e-waste guidelines and replace with a model that fits your needs and budget. Keeping a regular cleaning schedule can extend the life of your calculator and delay replacement.
How to Clean Different Calculator Types: Desk, Pocket, Scientific
Desk calculators tend to accumulate more dust on the display and keyboard surface; pocket calculators are more prone to pocket lint and moisture exposure. For scientific calculators with additional function keys, use extra attention around function clusters and replace worn keys if needed. Always consult the user manual for any model-specific cautions and testing steps after cleaning to ensure continued accuracy of functions such as memory stores and decimal configurations.
Tools & Materials
- Microfiber cloth (lint-free)(Use for both damp wiping and final dry polish)
- Isopropyl alcohol (70%-90%)(Dampen cloth or cotton swabs lightly)
- Cotton swabs(Target tight spaces around keys and edges)
- Soft brush or compressed air(Dust off exterior and between keys)
- Mild dish soap (optional)(Dilute and use only on plastic exteriors)
- Dry microfiber cloth(Final wipe to remove moisture)
- Small towel or mat(Protect surface while cleaning)
- Anti-static wristband (optional)(Reduce static on electronics)
- Air blower or canned air (optional)(Dislodge stubborn dust)
Steps
Estimated time: 30-60 minutes
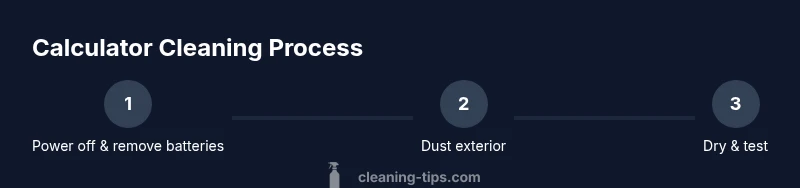
- 1
Power down and remove power source
Shut off the calculator and unplug any adapters. If batteries are removable, take them out to prevent short circuits during cleaning. This step minimizes electrical risk and protects the device’s circuitry from moisture exposure.
Tip: Keeping the device off during cleaning helps prevent accidental key presses while moisture evaporates. - 2
Prepare workspace and materials
Clear a clean, dry surface and arrange your tools within reach. Lay a towel to catch any drips, and set aside a dry area for final polishing. This reduces clutter and helps you work methodically.
Tip: Have a timer handy; spend no more than a few minutes at each wet step to limit exposure. - 3
Dust exterior with brush or air
Gently sweep dust from the keypad, display edge, and vents using a soft brush or blast brief bursts of air from the can. Avoid directing air straight into openings for long periods. This loosens debris before moisture is introduced.
Tip: Keep the device upright to prevent dust from resettling into crevices. - 4
Wipe keys with damp microfiber
Lightly dampen a microfiber cloth with isopropyl alcohol and wipe the keys in a consistent pattern. Do not oversaturate; moisture should vanish quickly. Clean the label surfaces and any sticky areas with a cotton swab as needed.
Tip: Work in small sections to avoid pooling liquid at the bottom edge of keys. - 5
Address stubborn residues
For stubborn grime, moisten a cotton swab and target problem areas around the keys and display edges. Remain gentle to avoid removing printed marks or adhesives. Repeat as needed with a fresh swab.
Tip: Never press keys aggressively while cleaning; lift residue rather than grind it in. - 6
Dry surfaces thoroughly
Use a dry microfiber cloth to remove any residual moisture. Allow 5–10 minutes for air-drying before reassembling or powering on. Ensure the display and keypad are completely dry to prevent short-term issues.
Tip: A fan or a warm, low-humidity area speeds up drying but avoid heat sources. - 7
Reinsert power source and test
Return batteries or reconnect the power adapter. Perform basic calculations to verify accuracy and function keys. If anything seems off, repeat the gentle cleaning steps or consult the user manual.
Tip: Test memory and decimal modes to confirm all features work correctly. - 8
Store safely and maintain
Store the calculator in a clean, dry place away from liquids. Create a quick monthly or quarterly cleaning reminder. Regular upkeep reduces grime buildup and keeps performance steady.
Tip: Document any model-specific notes for future reference.
Questions & Answers
Can I use water to clean a calculator?
Direct water contact is not recommended. Use a damp microfiber cloth with isopropyl alcohol and avoid moisture entering openings. Dry completely before use.
No, avoid water. Use a damp cloth with alcohol and dry thoroughly.
Should I remove the batteries before cleaning?
Yes. Removing batteries minimizes risk of short circuits and ensures no power runs through the device during cleaning.
Yes—remove the batteries before cleaning.
Is it okay to use window or glass cleaner on the display?
No. Avoid general glass cleaners; they can leave residues and damage displays. Stick to isopropyl alcohol on a microfiber cloth.
Avoid window cleaners; use alcohol on a microfiber cloth instead.
What if liquid spills inside the calculator?
Blot immediately, power off, and remove batteries if possible. Let the device air-dry completely before attempting to power back on.
If liquid spills, power down and let it dry completely before using again.
How often should I clean a calculator?
Clean as needed, more often for devices in high-traffic areas. Regular light cleans prevent buildup and maintain readability.
Clean as needed, especially in busy areas.
Can I clean a solar calculator with alcohol?
Yes, lightly dampen a cloth and wipe around edges; avoid soaking the solar cells and edges where liquid could seep in.
Yes, use a damp cloth and avoid the solar cells.
Watch Video
The Essentials
- Power down fully before cleaning.
- Use isopropyl alcohol on a microfiber cloth and avoid direct liquid contact.
- Dry thoroughly and test for accuracy before regular use.
- Follow model-specific guidance to prevent damage.
- Maintain a simple cleaning routine to extend device life.