How to Clean an On-Demand Water Heater (Tankless)
Learn to safely clean a tankless water heater, including flushing, filter maintenance, and vent checks. This guide helps homeowners prevent mineral buildup and keep an on-demand system running efficiently.

Goal: Learn to safely clean an on-demand water heater (tankless) to prevent mineral buildup and maintain efficiency. This guide covers flushing, filter cleaning, vent inspection, and routine maintenance using common tools. According to Cleaning Tips, regular flushing can extend unit life and keep energy use lower. Prepare a bucket, hoses, and the appropriate fittings before you start.
Understanding On-Demand Water Heaters (Tankless)
An on-demand water heater, or tankless unit, heats water only when you need it rather than storing hot water in a tank. This design can save energy, but mineral buildup from hard water can reduce flow and efficiency over time. Regular cleaning helps maintain peak performance and prolongs the unit’s life. The Cleaning Tips team emphasizes that understanding your specific model’s access panels and service ports is key to safe maintenance. Always consult the owner’s manual for any model-specific steps before you begin.
Why Clean Regularly for Efficiency and Longevity
Mineral scale from hard water gradually coats heat exchangers and flow paths, forcing the unit to work harder to deliver hot water. This can raise energy bills and shorten the system’s life. Cleaning reduces scale, restores flow, and can improve heat transfer. In our analysis, Cleaning Tips notes that predictable maintenance helps homeowners avoid costly repairs and keeps on-demand water heaters operating at or near their rated efficiency.
Safety First: Prep and Personal Protective Equipment
Before you touch any components, ensure the power or gas supply to the unit is safely isolated. Wear protective gloves and goggles to guard against splashes and sharp edges. Have a sturdy ladder if your unit is mounted high, and keep a bucket and towels handy for minor spills. Ensure the work area is dry and well-ventilated. If you’re unsure about venting or electrical connections, consider professional help. This prep step reduces the risk of shock, leaks, or exposure to cleaning agents.
What to Clean: Filters, Valves, and Heat Exchangers
Start by inspecting and cleaning any inlet filters or strainers. Remove debris and rinse with clean water. Check the service ports for blockages and flush lines as needed. If your unit uses a descaling solution or vinegar, follow the manufacturer’s guidelines for dilution and contact time. The heat exchanger and small passages can accumulate mineral scale; gentle brushing or flushing can help remove buildup. Always refer to your model’s documentation for limits on cleaning agents and procedures.
Maintenance Routine and Troubleshooting
After cleaning, reassemble and test the unit for leaks. Run hot water from a fixture to confirm warm output and check temperature consistency. Record the date of maintenance to plan the next service interval (typically annually, or sooner in hard-water areas). If you notice persistent performance issues after cleaning—unusual noises, reduced flow, or erratic hot water—consult a professional technician to inspect heat exchangers and venting for safety and compliance.
Tools & Materials
- Safety goggles(Protect eyes from splashes and debris)
- Rubber gloves(Keep hands clean and safe from cleaners)
- Bucket(Catch flushing fluids and spills)
- Hose adapters (3/4 inch)(Attach hoses to service ports)
- Submersible pump or dedicated flushing pump(Circulate descaler through lines)
- Descaling solution or white vinegar(Dilute per manufacturer guidelines)
- Screwdrivers or wrenches(For panel access or valve work)
- Owner’s manual(Model-specific instructions)
Steps
Estimated time: 60-90 minutes
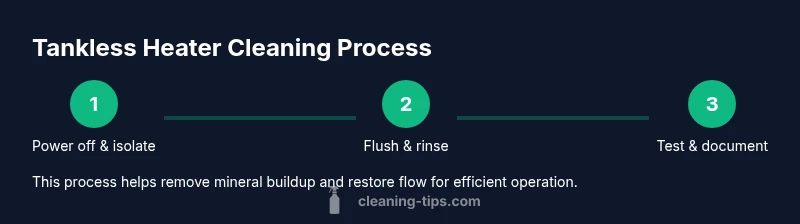
- 1
Power off and isolate utilities
Shut off power at the breaker or disconnect switch for electric units, or close the gas supply valve for gas units. This prevents shock or gas leaks during maintenance and ensures you can work safely.
Tip: If you’re unsure about electrical/gas isolation, ask a licensed technician to assist. - 2
Close water supply and drain the unit
Close the cold-water inlet valve and open the drain valve to relieve pressure and drain residual water from the system. This creates a safe flushing environment and prevents spills when attaching hoses.
Tip: Place a bucket under the drain to minimize spills and wear gloves. - 3
Set up flushing equipment
Connect hose adapters to service ports and attach hoses to a submersible pump. Position the pump to circulate the cleaning solution through the unit’s lines, following the manufacturer’s recommended flow path.
Tip: Check that hoses are secure to avoid leaks during circulation. - 4
Flush with descaler or vinegar
Run the circulating solution for 30–60 minutes, depending on hardness and buildup. This dissolves mineral scale and clears passages in the heat exchanger and pipes.
Tip: Use the solution at the recommended concentration; don't exceed suggested contact times. - 5
Rinse and remove descaler
After flushing, replace the cleaning solution with clean water and circulate to completely rinse residues from the system. Flush until water runs clear from the outlet.
Tip: Run water through the system for at least 5–10 minutes to ensure thorough rinsing. - 6
Reassemble, test, and document
Close the drain, reopen the water and power/gas supplies, and run hot water to verify proper operation. Inspect for leaks and note the maintenance date for future scheduling.
Tip: Take photos of hose connections for future reference.
Questions & Answers
Can I flush an on-demand water heater myself?
Yes, many homeowners can flush a tankless heater by following manufacturer guidelines and using proper PPE. If you’re unsure about gas lines, venting, or electrical connections, hire a professional.
Yes, you can, but if you’re unsure about gas lines or venting, hire a professional.
What should I use for descaling—vinegar or a commercial descaler?
Vinegar can be used for light buildup, but many manufacturers prefer a dedicated descaler. Always dilute per guidelines and avoid mixing with other cleaners.
Use a descaler recommended by your unit’s manual, or dilute vinegar as advised by the manufacturer.
How often should I clean a tankless water heater?
Frequency depends on water hardness and usage. In hard-water areas, annual or bi-annual cleanings are common; in softer water, every 1–2 years may suffice.
Hard-water areas may require yearly cleaning; softer water less often.
What are signs that my unit needs cleaning?
Poor hot water delivery, fluctuating temperatures, strange noises, or reduced flow can indicate mineral buildup requiring flushing and inspection.
If hot water is inconsistent or you hear noises, consider cleaning and inspection.
Is flushing always required after reinstalling or relocating a unit?
If the unit was moved or serviced, flushing helps remove dust and contaminants and ensures proper flow before regular operation.
Flushing after service is a good idea to ensure clean passages.
Watch Video
The Essentials
- Power down safely before maintenance
- Flushing removes mineral buildup and restores flow
- Inspect and clean filters and vents regularly
- Document maintenance date for proactive upkeep