How to Clean a Solder Iron Tip: A Practical, Step-by-Step Guide
Master the art of cleaning a solder iron tip with safe methods, tools, and maintenance tips to extend tip life and improve solder joints.

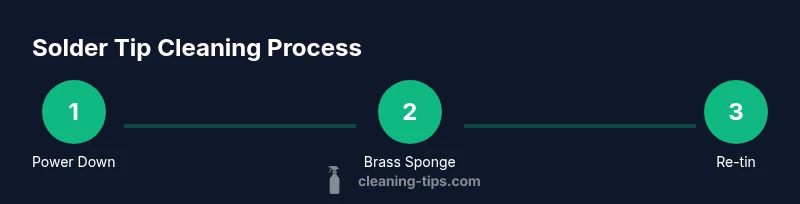
You will learn to clean a solder iron tip safely to improve heat transfer and joint quality. First unplug and allow the iron to cool, then wipe the tip on a brass sponge to remove old solder. Wipe with isopropyl alcohol, re-tin the tip, and store properly. Avoid grinding or using metal brushes that can damage the plating.
Why Clean Solder Iron Tip Matters
A clean solder iron tip is essential for consistent heat transfer, reliable wetting, and clean solder joints. When oxides and flux residues accumulate, heat transfer suffers, causing cold joints and surges in temperature that can damage components. Regular cleaning reduces oxidation and keeps the tip responsive, which in turn improves solder flow and minimizes rework. According to Cleaning Tips, a disciplined cleaning routine extends tip life and boosts overall soldering performance. Framing your workflow around a clean solder iron tip helps both beginners and experienced technicians achieve repeatable results, fewer errors, and safer working practices in a typical home workshop or professional lab.
What Causes Tip Oxidation and Contamination
Even when you use good flux and fresh solder, oxidation forms on the copper core beneath the iron plating over time. This oxide layer acts as an insulator, making it harder for heat to reach the tip and for solder to wet the surface. Contaminants from flux residues, stray metal particles, and dust can further impede heat transfer and alter joint quality. The result is a hotter iron to achieve the same heat at the tip, increasing the risk of heat damage to nearby components. Understanding these processes helps you tailor your cleaning routine to combat oxidation at its source and maintain tip efficiency.
Cleaning Tools and Their Roles
A well-equipped workspace makes cleaning faster and safer. The brass sponge is the workhorse, effectively removing oxidized solder without scratching the tip’s protective coating. A damp sponge or microfiber cloth dampened with isopropyl alcohol provides a quick wipe-down after the heavier cleaning. Isopropyl alcohol evaporates quickly and leaves minimal residue, helping you inspect the tip clearly. For re-tinning, keep a small amount of solder on the tip while hot so the surface reestablishes a conductive layer. Avoid steel wool, abrasive pads, or sandpaper, which can wear away the tip plating and shorten its life. A clean, organized setup minimizes mistakes and saves time over many sessions.
Setting Up a Safe Cleaning Routine
Begin every cleaning session with safety as a priority. Power off, unplug the iron, and allow it to cool completely before touching the tip. Then wipe away flux and old solder with a brass sponge while the tip is at a safe, slightly warm temperature if you prefer more effective cleaning. After removing residue, wipe the tip with isopropyl alcohol using lint-free tissue to remove remaining flux and oils. Keep the workspace well-ventilated and wear eye protection and gloves if you are handling hot equipment. A regular cooling-cleaning cycle reduces corrosion and keeps tip geometry stable for precise work.
Re-tinning and Regular Maintenance
Re-tinning the tip after cleaning is critical. Apply a small amount of fresh solder to the tip while it’s still hot, allowing the surface to form a thin, even coat of solder. This protective layer prevents rapid oxidation and ensures instant readiness for the next joint. Inspect the tip for signs of wear, pitting, or uneven coating; if you notice pronounced wear, it may be time to replace the tip. Maintain a light touch when cleaning to avoid bending or damaging the delicate tip geometry, which directly affects heat transfer and solder wetting.
Troubleshooting Common Cleaning Scenarios
If the tip won’t wet properly after cleaning, the oxide layer may be too thick or the tip plating may be worn. Re-clean with the brass sponge and re-tin, then ensure your iron temperature is appropriate for the solder alloy you’re using. Flux residues left on the tip can also hinder wetting; gently wipe again with isopropyl alcohol and re-tin. For stubborn oxidation, consider using a tip tinner or a specialized tip cleaner designed for electronics work, but avoid aggressive methods that remove plating. Regular maintenance reduces these issues over time.
Safety, Ergonomics, and Workspace Habits
Always work in a well-ventilated area and use protective gear when handling hot equipment. Keep the tip away from flammable materials, and never touch the hot surface. Maintain an orderly bench, with a dedicated zone for hot tools and a nearby container for used tips and cleaning materials. Adopting a consistent routine—pre-solder wipe, post-solder wipe, and periodic deep cleaning—helps you avoid common mistakes and prolong tip life. A clean workspace also reduces risk of accidental burns.
Prolonging Tip Life: Maintenance Without Guesswork
To maximize tip life, implement a simple routine: clean before soldering, clean after, re-tin frequently, and replace tips when wear is evident. Keep spare tips available for quick swaps to avoid forcing a dull tip to perform. Use a quality flux and avoid harsh cleaning solvents that can degrade plating. Periodically inspect the heater element and tip geometry; if the tip becomes visibly worn or develops deep pits, consider replacing it rather than attempting risky repairs. A disciplined approach reduces downtime and keeps your soldering consistent.
Final Checks Before You Start Your Next Assembly
Before resuming work, confirm the tip has a uniform, shiny tin coating and is completely dry. Test your iron on a scrap piece of solder to verify proper wetting and temperature response. If you notice inconsistent heat or dull joints, revisit the cleaning routine and re-tin as needed. A well-maintained tip translates to cleaner joints, fewer cold joints, and a smoother workflow across projects.
Tools & Materials
- Soldering iron (unplugged and cooled)(Ensure safe handling; do not attempt cleaning while plugged in and hot.)
- Brass sponge or brass wool(Use to wipe away oxidized solder without scratching the tip.)
- Isopropyl alcohol (70% or higher)(Dampens lint-free cloths or tissues for quick wipes.)
- Lint-free cloth or tissue(Kept nearby for final wipe and inspection.)
- Tip tinner or flux remover (optional)(Helpful for heavily oxidized tips or re-tinning sessions.)
- Safety gear (goggles and heat-resistant gloves)(Protect eyes and hands during maintenance.)
- Small container for used tips and cleaning waste(Keeps workspace organized and reduces spill risk.)
Steps
Estimated time: 15-25 minutes
- 1
Power down and unplug
Turn off the soldering station, unplug the iron, and allow it to cool completely before touching the tip. This prevents accidental burns and avoids rapid thermal shocks that could damage the tip or your board.
Tip: Never attempt cleaning a hot tip with water or metal tools while it’s energized. - 2
Wipe with a brass sponge
Hold the iron safely and gently sweep the tip across a brass sponge to remove bulk solder and oxidation. Do not press hard; let the sponge do the work. If residues persist, re-warm the tip slightly and wipe again.
Tip: A light, steady motion yields better results and minimizes tip wear. - 3
Wipe with isopropyl alcohol
Dampen a lint-free cloth with isopropyl alcohol and wipe the tip to remove flux residues and oils. Allow the tip to air-dry for a few seconds before the next step.
Tip: Use minimal liquid; avoid soaking the tip—surface moisture is enough. - 4
Re-tin while hot
Touch a small amount of solder to the tip while it is still warm to establish a thin tin coating. This protects the surface from oxidation and keeps heat transfer efficient for the next joint.
Tip: Ensure the solder wets the tip evenly; avoid large pools of solder. - 5
Inspect and adjust
Visually inspect the tip for uniform shine and smooth plating. If you see pitting or dark patches, re-clean and re-tin. Replace the tip if corrosion is extensive.
Tip: A dull or uneven tip will degrade joint quality and increase cleaning frequency. - 6
Store safely
Place the tip in a stable, safe spot away from children and pets. If you have a stand, park the iron there and avoid resting it on flammable surfaces.
Tip: Always allow the iron to cool before storage.
Questions & Answers
What is the best tool for cleaning a solder iron tip?
A brass sponge is the preferred tool for removing oxidation without abrading the tip plating. It efficiently clears burnt flux and old solder while preserving the tip geometry.
The brass sponge is the best tool for cleaning; it clears oxide without harming the tip.
Can I clean a hot tip with water?
No. Water can cause steam that ejects hot solder and potentially injures you or damages the board. Let the tip cool before any cleaning.
Don’t use water on a hot tip; let it cool first.
How often should I re-tin the tip?
Re-tin after cleaning sessions or as soon as you notice dullness. A thin protective tin layer prevents oxidation and preserves heat transfer.
Tin the tip after cleaning to prevent oxidation.
What should I do if the tip is heavily corroded?
If corrosion is extensive or you see deep pitting, replace the tip. Replacing is safer and guarantees consistent performance.
If corrosion is heavy, replace the tip.
Is isopropyl alcohol safe for all tips?
Isopropyl alcohol is generally safe for most tips when used sparingly and only after cooling. Avoid prolonged soaking and high concentrations on sensitive coatings.
IPA is safe in moderation after the tip cools.
Watch Video
The Essentials
- Clean solder iron tip improves heat transfer and joint quality
- Brass sponge is preferred for heavy cleaning, avoid steel wool
- Re-tin after cleaning to protect the tip and extend life
- Unplug, cool, and clean in a safe, organized workspace