Clean the Movie: A Step-by-Step Guide to a Cleaner Movie Night Setup
Learn how to clean the movie-watching space with practical, step-by-step guidance from Cleaning Tips. Improve screen clarity, air quality, and comfort for a better movie night.

To clean the movie-watching space effectively, begin with the screen or projector lens, then refresh surfaces, seating, and cables before a movie night. This steps-based quick guide outlines practical actions you can take in under an hour to improve visibility, reduce dust, and create a more comfortable viewing environment for lifelong viewing satisfaction.
Setting the stage: why clean the movie space matters
When you set out to clean the movie area, you’re not just tidying up. You’re removing dust that can blur the screen, reducing allergens in the room, and making the viewing experience noticeably more comfortable. According to Cleaning Tips, a well-maintained movie space translates to crisper images, better sound perception, and an overall more enjoyable night. The goal of this section is to help you understand how small, focused cleaning actions—especially around optics, seating, and cables—can elevate every film, documentary, or streaming session you enjoy at home. By establishing a clean baseline, you’ll spend less time during the night chasing distractions and more time immersed in the story. If you’re looking to “clean the movie” effectively, start with a plan, not a random sweep, and you’ll see results quickly.
Key idea: cleanliness improves both picture quality and comfort, making movie nights more immersive and less interrupted by dust or clutter.
Tools and supplies you’ll need
Before you dive in, gather a focused set of tools. This keeps the process smooth and minimizes repeated trips to the closet. You’ll want microfiber cloths (for gentle, streak-free cleaning), a soft brush or lint-free duster, a projector lens cleaning solution or isopropyl-alcohol wipes (70%), a spray bottle with plain water, a vacuum with a soft upholstery attachment, and an anti-static dusting cloth for electronics. For screens, avoid ammonia-based cleaners and avoid spraying directly on the screen. Keep doorways clear and have a small trash bag handy. Cleaning the movie space isn’t about heavy scrubbing—it’s about careful, deliberate touches that protect delicate surfaces while removing visible dust and fingerprints. Consistency matters: regular maintenance helps you maintain a high standard of clarity and comfort each time you press play.
Clean the screen and projector optics
Start with the most visually impactful element: the display surface. If you have a TV, wipe the screen with a microfiber cloth dampened slightly with water or a manufacturer-approved cleaner. For projector users, gently brush dust from the lens and housing before using compressed air or a lens-cleaning cloth. Never spray liquids directly onto lenses; apply to the cloth first. This prevents liquid damage and keeps optics clear, so you don’t lose luminosity during your next screening. After cleaning, perform a quick lens check under room lighting to ensure there are no smudges that could degrade contrast. Remember, your goal is to maintain pristine optics with minimal risk to coatings or electronics.
Pro tip: wipe in a circular motion and avoid pressing hard on delicate glass surfaces. A clean lens means crisper, more vibrant images.
Wipe down surfaces around the entertainment center
Dust tends to accumulate on the TV stand, cabinet doors, remotes, and decorative items. Use a microfiber cloth dampened with water or mild cleaner to wipe these surfaces. Be sure to unplug devices if possible before wiping, and dry surfaces to avoid moisture near electronics. Don’t forget the top of the soundbar, speaker grilles, and any glass surfaces—these areas reflect light and can reveal dust more clearly after you wipe. If you use a glass or screen cleaner, spray on the cloth rather than directly on surfaces to avoid streaks. A tidy entertainment area not only looks better, but it also reduces dust circulation in the room, contributing to a cleaner air environment during your movie night.
Note: avoid abrasive pads that could scratch finishes. Gentle wiping is enough to restore their shine.
Refresh seating and upholstery for comfort
Comfortable seating is essential for long movie stretches. Start by removing surface dust from cushions and fabric with a vacuum using a brush attachment. If cushions have removable covers, launder them according to care labels. For fabric that cannot be laundered, spot-clean with a mild fabric cleaner and a clean cloth. Don’t overlook the spaces between cushions, where crumbs and dust tend to hide. Finally, refresh rugs and throws with a light vacuum and, if needed, a gentle deodorizing spray that’s safe for fabrics. Clean seating contributes to a more immersive viewing experience since you won’t be distracted by particles or odors.
Safety note: always test cleaners on a small, hidden area first to ensure no color transfer or fabric damage occurs.
Manage cables and improve airflow
A clean movie space requires mindful cable management. Gather loose cords and secure them with clips or cable sleeves to minimize tripping risk and reduce dust accumulation. Route cables along the back of furniture and away from heat sources; avoid pinching or bending power cords. Use a small, portable vacuum or microfiber cloth to wipe down exposed cables and surge protectors. If your setup includes a vent or air intake nearby, ensure it’s not blocked and that there’s adequate airflow around the entertainment center. Clean, organized cables help prevent overheating and signal interference, which can subtly impact your viewing quality.
Quick weekly routines to stay cinema-clean
Keeping the movie space tidy between deeper cleans is easier with a simple weekly routine. Spend 5–10 minutes removing visible dust from surfaces, wiping fingerprints on remotes, and checking cables for loose connections. A fast screen wipe once a week helps keep glare and fingerprints in check. Rotate a quick vacuum of seating and rug areas on a schedule, ensuring dust does not accumulate where you sit for hours. A small weekly cadence prevents messy build-up and preserves the overall feel of a premium theater experience at home.
Tip: set a reminder to perform a 5-minute weekly clean so you never fall behind the baseline standard.
Safety reminders and common mistakes to avoid
When you clean the movie area, safety matters. Always unplug electronics before cleaning and avoid liquid exposure to power strips or outlets. Do not spray cleaners directly onto screens, lenses, or electronics. Use gentle, non-abrasive cloths and test cleaners on inconspicuous areas first. Common mistakes include over-wetting fabrics, using ammonia-based cleaners on coatings, and neglecting vent areas. Staying mindful of these details protects your equipment and ensures the longest life of your viewing setup. A little planning now pays off with fewer repairs later.
Seasonal checks: adapting your cleaning for different times of year
Different seasons bring varying dust levels and humidity, which can affect your movie space. In dusty months, increase surface wipes and vacuum frequency, and consider running a lightweight air change to prevent musty odors. In humid seasons, monitor condensation on screens and ensure dehumidification if needed to prevent mold growth on fabrics. If you have pets, seasonal shedding may require more frequent upholstery cleaning. Adapting your routine keeps your movie setup consistently clean and comfortable year-round.
After-action: setting up for the next movie night
Conclude each cleaning session by returning devices to their normal positions, tidying remote controls, and performing a quick visual check that nothing is blocking vents or speakers. Confirm the screen is free of smudges, the projector is covered (if applicable), and the seating area is comfortable and ready. A tidy baseline accelerates future cleanings and reduces prep time when movie night arrives. Finally, document any recurring issues (dinged screens, sticky remotes, tangled cables) so you can address them in your next maintenance window.
Tools & Materials
- Microfiber cloths(Use lint-free cloths for screens and optics)
- Soft brush or dusting cloth(Gently remove dust from vents and crevices)
- Isopropyl alcohol 70%(For electronics, dilute with water or use manufacturer wipes)
- Water spray bottle (plain water)(Light mist for delicate surfaces)
- Mild all-purpose cleaner(Only on non-electronic surfaces; avoid sprays on screens)
- Vacuum with upholstery attachment(Carpets and furniture - low suction)
- Cable clips or sleeves(Organize and conceal wires)
- Lint roller(Remove pet hair from upholstery)
- Glass cleaner (ammonia-free)(Use on glass surfaces and remotes when appropriate)
Steps
Estimated time: 60-90 minutes
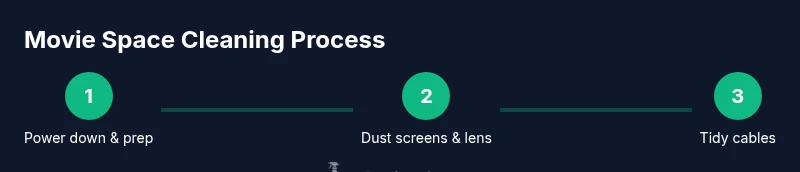
- 1
Power down and prep the space
Turn off and unplug electronics where feasible to reduce risk and avoid false readings on screens after cleaning. Clear the area of nonessential items to create a clean workspace.
Tip: Label power cords with sticky notes to reassemble quickly. - 2
Dust screen and projector lenses
Gently brush away loose dust from screens or projector housings. Use a lens-cleaning cloth or microfiber pad; avoid spraying liquids directly on lenses.
Tip: Work in a well-lit area to spot smudges easily. - 3
Wipe surfaces around the entertainment center
Dust the stand, shelves, remotes, and glass surfaces with a slightly damp microfiber cloth. Dry surfaces afterward to prevent moisture near electronics.
Tip: Move remotes and devices to wipe behind them for a complete clean. - 4
Clean cushions and upholstery
Vacuum seats and cushions; spot-clean fabrics that show stains. If covers are removable, launder them per care labels.
Tip: Spot-clean stains promptly to prevent setting. - 5
Tidy cables and organizers
Group cables, secure with clips, and route along furniture edges. Wipe exposed cables with a microfiber cloth to remove dust.
Tip: Label each cable with color codes to simplify future setup. - 6
Vacuum rugs and floors
Give the floor a quick vacuum; focus on the area directly in front of seating. For high-traffic spots, do a deeper clean weekly.
Tip: Use suction patterns that lift debris rather than push it around. - 7
Refresh air and test the setup
Open a window briefly if outdoor air quality is good, or run a quick air purifier cycle. Reconnect devices and confirm all components power on.
Tip: Test streaming or disc playback to ensure picture and sound are optimal. - 8
Perform a quick post-clean check
Check for any damp spots on fabrics, dust on vents, or loose cables. Put items back in their place and restore seating comfort.
Tip: Keep a small wipe-down kit in the living room for on-demand touch-ups. - 9
Set up for movie night
Arrange seating for optimal sightlines, power on devices, and run a final brightness and volume check. Ensure remotes are within easy reach.
Tip: Create a 5-minute pre-movie checklist to minimize delays.
Questions & Answers
What should I clean first in a movie setup?
Begin with the screen or projector lens, then dust surfaces, tidy seating, and finally organize cables. This sequence minimizes recontamination and ensures optimal viewing.
Start with the screen, then surface dusting, seating, and cable tidying for best results.
Can I use household cleaners on electronic screens?
Use manufacturer-approved cleaners or plain water with a microfiber cloth. Avoid ammonia-based cleaners and spraying liquids on screens or electronics.
Use gentle, screen-safe cleaners and never spray liquids on electronics.
How often should I clean the movie space?
Do a quick wipe weekly and a deeper clean monthly to maintain clarity and comfort.
Clean weekly with a deeper reset about once a month.
Is it safe to vacuum electronics?
Use a low-suction setting and keep the nozzle away from ports; use a brush attachment for safety.
Vacuum with care, using low suction and a brush attachment.
What are signs I cleaned too aggressively?
Streaks, moisture near electronics, or damaged coatings. If you see these, ease off cleaner and consult manufacturer guidance.
Watch for streaks or moisture near devices and adjust cleaning pressure.
What about pet hair in a movie room?
Use a lint roller and microfiber cloth to remove hair, then vacuum upholstery and rugs.
Lint roller and microfiber cloth remove pet hair, then vacuum.
Watch Video
The Essentials
- Plan before you clean for best results.
- Protect optics and electronics with gentle, manufacturer-approved cleaners.
- Tidy seating and cables to boost comfort and view quality.
- Establish a quick weekly routine to maintain cinema-cleanliness.
- Seasonal adjustments keep the setup ready year-round.