How to Clean a Washing Machine: A Step-by-Step Guide
Discover safe, proven methods to clean your washing machine, banish odors, and keep laundry fresh. This step-by-step guide covers drum, gasket, drawers, and maintenance routines for a healthier home.

You're about to learn how to clean a washing machine end-to-end, including the drum, door gasket, detergent drawer, and hoses. This guide also covers odor prevention, safe cleaning agents, and a maintenance routine to keep your washer fresh between uses. By following these steps, you reduce buildup, prevent mildew, and extend the life of your appliance.
how clean washing machine: why it matters
If you're wondering how clean washing machine, this guide explains why routine maintenance matters. Detergent residue, soap scum, and hidden mold can build up inside drums, seals, and hoses, leading to odors and reduced cleaning performance. According to Cleaning Tips, regular care not only prevents odors but also extends the life of the appliance and protects fabrics. The Cleaning Tips Team emphasizes that a simple, consistent schedule beats sporadic deep cleans. In most homes, a 30- to 60-minute monthly session is sufficient to keep the interior fresh and to catch issues like a loose hose or a clogged detergent drawer before they escalate. In this middle section, you’ll learn how to approach cleaning methodically, with safe cleaners, and with an eye toward maintenance habits that fit your routine.
What you’ll need before you start
Before you begin, gather the tools and materials you’ll rely on for a thorough clean. A careful setup saves time and reduces the risk of splashy accidents. The team at Cleaning Tips recommends laying out supplies within reach and arranging a dedicated work area to keep detergents and cleaners away from kids and pets. This section outlines practical essentials and optional extras to tailor the process to your washer type and budget. Having the right items on hand helps you move through each stage without interruption, making the cleaning routine feel manageable rather than daunting.
Natural cleaning options and safety notes
Many households start with natural options to avoid harsh chemicals. White vinegar and baking soda are popular choices for descaling, deodorizing, and dissolving residue. The Cleaning Tips Team notes that vinegar is helpful for odor control, while baking soda provides gentle abrasive action for stubborn spots. Important safety caveats include never mixing vinegar with bleach, and avoiding abrasive tools that might scratch surfaces. If your washer manufacturer recommends a specific cleaner, follow that guidance to prevent warranty concerns. This section also covers when to favor commercial washers cleaners and how to use them safely as part of a recurring maintenance plan.
Step 1: Unplug and prep your washer
Safety first: unplug the machine and ensure the lid is closed to prevent accidental starts during cleaning. Wipe the exterior with a damp cloth to remove dust and fingerprints. If your washer has a removable detergent drawer, take it out and inspect for residue. This initial prep stage reduces risk and makes subsequent steps more effective. The goal is a clean surface and a dry, stable workspace so you can access the drum and seals easily.
Step 2: Run an empty hot-water cycle with a cleaning agent
A hot-water cycle helps loosen grime, mildew, and detergent buildup from the drum and internal hoses. Add a safe cleaning agent such as white vinegar to the detergent dispenser or run with plain hot water if you prefer. Run the full cycle without clothes, and then pause mid-cycle if your model supports replenishing the cleaning agent mid-way. This step starts the descent of mineral deposits and creates a fresher odor baseline, making the next steps more effective.
Step 3: Scrub the drum and door gasket (seal)
Open the door and visually inspect the drum walls and the rubber gasket for mold, grime, and soap scum in folds. Use a microfiber cloth and a soft-bristled brush to scrub the drum edges and the gasket crevices. Pay special attention to the folds where water can accumulate. After scrubbing, wipe away loosened debris with a clean cloth. This targeted cleaning reduces the risk of re-depositing contaminants on laundry and improves overall hygiene.
Step 4: Clean the detergent drawer and hoses
Detergent drawers can harbor residue that leads to musty odors. Remove the drawer, soak it in warm water with a little mild detergent, and scrub the slots and seals. Rinse thoroughly before reinserting. If your model has hoses attached to the drawer, wipe them down and look for any signs of leakage or buildup. This prevents transfer of cleaning residues into your clothes and keeps dispensing precise.
Step 5: Clean the drain pump filter (if accessible) and seals
Many machines include a drain pump filter or access to a cordon in the front panel. If your model exposes a filter, remove it carefully and rinse under running water to remove lint, coins, or hair that can block drainage. Inspect hoses for bulges or kinks and wipe away any buildup. Keeping the drain path clear helps prevent improper draining and reduces the chance of leaks after future washes.
Step 6: Rinse, dry, and maintain a fresh habit
Run a final rinse cycle with hot water to flush out any remaining cleaning residues. Wipe the door, gasket, and exterior again, then prop the door open for a while to air-dry the interior. Establish a simple maintenance habit—leave the door ajar between uses or wipe the seal dry after each cycle—to minimize moisture and mildew buildup.
Tools & Materials
- Rubber gloves(Protect hands during scrubbing and contact with cleaners)
- Microfiber cloths(Lint-free for wiping drum, gasket, and drawer)
- Soft-bristled brush (old toothbrush)(Detail cleaning in grooves and folds)
- Bucket or basin(Catch drips and hold soaking items)
- Old towels or absorbent rags(Mop up spills and dry surfaces)
- White vinegar (5% acidity)(Descale and deodorize the drum)
- Baking soda(Use for gentle deodorizing and residue removal)
- Mild dish soap or laundry detergent(For drawer cleaning and light scrubbing)
- Measuring cup(Useful if using prescribed amounts in cleaners)
- Optional: commercial washer cleaner tablets(As a supplement for deep cleans)
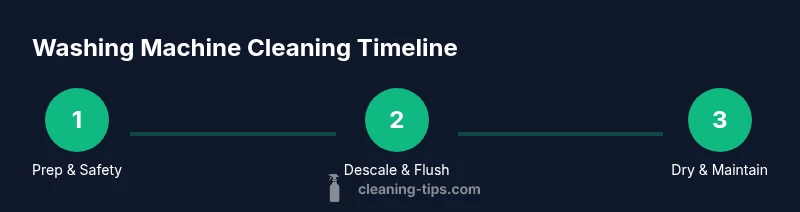
Steps
Estimated time: 60-90 minutes
- 1
Unplug and prep
Power off and unplug the washer. Wipe the exterior and remove the detergent drawer for inspection. This ensures safety and makes it easier to access the interior components.
Tip: Keep water away from outlets and lay towels to catch splashes - 2
Run hot-water cycle with cleaner
Run an empty cycle using hot water with vinegar or a recommended cleaner. The goal is to loosen buildup inside the drum and hoses before manual scrubbing.
Tip: Pause mid-cycle if your model supports adding cleaner later - 3
Scrub drum and gasket
Scrub the drum walls and door gasket folds with a microfiber cloth and brush. Clean visible mold or soap scum and wipe away residues.
Tip: Don’t miss the hidden creases where moisture collects - 4
Clean drawer and hoses
Soak and scrub the detergent drawer slots; rinse and reinsert. Wipe attached hoses and check for cracks or leaks.
Tip: Rinse thoroughly to avoid transfer of cleaner to clothes - 5
Check filter and drain path
Access the drain pump filter if available and rinse free of debris. Inspect drainage hoses for blockages or kinks.
Tip: If you’re unsure how to access the filter, consult the manual - 6
Rinse and dry
Run a final hot rinse to remove residues. Dry the door gasket and exterior, then leave the door slightly open to air-dry the interior.
Tip: Drying prevents musty smells between washes
Questions & Answers
How often should I clean my washing machine?
Most households benefit from a monthly or quarterly clean, depending on usage and odor. If you notice musty smells, increase frequency temporarily. Regular maintenance helps prevent buildup that can affect performance.
For most homes, cleaning once a month or every three months works well; adjust if you detect odors.
Can I use vinegar and baking soda at the same time?
It's best to use them separately rather than mixing them at the same time. Use one for a cleaning cycle, then run a separate rinse with water to avoid residues.
Don't mix vinegar and baking soda at once; use them in separate steps.
Is it safe to use bleach in a front-load washer?
Many manufacturers warn against routine use of bleach because it can degrade rubber seals over time. If you must use it, check your manual and use sparingly with proper ventilation.
Check your model’s manual before using bleach; it can wear seals over time.
What if I still smell mildew after cleaning?
Target the gasket folds and any hidden corners with a thorough scrub. Run an extra hot cycle with a dilute cleaner and leave the door open between uses to dry fully.
If odors persist, scrub the gasket again and run another hot rinse with the door ajar.
Does my washer have a filter I should clean?
Some models include a drain pump filter that collects lint and debris. If yours has one, remove and rinse it regularly; consult the manual for specific steps.
Many washers have a drain filter—check your manual and clean it periodically.
Are there safe commercial cleaners I can use?
Yes, you can use manufacturer-approved wash machine cleaners as directed. They are designed to be safe for seals and hoses when used as recommended.
Yes—use cleaners that are approved by your washer brand and follow directions.
Watch Video
The Essentials
- Schedule regular cleanings to prevent buildup
- Prioritize drum and gasket maintenance
- Clean the detergent drawer to stop odors
- Inspect filters and hoses for ongoing performance
- Dry and store with the door ajar to prevent mildew