How Do I Clean a Laptop Screen? A Safe, Effective Guide
Learn how to safely clean a laptop screen using a microfiber cloth, distilled water, and screen-safe cleaners. This educational, practical guide covers coatings, common mistakes, and maintenance to keep your display crystal clear.

You can safely clean a laptop screen by powering down the laptop and unplugging it, using a soft microfiber cloth lightly dampened with distilled water or a dedicated screen cleaner, and wiping in gentle circular motions. Never spray liquid directly onto the screen, avoid pressing hard, and skip household solvents. For stubborn smudges, repeat with a light touch.
Why Cleaning a Laptop Screen Matters
If you’ve ever asked yourself, how do i clean a laptop screen, you know that clear visibility isn’t just about aesthetics—smudges and dust can impair readability and contribute to eye strain during long work sessions. According to Cleaning Tips, regular, gentle cleaning helps preserve the screen’s coating and ensures colors remain accurate and glare-free. A clean display also reduces the need for excessive brightness, which can save a little energy and extend battery life. This is especially important on days when you’re staring at spreadsheets, code, or teaching material for hours at a time. By keeping dust and fingerprints under control, you improve not only the visual experience but also your overall ergonomic setup. In practice, a quick wipe at the end of the day or after a long meeting can become a simple habit that yields big readability rewards over weeks and months.
Safety First: Protect Your Screen
Before you start cleaning, power down completely and unplug the laptop. If you can, remove the charger and wait for the screen to cool. liquids should never be sprayed directly onto a screen or into any ports or hinges. Use a soft, lint-free microfiber cloth and a dedicated screen cleaner or distilled water only. Avoid aggressive pressure; LCD and OLED panels react poorly to scrubbing. Keep cleaning materials away from keyboard gaps and USB-C/HDMI ports to prevent moisture intrusion. This initial safety step is often overlooked, but it’s the foundation of a safe, streak-free clean that won’t compromise the display’s performance.
Understanding Screen Coatings and What to Avoid
Modern laptop screens often feature anti-reflective or matte coatings, along with protective overcoats. Harsh solvents like ammonia, acetone, or vinegar can damage these coatings and cause clouding or micro-scratches. Some coatings are more delicate around edge areas or near cameras and sensors. To protect coatings, never use household cleaners or solvents not labeled as safe for LCD/LED panels. If you hear a squeak or see micro-scratching, stop and reassess your method. The goal is to remove oils and dust without abrading the surface, which means gentleness and restraint are your best tools.
Cleaning Solutions: Water, Isopropyl Alcohol, and Screen Cleaners
A restrained approach often works best: a high-quality microfiber cloth dampened with distilled water or a screen-safe cleaner can remove most smudges. For stubborn grime, a very light amount of isopropyl alcohol can be used, but only on a cloth and never sprayed directly onto the screen. Avoid cleaners with high alcohol content near sensitive coatings, and never mix cleaners in a spray bottle aimed at the screen. When you do use alcohol, apply it to the cloth first and gently wipe in a circular motion. Remember, the principle is to dampen, not soak. If you’re unsure, opt for a dedicated screen cleaner designed for LCD/OLED displays.
Tools and Materials You'll Need (and Why)
To execute a safe clean, assemble a microfiber cloth, distilled water, a screen-safe cleaner or isopropyl alcohol (dilute and apply to cloth), a spray bottle (optional for outside-the-cloth use), and cotton swabs for tight spots. A dry microfiber cloth or lint-free towel is handy for finishing and drying. Keeping a clean, dedicated kit for electronics reduces the chance of transferring dust or oils from other surfaces. By preparing properly, you’ll minimize the risk of streaks and moisture seeping into seams.
Step-by-step Visual Guide to Cleaning (Narrative)
Begin with a dry dusting of the screen to remove loose particles. Lightly dampen your microfiber cloth with distilled water or screen-safe cleaner; never spray liquid directly on the screen. Wipe in gentle circular motions, starting from the center and radiating outward, using minimal pressure. If a stubborn fingerprint persists, re-dampen the cloth very slightly and repeat with care. After you’re satisfied with the surface, dry with a dry microfiber cloth and inspect for streaks. If streaks remain, switch to a fresh section of the cloth and repeat. Finally, wipe the edges near the bezels to remove any dust that may have migrated.
Common Mistakes to Avoid
Common mistakes include spraying liquids directly on the screen, using household cleaners like window cleaners, pressing hard, or using paper towels that shed fibers. Each of these can degrade coatings or cause micro-scratches. Another frequent misstep is cleaning while the device is warm or in a humid environment, which can encourage moisture intrusion. Staying with a mild, electronics-safe approach is the best defense against streaks and damage.
Maintenance Tips to Keep It Cleaner Longer
Regular light cleanings are more effective than infrequent deep cleans. Establish a routine: a quick wipe every few days and a deeper wipe every few weeks, depending on usage. Consider using a screen protector to reduce direct contact with oils and dust. Keep your desk clean and dust-free, especially around screens and keyboards. If you work in a dusty environment, you may benefit from an air purifier or a microfibre cloth dedicated to screen care. Consistency is key to keeping glare down and readability high.
Troubleshooting: When to Seek Professional Help
If you notice persistent clouding, color shifts, or cracks, avoid attempting home repairs. Cleaning a screen with improper techniques can worsen damage. If moisture gets behind the display, or if you see condensation around the edges, power down and unplug, and contact a professional technician. When in doubt, consult your device manufacturer’s guidelines or a certified technician to prevent further harm.
Tools & Materials
- Microfiber cloth(Lint-free, soft, electronics-safe)
- Distilled water(Use when distilled water is available; avoids mineral deposits)
- Screen-safe cleaner(Commercial cleaner labeled safe for LCD/OLED screens)
- Isopropyl alcohol(Optional for stubborn smudges; use very dilute solutions on cloth)
- Spray bottle(For moisture control when applying to cloth (do not spray directly on screen))
- Cotton swabs(For corners and around bezels)
- Dry microfiber towel(Used to finish and remove any remaining streaks)
Steps
Estimated time: 15-20 minutes
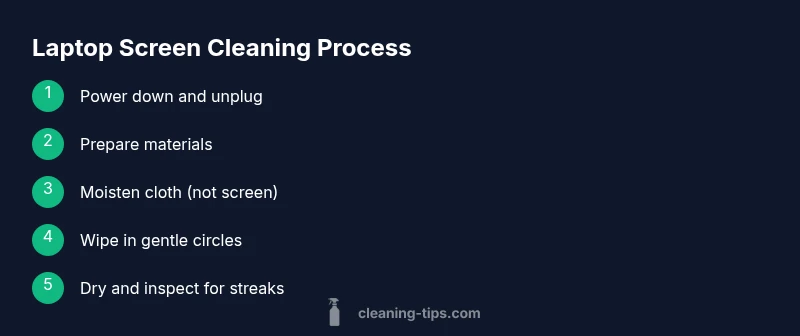
- 1
Power down and unplug
Shut down the laptop completely and disconnect the power adapter. This minimizes the risk of short circuits and ensures you can clean safely without active electricity. Let the device sit for a moment if it’s been in heavy use so the screen isn’t set to an active brightness. This step sets a safe baseline for all subsequent actions.
Tip: Keep liquids away from keyboard and ports when cleaning near bezels. - 2
Prepare materials and workspace
Clear the desk, gather your microfiber cloths, distilled water, and any optional cleaners. A clean, dust-free workspace reduces the chance of particles scratching the screen during cleaning. Have a dry cloth handy for finishing and a small brush or swab for edges.
Tip: Use a dedicated electronics cleaning kit to avoid cross-contamination from other surfaces. - 3
Moisten the cloth, never the screen
Lightly dampen the microfiber cloth with distilled water or a screen-safe cleaner. Do not spray liquid directly onto the screen. Excess liquid can seep into the edges and cause damage. The goal is a barely damp cloth capable of lifting oils without leaving pools.
Tip: Always test a small area first if you’re using a new cleaner. - 4
Wipe in gentle circular motions
Begin at the center of the screen and move outward in smooth circles. Use minimal pressure; heavy rubbing can degrade coatings. Work slowly to cover the entire surface, including edges near the bezels. Avoid circular overlaps that trap moisture at edges.
Tip: Use fresh sections of the cloth as you progress to avoid spreading oils. - 5
Tackle stubborn smudges
For fingerprints or oils that don’t respond to a light pass, re-dampen the cloth and re-wipe those areas with a lighter touch. If using alcohol, ensure it’s on the cloth, not sprayed, and apply sparingly. Do not scrub aggressively, which can scratch or dull coatings.
Tip: Limit the number of passes to prevent over-wetting and streaks. - 6
Dry and inspect
Switch to a dry microfiber cloth and go over the screen to remove any residual moisture or streaks. Inspect under good lighting, adjusting angle to catch reflections. If you still see streaks, repeat with a clean portion of the cloth and a very light touch.
Tip: A second, gentle pass is often enough to eliminate streaks. - 7
Finish with bezel and edges
Gently wipe the bezels and camera area where dust tends to accumulate. These regions can trap oils that later migrate onto the screen. A dry stroke here helps prevent new smudges on subsequent use.
Tip: Avoid rubbing liquids into gaps; a dry pass is usually sufficient for edges.
Questions & Answers
Is it safe to use water to clean laptop screens?
Yes, when used with a damp microfiber cloth and applied to the cloth rather than directly to the screen. Distilled water is preferred to avoid mineral deposits.
Yes, use a damp microfiber cloth with distilled water, never spray water directly on the screen.
Can I use alcohol on my laptop screen?
Isopropyl alcohol can be used in very dilute forms on a cloth, not sprayed on the screen. Avoid frequent use on sensitive coatings and always test first.
Alcohol can be used sparingly on a damp cloth, not sprayed, and you should test a small area first.
What should I avoid when cleaning a laptop screen?
Avoid ammonia-based cleaners, vinegar, acetone, and direct spraying onto the screen. Do not press hard or rub aggressively, and avoid cleaning while the device is hot.
Avoid harsh chemicals and spraying directly on the screen; use a soft cloth with a electronics-safe cleaner.
Can I clean touchscreens the same way as non-touch displays?
Touchscreens require even gentler strokes and a cloth dampened slightly more cautiously. Use non-abrasive cleaners labeled for touch displays.
Yes, but be gentler and ensure the cleaner is safe for touch screens.
How often should I clean my laptop screen?
Clean as needed when you notice smudges or dust; many users do a light clean weekly and a deeper clean every few weeks depending on use and environment.
Clean when you notice smudges, typically every couple of weeks.
What should I do if the screen is damaged while cleaning?
Stop immediately, power down, and seek professional assessment. Do not attempt repairs yourself; coatings and layers can be easily damaged.
If you suspect damage, stop cleaning and contact a professional.
Watch Video
The Essentials
- Power down and unplug before cleaning.
- Use a dedicated screen cleaner or distilled water with a microfiber cloth.
- Never spray liquid directly on the screen or apply heavy pressure.
- Wipe center-out with gentle circular motions to avoid streaks.
- Inspect under good lighting and finish with edges clean