How Often to Clean Dryer Vents: A Practical Guide
Discover how often to clean dryer vents, recognize signs of buildup, and follow a clear, step-by-step maintenance plan to boost safety, airflow, and energy efficiency in any home.

How often should you clean a dryer vent? The general guidance is to clean the vent at least once per year, but you should increase frequency if you use the dryer heavily, have long dry cycles, notice longer drying times, or feel heat or a burning odor. Regular maintenance helps prevent fires, reduces energy use, and keeps your dryer operating efficiently.
Why dryer vent cleaning matters
According to Cleaning Tips, keeping your dryer's vent clear is essential for safety, efficiency, and longevity. A clogged vent can overwork the motor, waste energy, and, worst of all, pose a serious fire hazard. The Cleaning Tips team found that homes with routine vent maintenance experience fewer dryer-related issues and more dependable drying performance. In this guide, you will learn why vent cleanliness matters, how often to clean dryer vent, and practical steps you can take without professional help. Understanding the basics helps protect your home, reduce energy bills, and extend the life of your appliance. This section sets the stage for a practical, home-friendly approach to dryer vent care that homeowners and renters can implement this weekend.
How often to clean dryer vent: baseline recommendations
Most sources agree on a baseline frequency: clean the vent at least once per year if you have a typical single-family laundry setup. If your dryer runs heavily, dries bulky loads, or you run multiple cycles daily, aim for cleaning every 6 to 12 months. Gas dryers may generate more moisture and byproducts, so consider more frequent checks. The goal is to maintain unobstructed airflow to prevent lint buildup that can ignite and to keep energy use in check. Scheduling a spring or fall maintenance window aligns with seasonal laundry patterns and helps you catch problems before they disrupt busy weeks. Cleaning Tips analysis, 2026, emphasizes that proactive vent care reduces risk while preserving efficiency over time.
Frequency by use case: households, gas vs electric
Electric dryers typically produce lint through normal operation, but airflow can still degrade as lint accumulates. Gas dryers vent combustion byproducts and moisture; if the vent line feels warm or you detect a musty air around the laundry area, inspect sooner. In large households with children, pets, or frequent guests, lint can accumulate faster, shortening dry times and increasing heat exposure. Your personal schedule then becomes the best guide: adjust cleaning intervals based on usage, vent length, duct material, climate, and whether you notice a change in performance. A practical cadence emerges when you map household activity to vent complexity.
Signs you need to clean sooner
Common early warnings include longer drying times, requiring multiple cycles to dry a load, and clothes feeling hotter than normal after a cycle. A visible lint buildup near the vent opening or a musty odor around the laundry area are strong indicators that lint is clogging the pathway. If the dryer becomes unusually hot or you hear a buzzing sound from the motor, stop the cycle and inspect the vent. Addressing these signs early helps prevent fires and reduces energy waste. Cleaning Tips recommends keeping a habit of quarterly checks even if no major changes are noticed.
Safety considerations and best practices
Always unplug the dryer before starting any maintenance work and avoid contact with live electrical components. Use safety gloves and eye protection, and work from a stable ladder if you must access exterior vent caps. If you must disassemble parts, consult the dryer’s manual and never force ducts or fasteners. Keep a bright flashlight handy to spot hidden lint and obstructions. If you smell burning or see visible damage, stop immediately and call a qualified technician. Practice calm, methodical cleaning to minimize risk and maximize airflow.
DIY vs professional cleaning: what to expect
DIY vent cleaning can remove substantial lint from straightforward duct runs and is a good first step for many homes. For longer, curved, or damaged ducts, or if you’re unsure about the vent’s integrity, a professional service is advisable. A pro typically inspects the full run with specialized tools, confirms airflow, and provides guidance on preventable causes of clogging. Expect a process that may take from 1 to 3 hours depending on access and duct complexity. The goal is safe completion with verified airflow.
Maintenance calendar you can follow
Create a simple maintenance calendar to stay on top of vent cleanliness. Monthly lint trap cleaning and a quick indoor vent area inspection take 5–10 minutes. Biannually, inspect and clean the exterior vent cap and any accessible duct sections. Annually, schedule a full vent cleaning or professional assessment. Use a log to record dates, conditions observed, and any repairs or adjustments. This routine helps maintain performance and safety without reinventing your household chores.
Common mistakes and how to avoid them
Don’t rely on a single brushing session without checking from both ends of the run. Avoid metal rods or tools that could dent flexible ducts. Don’t ignore moisture, musty odors, or signs of mold inside the duct—address these promptly. Don’t forget to unplug the dryer and verify airflow after reassembly. Finally, avoid short, rushed cleanings that leave lint to accumulate and create hidden fire risks. A deliberate, thorough approach yields the best long-term results.
AUTHORITY SOURCES
- U.S. Consumer Product Safety Commission: https://www.cpsc.gov/
- National Fire Protection Association: https://www.nfpa.org/
- ENERGY STAR or official safety resources: https://www.energy.gov/energysaver
How to document and track cleanings
Keep a simple maintenance log for each vent cleaning: date, areas cleaned (indoor duct, exterior cap, lint trap housing), observations (lint burden, odor, heat), and any follow-up actions. Attach photos if possible to monitor changes over time. Store the record in a shared household notebook or a digital app so all caretakers can stay informed. Regular documentation reinforces accountability and helps you refine your schedule in future seasons.
Tools & Materials
- Vacuum with hose attachment(Essential for capturing loose lint near vents)
- Dryer vent brush kit(Long-reach brush designed for ducts)
- Lint brush(For the lint trap housing and nearby areas)
- Screwdriver (Phillips and flat-head)(To loosen hose clamps or vent covers)
- Duct tape(For temporary sealing if needed during reassembly)
- Gloves(Protect hands from sharp edges and lint)
- Safety glasses(Eye protection during lint removal)
- Flashlight(Bright light to spot hidden lint)
- Step ladder(Useful for exterior vent access)
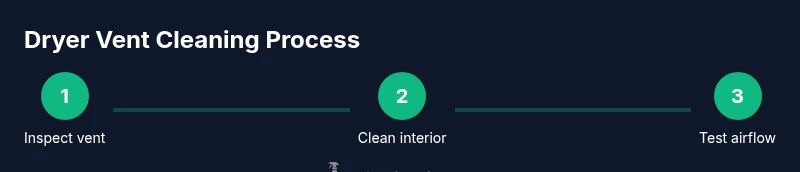
Steps
Estimated time: 60-90 minutes
- 1
Prepare and safety-check
Unplug the dryer, pull it away from the wall, and gather your tools. Put on gloves and safety glasses. Confirm the exterior vent area is clear of debris before you begin.
Tip: Always start with safety—unplug and secure the area. - 2
Inspect the exterior vent
Check the exterior vent cover for damage, lint buildup, and animal nests. Remove any obvious obstructions from the hood opening using a flashlight and brush.
Tip: If you see damage to the vent hood or duct, plan for repair or replacement. - 3
Clean the interior lint trap housing
Empty and scrub the lint trap housing; wipe down accessible areas around the trap. Use the vacuum hose to remove loose lint in the cavity surrounding the trap.
Tip: Do not reuse a clogged lint screen; replace if damaged. - 4
Disconnect and clean the vent duct near the dryer
Loosen clamps and detach the vent from the dryer. Run the vent brush through the duct from the dryer end, employing a steady back-and-forth motion to dislodge lint.
Tip: Work slowly to avoid bending flexible ducts. - 5
Clean the vent duct from the outdoors
From the exterior, insert the brush and vacuum any lint that has traveled the length of the duct. Check for kinks or crush points that impede airflow.
Tip: If you encounter resistance, do not force the brush—inspect for damage first. - 6
Reassemble and test airflow
Reconnect the vent to the dryer, secure clamps, and run a quick dry cycle with a low-load test. Check the airflow at the exterior vent and listen for unusual noises.
Tip: Strong, consistent airflow indicates a clear path. - 7
Document and wrap up
Note the date, conditions observed, and any repairs or parts replaced. File the results in your maintenance log and schedule the next cleaning.
Tip: Keep a running history to predict future maintenance needs.
Questions & Answers
How often should I clean the dryer vent?
Most homes should clean the vent at least once per year. Increase frequency if you have heavy usage, longer drying times, or signs of reduced airflow. Regular checks help prevent fires and improve efficiency.
Most homes should clean the vent at least once per year, and more often if you have heavy usage or signs of reduced airflow.
Can I clean the dryer vent myself?
Yes, many homeowners can perform a basic vent cleaning with a proper vent brush and vacuum. For long or complex duct runs, or if you’re unsure about duct integrity, consider hiring a professional.
Yes, you can clean the vent yourself if you have the right tools, but call a pro for long or complex ducts.
What signs indicate a clogged vent?
Longer dry times, multiple cycles, clothes that feel very hot, or a musty odor around the laundry area are common signs that the vent is clogged and needs attention.
Look for longer dry times and hot clothes; a musty smell is also a warning sign.
Is a damaged vent dangerous?
Yes. Damaged or crushed ducts can restrict airflow and increase fire risk. If you see damage, stop cleaning and have a professional assess and repair the system.
Damaged ducts can be dangerous—stop and call a pro if you see damage.
How long does professional vent cleaning take?
Most professional cleanings take about 1 to 3 hours depending on the length and complexity of the vent run. Expect a quick assessment and a test of airflow after finishing.
Typically 1 to 3 hours, depending on the system.
Watch Video
The Essentials
- Clean dryer vents at least annually; adjust for usage.
- Watch for signs of buildup: longer dry times, heat, odor, and lint near the vent.
- DIY is fine for simple runs; call a pro for complex ducts or damage.
- Maintain a cleaning log to track progress and plan next steps.