How to Clean Burnt Pan: A Practical Guide for Home Cooks
Learn safe, effective methods to clean burnt pans using baking soda, vinegar, and gentle scrubbing. This guide covers non-stick and metal cookware with practical prevention tips.

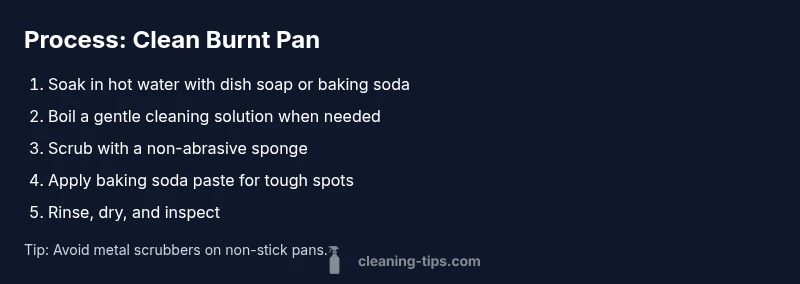
You can safely remove burnt-on residue from a pan by soaking, boiling with soap or baking soda, and scrubbing with a non-abrasive pad. Start with warm water and dish soap, then apply a baking soda paste for stubborn spots. This step-by-step method minimizes scrubbing and protects pan finishes.
Why burnt pan cleaning matters
According to Cleaning Tips, burnt pan cleanup is more than just aesthetics. Leftover carbonizing residues can harbor odors, transfer flavors, and make future cleaning harder. A methodical approach protects cookware finishes and extends the life of your pots and pans. By starting with gentle loosening and moving to targeted scrubbing, you reduce the risk of scratching delicate coatings while restoring the pan to near-original condition.
Common causes of burnt pans
Burnt pans usually result from overheating oils, sugar-rich sauces, or leaving food unattended. High heat can bake sugars into a crust, while fatty foods burn at lower temperatures. Understanding these triggers helps you tailor your cleaning strategy: avoid aggressive scrubbing early; instead, loosen first with soaking and gentle agitation. For non-stick surfaces, preserving the coating is essential, so limit abrasive tools and avoid metal scrubbers that can wear the finish over time.
Tools and ingredients you’ll need
- Dish soap (mild, liquid) for everyday cleaning and initial loosening
- Baking soda (for paste and deodorizing) and a spoon for mixing
- White vinegar (optional) to help break down tough residues
- Warm water and a pan large enough to submerge the item
- Non-abrasive sponge and a plastic scraper for safe scrubbing
- Stiff-bristled brush (optional, for metal pans only) and gloves for hand protection
- Lemon slices or salt as alternative abrasives for light scouring
Note: Always have a towel handy to avoid a slippery surface if the pan is hot during the cleaning process.
Method A: soaking and gentle loosening
Soaking is the gentlest starting point. Fill the pan with hot water and a few drops of dish soap, or sprinkle in 1–2 tablespoons of baking soda. Submerge the pan completely if possible and let it sit for 15–30 minutes. The warmth and alkaline properties of the agents help lift carbonized food without aggressive scrubbing. If the pan is very large, fill a sink or basin with warm soapy water and place the pan inside. When you return, the burnt layer should be noticeably softer and easier to lift off.
Method B: boiling a cleaning solution for stubborn spots
For stubborn residues that won’t budge with soaking alone, bring a fresh cleaning solution to a gentle simmer. Fill the pan with water, add a splash of dish soap or 2–3 tablespoons of baking soda, and bring to a simmer for 5–10 minutes. Optional: add a splash of white vinegar for extra lift. The boiling action agitates the crust and helps dissolve it. Always monitor closely to avoid splashing hot liquid and never leave the pan unattended on the stove.
Method C: scrubbing with abrasives and smart technique
Once the burnt area has softened, scrub with a non-abrasive sponge in a circular motion. For tough spots, switch to a soft-bristle brush or a plastic scraper to gently lift residue without scratching the surface. Rinse frequently to remove loosened particles and re-wet the surface if needed. If you’re cleaning a non-stick pan, avoid metal scrubbers entirely and keep strokes light to preserve coating integrity.
Method D: baking soda paste for stubborn stains
If residues remain, mix a thick paste of baking soda and a little water. Apply the paste to the affected areas and let it sit for 10–15 minutes. Scrub again with a non-abrasive sponge, then rinse thoroughly. This paste is effective because baking soda acts as a mild abrasive and a deodorizer without harsh chemical cleaners. Remember, on non-stick surfaces, keep the paste thin and avoid aggressive abrasion.
Method E: final rinse, dry, and inspection
Rinse the pan with warm water until all cleaning agents are gone. Dry it completely with a clean towel to prevent water spots and rust, especially on iron pieces. Inspect the surface for remaining stains or pitting. If needed, repeat the soaking or paste step on particularly stubborn areas. A quick light oiling after drying can help maintain bare metal cookware and prevent future sticking.
Special considerations for different pan types
- Non-stick pans: Use only soft sponges and avoid steel wool or metal brushes. Maintain coating by cleaning promptly after use and never submerge for long periods.
- Stainless steel: You can use a bit more abrasion, including a nylon scrubber or gentle steel wool if the surface is brushed, but avoid scratching the finish.
- Cast iron: Avoid soaking too long; instead, a small amount of coarse salt as an abrasive can help; re-season with oil after cleaning to preserve seasoning layer.
- Aluminum pans: Be cautious with acidic cleaners; use baking soda and water instead of strong acids to preserve finish and prevent pitting.
Troubleshooting stubborn stains and odor control
If odors linger after cleaning, boil a solution of water with a little vinegar (1:4 ratio) for 5–10 minutes, then rinse well. Another trick is to sprinkle baking soda on the warm pan and let it sit for a while before scrubbing. For deeply ingrained stains, alternate between baking soda paste and vinegar rinse cycles to gradually loosen burnt-on material without harsh chemicals.
Maintenance to prevent future scorching
Preventing future burns is easier than removing them. Always preheat pans gradually, use heat settings appropriate to your cookware, and apply a thin layer of oil when needed. Clean spills promptly to prevent them from hardening as the pan cools. For ovens and stove-top cooking, keep an eye on foods high in sugar or fat that are prone to scorching. A routine cleaning cycle after heavy use can help keep pans in better condition over time.
Tools & Materials
- Dish soap(Mild liquid soap for everyday cleaning.)
- Baking soda(For paste and deodorizing.)
- White vinegar(Optional; helps loosen residues.)
- Water(Hot or warm for soaking.)
- Non-abrasive sponge(Gently lift residue without scratching.)
- Plastic scraper(Safer on coated pans than metal scrapers.)
- Stiff-bristled brush(Use only on metal pans; avoid non-stick coatings.)
- Gloves(Protect hands from hot water and cleaners.)
- Lemon slices or salt(Alternative mild abrasives for light scouring.)
Steps
Estimated time: 45-60 minutes
- 1
Remove loose debris
Let the pan cool slightly if it is hot, then use a plastic scraper to lift off any loose, burnt particles. Wipe the surface with a damp cloth to remove crumbs before you begin soaking. This reduces the amount of residue that needs aggressive cleaning later and minimizes the risk of scratching the pan during subsequent steps.
Tip: Work with the grain of any texture on the pan and keep the scraper shallow to avoid gouging the coating. - 2
Soak to loosen burnt residue
Fill the pan with hot water and a few drops of dish soap or a sprinkle of baking soda. Let it soak for 15–30 minutes to soften baked-on deposits. For very large pans, use a basin or sink to submerge the entire surface. This step is crucial to reduce the effort needed during scrubbing.
Tip: If you plan to reuse the pan soon, you can reheat the soaking water to rinse later without cooling the pan too much. - 3
Boil a cleaning solution for stubborn spots
If the residue remains after soaking, bring the cleaning solution to a gentle boil and let it simmer for 5–10 minutes. A splash of vinegar or extra baking soda can help break down the crust. Avoid letting the liquid boil over and keep hands away from splashing hot liquid.
Tip: Monitor closely; boil at a gentle rate to prevent warping or damaging delicate coatings. - 4
Scrub with a non-abrasive tool
Use a damp non-abrasive sponge to scrub in small circles. If necessary, switch to a soft-bristled brush for tougher areas. Rinse frequently to remove loosened material and re-wet the surface as needed. For non-stick surfaces, avoid any metal scrubbers entirely.
Tip: Keep your scrubbing sessions short and steady to avoid overheating the coating or surface. - 5
Apply a baking soda paste for stubborn stains
Mix baking soda with water to form a thick paste. Apply to stubborn spots and let sit for 10–15 minutes before scrubbing again. Rinse thoroughly to remove all paste residue. This step targets persistent burn marks without harsh chemicals.
Tip: On non-stick pans, apply paste sparingly and avoid polishing motions that could wear the coating. - 6
Rinse, dry, and inspect
Rinse the pan completely with warm water until no cleaner remains. Dry with a clean towel to prevent water spots and rust. Inspect for any remaining stains or damage and decide if another round is needed. For cast iron, lightly oil the surface after drying to maintain seasoning.
Tip: Drying with warmth (low heat on the stove) helps evaporate moisture and prevents rust.
Questions & Answers
What is the easiest method to clean a burnt pan?
Start with soaking the pan in hot soapy water to loosen the residue. If needed, add baking soda and gently scrub with a non-abrasive sponge. For stubborn spots, apply a baking soda paste and let it sit before scrubbing again.
Soak, then scrub gently; use a baking soda paste for tough spots.
Can I use baking soda on non-stick pans?
Yes, baking soda is generally safe for non-stick surfaces when used sparingly and scrubbed with a non-abrasive sponge. Avoid harsh scrubbing that can wear the coating.
Baking soda is safe on non-stick if you scrub gently.
Is it safe to use vinegar on burnt pans?
Vinegar can help with mineral residues and can be used in small amounts. Avoid using vinegar on aluminum pans in high concentrations, as it can tint or pit the metal over time.
Vinegar can help, but use carefully on certain metals.
How should I prevent burning pans in the future?
Preheat gradually, use appropriate heat levels for your pan type, and avoid leaving sugary or fatty sauces unattended. A quick clean after cooking prevents buildup.
Preheat slowly and watch heat levels to prevent future burns.
Can I put burnt pans in the dishwasher?
Most non-stick pans should not go through a dishwasher as harsh detergents and high heat can damage coatings. Cast iron and some stainless pans may be dishwasher safe, but hand washing is usually best.
Dishwashers can harm some pans; check your pan’s care guide.
What about using oven cleaner on burnt pans?
Oven cleaners are generally not recommended for everyday cookware as they can be too harsh and may leave residue. If you choose to use it, ensure the pan is compatible and thoroughly rinse afterward.
Avoid oven cleaners on cookware unless you know it’s safe to use.
Watch Video
The Essentials
- Loosen residue with soaking first.
- Use baking soda for safe, effective cleaning.
- Avoid abrasive tools on non-stick pans.
- Rinse and dry completely to prevent rust.
- Regular maintenance prevents heavy buildup.