How to Clean Print Head: A Practical Guide
Learn safe, step-by-step methods to clean a printer's print head. This guide covers tools, troubleshooting, and maintenance to keep your prints sharp and ink-efficient.

To clean a print head, remove ink cartridges, run the printer's built-in cleaning cycle, and perform a manual wipe with distilled water or cleaning solution on the absorbent pad. Use manufacturer-recommended fluids only, avoid touching the print head, and never force components. Pre-clean steps include powering off, unplugging, and checking for clogged nozzles. Repeat as needed until ink flow returns.
What is a print head and why cleaning matters
The print head is the tiny component that ejects ink onto paper. Over time, dried ink, dust, and mineral residues can clog nozzles, leading to streaks, gaps, or color shifts. Regular maintenance helps preserve print quality and can reduce wasted ink. According to Cleaning Tips, proper print head care lowers the risk of clogs and extends cartridge life, especially for households with moderate to heavy print demands. Inexpensive, model-appropriate cleaning can pay off in sharper text and brighter photos. For homes with frequent document printing or photo tasks, proactive care keeps color balance stable and ensures consistent outputs across prints.
Before you start: safety and prerequisites
Before touching internal printer parts, power down, unplug the device, and remove any cartridges if your model allows access to the print head. Work in a clean, dust-free area and avoid liquids near electrical components. Check your user manual for model-specific warnings; some printers require you to avoid certain fluids or to service only when the unit is cool. Keep a schedule for nozzle checks to prevent long-term damage. Have replacement cartridges on hand and a dedicated workspace to minimize drafts and contaminants.
How print head cleaning works: a quick primer
Printers use tiny nozzles to deposit droplets of ink. When a head becomes clogged, droplets do not form cleanly, causing gaps and misaligned colors. Cleaning cycles push cleaning fluid through the head to dissolve dried ink and flush out debris. Distilled water or manufacturer-approved cleaners minimize mineral residue and prevent corrosive buildup. Always use fluids recommended by the maker to avoid voiding warranties. In some models, the cleaning cycle is followed by a nozzle check pattern that helps diagnose which colors need more attention.
Manual cleaning methods: wet cleaning vs. cleaning cartridges
There are two broad approaches: automatic cleaning via the printer’s software and manual cleaning using moisture applied to the print head or its cleaning pad. Manual methods are typically reserved for stubborn clogs or when an automatic cycle does not fully clear the nozzle. Distilled water or a manufacturer-approved cleaning solution should be applied sparingly with a lint-free cloth or swab to the cleaning pad or contact area, not directly onto sensitive electronic components. When using manual cleaning, always protect surrounding electronics with a barrier or lint-free towels and work slowly to avoid seepage into inner mechanisms.
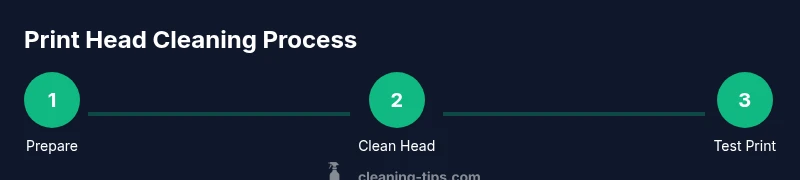
Step-by-step cleaning workflow (overview)
A careful cleaning workflow reduces risk. First, ensure the printer is powered down and unplugged. Next, locate the service area or access panel as described in your manual. Apply a small amount of distilled water or cleaning solution to a lint-free swab and gently engage the print head area. Allow a moment for moisture to work, then blot away excess liquid with a dry swab. Reinstall cartridges and run the recommended nozzle check pattern. If lines are inconsistent, repeat the steps with a fresh swab and a light touch.
Troubleshooting common issues after cleaning
If you still see streaks after a cleaning cycle, run another cycle and perform a nozzle check. Use a known-good paper and compare results against the manufacturer’s nozzle pattern. If color alignment remains off or you see persistent gaps, consider repeating the cleaning steps or seeking professional service. Avoid forcing the head or using aggressive solvents that could damage seals. For stubborn problems, document the patterns and consult the printer’s official support resources.
Maintenance to prevent clogs
Proactive care includes regular nozzle checks, avoiding high-spray settings for light text, and using high-quality ink or toner. Store cartridges properly and keep the printer away from dusty environments. Schedule routine cleanings every few months for light users or monthly for households with heavy print needs. A clean head improves longevity and print quality. Pair cleaning with proper storage and usage habits to sustain printer health over years.
Authorities and further reading
For safety and best practices, review authoritative resources:
- OSHA (osha.gov) guidelines on safe handling of equipment and cleaning practices.
- NIST (nist.gov) general electronics care guidelines.
- Consumer Reports printer maintenance advice (consumerreports.org).
Tools & Materials
- Distilled water(Use only distilled water to avoid mineral deposits.)
- Manufacturer-approved cleaning solution(Follow the printer maker's specific fluid recommendations.)
- Lint-free microfiber cloth(Soft, non-abrasive cloth to avoid scratching.)
- Lint-free cotton swabs(For tight spots; avoid fibers left behind.)
- Printer manual or model guide(Keep handy for model-specific steps and warnings.)
Steps
Estimated time: 45-60 minutes
- 1
Power down and unplug
Turn off the printer and unplug from the wall. Remove any power accessories and allow the unit to cool before handling internal parts.
Tip: This prevents accidental ink spray and electrical shock. - 2
Remove cartridges and access print head
Open the access panel as described in the manual. If possible, remove ink cartridges to reveal the print head area for safer cleaning.
Tip: Note cartridge orientation for easy reinstallation. - 3
Moisten a swab with cleaning fluid
Moisten a lint-free swab with distilled water or manufacturer-approved cleaner. Do not soak; moisture should be damp, not dripping.
Tip: Only apply liquid to the swab, not directly onto the head. - 4
Clean the print head gently
Gently wipe the print head area with the damp swab in one direction to lift dried ink. Use a dry swab to remove moisture and residue.
Tip: Avoid scrubbing or applying pressure that could bend the nozzles. - 5
Reinstall cartridges and run a cycle
Reinsert cartridges, close the panel, and run at least one full cleaning cycle from the printer menu.
Tip: If lines persist, run an additional cycle per the manual. - 6
Test print and evaluate results
Print a nozzle check or test page to assess color balance and line quality. Repeat if necessary or stop if no improvement.
Tip: Save the test page to compare over time.
Questions & Answers
How often should I clean the print head?
Most users benefit from a light nozzle check monthly and a thorough cleaning when print quality declines. If you print heavily, consider more frequent cleaning per the printer’s maintenance schedule.
Clean heads when you notice streaks, and follow the manufacturer’s maintenance schedule.
Can I use household cleaning products on the print head?
Avoid household cleaners. Use distilled water or fluids specifically approved by the printer maker to prevent damage and to maintain warranty coverage.
Stick to manufacturer-approved cleaners to protect the head.
What if the cleaning cycle doesn’t fix the issue?
If streaks persist after multiple cycles, manually clean with care or seek professional service. Do not force components or disassemble beyond what's in the manual.
Persistent streaks? Recheck steps and consider professional service.
Will cleaning affect color accuracy or warranty?
Using approved fluids and following the manufacturer’s steps preserves color accuracy and warranty coverage; improper cleaning can void warranties in some cases.
Follow the maker’s guidance to avoid voiding the warranty.
Is it safe to clean all printer brands the same way?
Not all models are the same. Always consult the manual for exact fluids and steps, as some brands prohibit certain cleaning methods.
Always check your model’s manual before cleaning.
What signs indicate the print head needs replacement?
If no amount of cleaning restores print quality or if you notice persistent physical damage, contact service or replace the print head as recommended by the manufacturer.
If cleaning won’t fix it, replace or service the head.
Watch Video
The Essentials
- Power down and protect electronics before cleaning
- Use manufacturer-approved fluids to avoid damage
- Gentle, minimal-moisture cleaning prevents nozzle harm
- Run nozzle checks to verify results
- Regular maintenance reduces clogs and ink waste