How to Clean a Speaker: A Practical Step-by-Step Guide
Learn how to clean a speaker safely and effectively to maintain sound quality and longevity. This guide covers tools, methods, safety, and maintenance for various speaker types.

To clean a speaker safely, start by powering down and unplugging it. Remove the grille if possible, then dust the exterior with a microfiber cloth. Use a barely damp cloth or compressed air for hard-to-reach areas, avoiding moisture near drivers. Reattach the grille once completely dry and test at low volume. Regular, gentle cleaning helps preserve sound quality and prolongs life.
Why cleaning a speaker matters
How to clean speaker surfaces and vents isn’t just about aesthetics—dust, pet hair, and fingerprint oils can insulate heat, clog vents, and subtly degrade sound quality over time. Regular maintenance helps preserve bass response, treble clarity, and overall balance. The Cleaning Tips team emphasizes that tidy grilles and clean ports improve airflow and reduce the chance of overheating in compact enclosures. By keeping the exterior dust-free, you also minimize the risk of debris migrating inward when you move or adjust the unit. This section sets the foundation for safe, effective cleaning that protects your investment and preserves listening enjoyment.
Safety first when you clean a speaker
Safety is non-negotiable when dealing with electronic devices. Always unplug and power down before handling any components. Keep liquids away from ports, drivers, and internal circuits. Avoid aerosol cleaners, which can seep into seals and cause corrosion. If your speaker includes magnets or a magnetic grille, take care to avoid pinching fingers or metal objects near the surface. For models with fabric grilles, test a small area first to ensure colors don’t bleed. When in doubt, consult the user manual or contact the manufacturer.
Tools and materials you’ll need
Having the right toolkit makes cleaning easier and safer. A microfiber cloth is your primary tool for dry wiping. A soft brush or a small paintbrush helps dislodge dust from crevices. A can of compressed air (short bursts, upright) can remove stubborn dust from vents. For grime, use a barely damp microfiber cloth with water or 70% isopropyl alcohol on non-driver surfaces only. Avoid spraying directly onto the speaker. Optional items include a gentle vacuum with a brush attachment and a soft cotton swab for tight corners. Store cleaners out of reach of children and pets.
Step-by-step overview of safe cleaning (high level)
This section provides a logical flow you’ll apply in practice: 1) power off and unplug, 2) remove the grille if possible, 3) dry wipe all accessible surfaces, 4) clean vents and ports with air or brush, 5) carefully damp wipe non-driver areas, 6) reattach the grille and dry completely, 7) test at low volume, 8) establish a routine to keep grime at bay. Each action minimizes moisture exposure and protects sensitive components while delivering the best listening experience.
Cleaning by speaker type: portable, bookshelf, and in-wall
Different designs require tailored approaches. Portable speakers often have fabric covers and smaller drivers; keep moisture away from the fabric and driver surfaces. Bookshelf and floor-standing models typically feature larger grilles and exposed cones; avoid touching drivers directly and center your cleaning on the grille. In-wall and ceiling speakers demand extreme care to avoid perforation or entering the cavity; cap ports or use a long, soft brush to minimize contact with cones. Always respect manufacturer guidelines for each model.
Advanced techniques for stubborn grime
For embedded grime on non-driver surfaces, a microfibre cloth with a tiny amount of isopropyl alcohol (70%) can help, but never apply liquid directly to the device. For fabric grilles, use a lint roller or vacuum with a brush attachment to lift dust without saturating the material. If grease or sticky fingerprints persist, consider a diluted soap solution (a drop of mild dish soap in a cup of water) applied to a cloth and tested on a non-visible area first. Let surfaces dry completely before reassembly.
Maintenance habits to extend speaker life
Create a quick cleaning routine: weekly quick dusting with a microfiber cloth, monthly light cleaning of grills, and quarterly deeper cleans. Place speakers away from direct sunlight, humidity, and cooking grease to reduce grime buildup. Consider using speaker covers or keep grills closed during heavy dust seasons. Regular maintenance helps keep drivers responsive and the acoustic signature stable, so you can enjoy consistent sound quality.
Common mistakes and how to avoid them
Avoid spraying cleaners or water directly onto a speaker, as moisture can seep into the driver assembly. Don’t use abrasive cloths or rough brushes that can scratch the surface. Never pry or force the grille off without guidance from the manual. If you hear distortion after cleaning, power off and inspect for moisture or debris near the drivers, then proceed cautiously. When in doubt, seek professional help rather than risking permanent damage.
Quick reference: after-cleaning checklist
- Power off and unplug
- Ensure all surfaces are dry before reassembly
- Reattach or secure the grille properly
- Test at low volume before normal usage
- Record cleaning dates to establish a routine
Tools & Materials
- Microfiber cloth(Lint-free; dry or barely damp)
- Soft brush or cotton swab(Gently remove dust from crevices)
- Vacuum with brush attachment(Low suction, avoid contact with cones)
- Compressed air can(Short bursts; keep upright)
- Isopropyl alcohol (70%)(For non-driver surfaces only)
- Mild dish soap(Dilute in water for stubborn grime (test first))
- Water spray bottle(Use sparingly; never spray directly)
Steps
Estimated time: 15-25 minutes
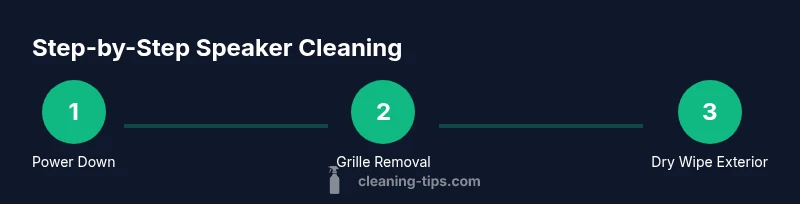
- 1
Power down and unplug
Turn off the speaker and unplug from power or disconnect Bluetooth/wireless connections if applicable. This prevents shock risks and accidental inputs while you clean.
Tip: Check for indicator lights to confirm it is fully powered down. - 2
Remove the grille if accessible
Gently remove the grille or fabric cover according to the manufacturer’s instructions. This exposes the driver area for thorough cleaning and reduces the chance of dust migrating inside during cleaning.
Tip: If screws are used, use the correct small screwdriver to avoid stripping. - 3
Dry wipe exterior surfaces
Wipe with a dry microfiber cloth in smooth, even motions. This first pass lifts dust without introducing moisture near electrical components.
Tip: Fold the cloth to present a fresh surface as it collects dust. - 4
Clean the ports and crevices
Use a soft brush or compressed air to dislodge dust from ports and crevices. Keep the can upright and use short bursts to avoid propellant moisture.
Tip: Hold the speaker steady and avoid pointing air at the cone area. - 5
Dampen a cloth for stubborn grime
Lightly dampen a microfiber cloth with water or a 70% isopropyl alcohol solution. Wipe non-driver surfaces only; do not apply moisture to the cones or surround.
Tip: Do a spot test on an inconspicuous area first. - 6
Reattach the grille and dry thoroughly
Place the grille back securely and allow any remaining moisture to evaporate completely before powering on again.
Tip: Giving extra minutes to dry reduces the chance of moisture triggering issues. - 7
Test at low volume
Power on the speaker and play a test track at low volume to confirm there’s no rattling or distortion after cleaning.
Tip: If you hear unusual noises, power down and inspect for residual moisture or debris. - 8
Schedule regular maintenance
Set a routine: quick dust weekly, light wipe monthly, deeper cleans quarterly to maintain performance.
Tip: Keep a cleaning log to track when you last cleaned and what you used.
Questions & Answers
Can I use water to clean my speaker?
Yes, but use a barely damp cloth and avoid spraying directly. Keep moisture away from the driver area.
Yes, but only with a barely damp cloth and never spray liquids directly on the speaker.
Is it safe to remove the grill?
If the grill is meant to come off, do so gently following the manual. Otherwise, clean around the edges and avoid forced removal.
If the grill is designed to come off, do it gently per the manual.
How often should I clean my speakers?
Light cleaning monthly; deeper cleanings every few months depending on dust and environment.
Clean monthly; deeper cleans as needed.
Will cleaning affect sound quality?
Careful cleaning should not affect sound. Avoid moisture near drivers and cones.
Cleaning carefully won’t affect sound if you avoid moisture near the drivers.
What if I hear distortion after cleaning?
Power off and inspect for moisture or debris. If it persists, seek professional help.
If you hear distortion, stop and check for moisture.
Watch Video
The Essentials
- Power down before cleaning
- Use gentle tools to avoid driver damage
- Moisture should be minimal and localized
- Regular maintenance prolongs speaker life