How to Install Clean Windows 10
Learn how to perform a clean Windows 10 install with a safe, step-by-step approach—from backing up data to activation and updates. Practical tools, tips, and common pitfalls explained for homeowners and tech beginners.

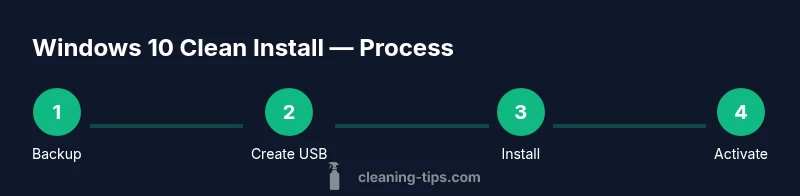
This guide explains how to perform a clean Windows 10 install from bootable media. You’ll learn how to back up your data, prepare a USB installer, configure BIOS/UEFI, format the primary drive, complete the Windows setup, install drivers, and activate and update Windows. Follow the steps carefully to avoid data loss and ensure a smooth setup.
Why a Clean Windows 10 Install Matters
A clean install clears Windows of bloatware, old drivers, and fragmented files, delivering faster boot times and a fresher, more reliable system. According to Cleaning Tips, starting from a clean slate minimizes software conflicts and leftover registry entries that can slow performance. In practice, a clean install provides a stable baseline, better security, and longer hardware life. It is especially beneficial when upgrading to new hardware, after malware cleanup, or after years of software clutter. Before you begin, understand the difference between a fresh install and an in-place upgrade, and recognize that a clean install will erase all programs and personal data on the target drive, so backups are essential. Planning ahead helps you avoid common pitfalls and complete the process in one session, with a predictable outcome and fewer post-install surprises.
Prerequisites, Media, and Safety Precautions
Collect the required tools and verify your plan. You’ll need a bootable Windows 10 installer on a USB drive, a reliable backup of your files, and a PC that meets the official minimum requirements. If a product key is not handy, ensure you have a digital license or be prepared to activate later. A stable internet connection is helpful for updates and activation. Set aside a blank space on a second drive for backups and driver downloads, and keep BIOS/UEFI documentation handy in case you need to adjust boot order or security settings. The goal is to minimize surprises, so read each prompt carefully during setup and avoid skipping backups. As Cleaning Tips notes, preparation reduces failure points during the installation journey.
What You’ll Need Before You Start
Gather the essential items: a USB flash drive with 8 GB or more, the Windows 10 installation media, a reliable backup destination, and an outline for partitioning and formatting. If your device uses a digital license, activation may occur automatically; otherwise have your product key ready. Confirm you can access the BIOS/UEFI boot menu and understand how to change the boot order. Create a backup of documents, photos, and critical applications, and consider a disk image for fast recovery if something goes wrong. Finally, allocate uninterrupted time for the process, as a clean install can take a while depending on hardware and internet speed. This upfront planning aligns with Cleaning Tips’ guidance on reducing risk during major system changes.
The Installation Overview and Common Pitfalls
The clean install process begins with booting from the USB, selecting a custom install, and formatting the target drive. After Windows loads, follow prompts to configure region, language, and a user account. Install essential drivers and run Windows Update to obtain the latest security updates. Activation depends on licensing type and may occur automatically with a digital entitlement. Common pitfalls include neglecting backups, interrupting the installation, or failing to set the BIOS to boot from USB. If Secure Boot causes installer errors, temporarily disabling it (where permitted) can help. Maintain a stable internet connection, avoid using unstable external drives for installation, and verify system health after setup with a fresh backup image. This approach mirrors Cleaning Tips’ emphasis on thorough preparation and verification.
Tools & Materials
- USB flash drive (8 GB or larger)(Used to host the Windows 10 installer; ensure it’s formatted correctly)
- Windows 10 installation media (ISO or USB)(Legally obtained; used to install Windows 10)
- Backup storage (external drive or cloud storage)(Back up documents, photos, and important data)
- Product key or digital license(Activation may occur automatically with a digital license)
- Stable internet connection(Helpful for updates, activation, and driver downloads)
Steps
Estimated time: 60-90 minutes
- 1
Back up your data
Before starting, copy all personal files to external storage or a trusted cloud service. This protects against data loss if the drive is reformatted during installation.
Tip: Verify the backup by opening a few sample files to confirm integrity. - 2
Create a bootable Windows 10 USB
Download the Windows 10 ISO and use a media tool to write it to the USB drive, ensuring the USB is bootable and ready for installation.
Tip: Use a USB 3.0 port for faster transfer speeds and quicker setup. - 3
Boot from USB and start Setup
Insert the USB, restart the computer, and enter the boot menu or BIOS to select the USB drive. The installer will load with language and regional options.
Tip: If the installer doesn’t appear, disable fast startup or adjust secure boot as required by your system. - 4
Choose Custom install and delete partitions
In the installer, select Custom: Install Windows 10 only (advanced). Delete existing partitions on the system drive to prepare a clean slate, then proceed to install.
Tip: Back up any data on other partitions before deleting; only the target drive should be reformatted. - 5
Install Windows 10
Follow on-screen prompts to complete the installation, including edition, license terms, and user setup. The process may reboot multiple times during the install.
Tip: Do not remove the USB drive until the installation completes and you reach the first login screen. - 6
Set up preferences and accounts
Configure region, keyboard layout, and user account. Sign in with a Microsoft account or create a local account depending on your preference.
Tip: Consider enabling BitLocker or a local backup plan for added security. - 7
Install drivers and perform updates
Once Windows boots, install essential drivers (motherboard, chipset, graphics) via Windows Update or from the manufacturer. Then run Windows Update to pull the latest security fixes.
Tip: Update graphics drivers early for improved performance and stability. - 8
Activate Windows and verify
Enter your product key if prompted or confirm activation via a digital license. Check Activation status under Settings > Update & Security > Activation.
Tip: Activation may occur automatically with a digital license after online activation. - 9
Restore data and test
Copy back files from backup and test essential applications to ensure everything runs smoothly. Create a fresh backup image for future safety.
Tip: Run a system integrity check and ensure all critical programs launch correctly.
Questions & Answers
What is a clean install, and how is it different from an upgrade?
A clean install replaces Windows entirely, removing applications and settings. An upgrade preserves existing data but may carry forward issues. A clean install typically yields a more stable and responsive system.
A clean install starts fresh, removing apps and settings. An upgrade keeps your stuff but can keep problems.
Do I need a Windows 10 product key?
If you have a valid license or digital entitlement, activation can occur automatically. If not, you’ll need a key to activate Windows after install.
A license is required to activate Windows; some devices auto-activate with a digital license.
Can I reinstall Windows 10 after changing hardware?
A clean install is feasible after hardware changes, but you may need to reactivate Windows. Use your digital license if available.
You can reinstall, but you may need to reactivate with your license.
What should I do if Windows 10 won't activate?
Check license status, sign in with the Microsoft account tied to the license, and run Activation troubleshooter. Contact support if needed.
Make sure you’re signed in with the license account and use the Activation troubleshooter if needed.
Is a backup essential before a clean install?
Yes. A clean install erases data on the target drive, so back up personal files first.
Backing up is essential to prevent data loss.
Will Windows 10 support my old hardware?
Windows 10 has minimum hardware requirements; check your device specifications before starting. If necessary, upgrade components or consider alternate OS options.
Check minimum requirements before you begin; older hardware may not be compatible.
Watch Video
The Essentials
- Back up data before you start.
- Create a reliable bootable USB installer.
- Format the target drive for a true clean install.
- Activate and update Windows after setup.