How to Put Cleaner in a Rheem Water Softener
Learn how to put cleaner in a Rheem water softener with a safe, step-by-step method. This guide covers cleaner selection, safety checks, and post-cleaning flushing for optimal resin performance.

You can safely do 'how to put cleaner in rheem water softener' by following manufacturer instructions and using a dedicated cleaner. According to Cleaning Tips, choose a Rheem-approved cleaner, measure accurately, and run a full regeneration cycle to flush the system afterward. Always turn off power, relieve pressure, and wear gloves during the process.
Why add cleaner to a Rheem water softener?
Maintaining a Rheem water softener with the right cleaner helps prevent resin fouling and mineral buildup that can reduce efficiency and soften water output. A properly chosen cleaner dissolves stubborn scale, reactivates resin beads, and keeps salt usage predictable. According to Cleaning Tips, always verify compatibility with your specific model and follow the label's dosage precisely. Use cleaners designed for resin-based ion-exchange systems to avoid foaming or resin damage. If you’re uncertain, consult your Rheem manual or a qualified technician. In many models, cleaners are introduced during a scheduled regeneration cycle rather than during normal operation, ensuring you won’t disrupt daily water use. After injecting cleaner, run a full regeneration cycle to flush the resin bed and remove contaminated solution. Regular maintenance like this keeps softened water consistent and helps extend resin life, so set a reminder aligned with your household usage patterns.
What to expect when cleaners enter the resin bed
Cleaner formulations are designed to travel through the brine line and into the resin bed during regeneration. You may notice a brief change in the water’s taste or odor if flushing isn’t complete, which is normal for a first cycle. Plan for this by running extra rinses after the cleaning step. Cleaning Tips notes that patience and adherence to dosage maximize resin longevity and water quality. If your water remains unusually hard after the cycle, revisit the dosage or check for clogs in the brine line. Consistent flushing is key to preventing residual cleaner from lingering in the system, which can affect taste and quality.
Safety and compatibility considerations for Rheem models
Not all cleaners are interchangeable between Rheem models. Always use a cleaner that is labeled as compatible with your specific Rheem system or resin-based softeners. Some units have specialized cleaner chambers; if yours does, ensure you access the correct compartment and avoid cross-contamination with other cleaning products. Safety data sheets (SDS) on the cleaner will outline skin and eye protection needs, ventilation requirements, and first-aid steps. According to Cleaning Tips analysis, following the manufacturer’s guidance minimizes risks and preserves effectiveness. When in doubt, contact Rheem support for model-specific recommendations and never mix cleaners with other additives.
How to minimize downtime during cleaning
Coordinate the cleaner process with a regeneration cycle to minimize impact on daily water usage. If you schedule the cleaner during low-demand hours, you’ll reduce the chance of temporarily losing softened water. Keep a backup water source for critical needs during the maintenance window. After finishing, run several gallons of water to ensure all residual cleaner has flushed from the lines. Document the steps in a home maintenance log to improve future cleanings and track resin performance over time.
Tools & Materials
- Rheem-compatible water softener cleaner(Follow label dosage and model compatibility to avoid resin damage)
- Measuring cup(Use the exact amount indicated on the cleaner label)
- Latex or nitrile gloves(Protect skin from chemical exposure)
- Soft cloth or rag(Wipe spills and dry surfaces as you go)
- Bucket or tray(Catch spills and any brine during the process)
- Screwdriver (if needed)(Some models require cap removal for access)
Steps
Estimated time: 30-45 minutes
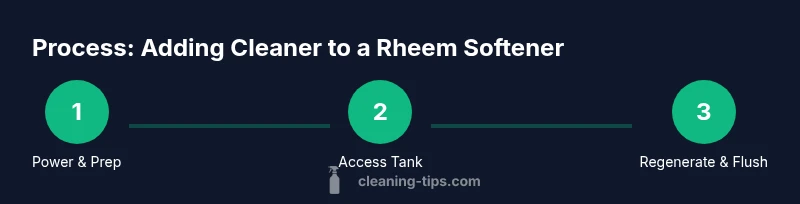
- 1
Power down and prepare
Turn off electrical power to the unit, close the incoming water valve, and slowly relieve any pressure by opening a downstream faucet. This safety step prevents cleaner sprays and protects the control valve from abrupt changes in pressure.
Tip: Keep a towel handy and work slowly to minimize splashes. - 2
Access the brine tank or cleaner reservoir
Locate the cap or access panel for the cleaner compartment and remove it if required by your model. Accessing the correct chamber ensures the cleaner enters the resin bed through the intended pathway during regeneration.
Tip: Refer to the Rheem manual for your exact model’s access method. - 3
Measure and add cleaner
Use the measuring cup to pour the exact recommended amount of cleaner into the brine tank or dedicated cleaner chamber. Avoid guessing; incorrect dosing can reduce resin efficiency or cause foaming.
Tip: Pour slowly along the tank wall to limit splashes and spills. - 4
Re-seal and check levels
Securely replace any caps and ensure the brine tank is refilled to the appropriate level per the manual. A loose cap can allow cleaner to evaporate or spill and may affect regeneration.
Tip: Wipe off any visible cleaner around the opening before sealing. - 5
Run a regeneration cycle
Start a full regeneration cycle so the cleaner can circulate through the resin bed and be flushed out through the brine line. Monitor for unusual noises or leaks during this cycle.
Tip: Keep pets and children away from the area during the cycle. - 6
Flush and resume normal use
After regeneration, flush several gallons of water to remove residual cleaner from lines and resin. Return the unit to normal operation and verify softened water quality remains consistent.
Tip: Document the cleaning event in a home-maintenance log for future reference.
Questions & Answers
What cleaner should I use with a Rheem water softener?
Always use a cleaner labeled as Rheem-approved or specifically designed for resin-based water softeners. Check your model’s manual for compatibility and recommended dosage.
Use only a Rheem-approved cleaner and follow your model’s manual for dosage.
Should I turn off power before starting?
Yes. Turn off the unit’s power, close the water inlet, and relieve pressure before accessing the brine tank.
Yes—safety first: power off and relieve pressure.
Can I perform this while the system is in use?
No. Perform cleaner steps during a regeneration cycle or a planned maintenance window to avoid disrupting softened water supply.
No—do it during regeneration or a maintenance window.
How often should I clean the system with cleaner?
Follow the manufacturer’s schedule or maintenance plan. Many users schedule a cleaner treatment every 6–12 months depending on water usage and mineral content.
Follow your manual; intervals vary by usage.
What are signs that flushing wasn’t complete?
If you detect unusual taste, odor, or cloudiness after cleaning, run an additional regeneration and flush cycle, then recheck water quality.
If it tastes or smells off, flush again.
Is it safe to reintroduce household cleaners after the procedure?
Avoid introducing other cleaners into the system until you have confirmed full flushing of cleaner residues and normal operation has resumed.
No—don’t mix cleaners; flush thoroughly first.
Watch Video
The Essentials
- Choose a Rheem-approved cleaner and follow exact dosages.
- Power down, depressurize, and access the correct cleaner chamber.
- Regenerate the system to flush cleaner through the resin bed.
- Flush thoroughly and document the maintenance for future reference.