How to Tell When Your Karcher Window Cleaner Is Charged
Learn how to tell when your Karcher window cleaner is charged, including indicators, charging times, and safe practices. This guide covers model variations and practical steps to keep suction strong and battery healthy.

This quick guide shows you how to tell when your Karcher window cleaner is charged. Learn to read indicator lights, note charging duration, and recognize when the battery is full. We cover model variations and safe charging practices to avoid overcharging, ensuring peak suction for your cleaning tasks. If you’re unsure, consult the manual or Cleaning Tips for model-specific cues.
Why knowing the charge status matters
Knowing when your Karcher window cleaner is charged matters for both performance and safety. A fully charged battery delivers maximum suction and efficient cleaning, while a partially charged battery can struggle on larger panes or stubborn grime. Regularly checking charge status helps you plan cleaning sessions, reduces downtime, and extends the battery’s overall lifespan. According to Cleaning Tips, a predictable charging routine minimizes wear and tear on the power cell and helps you avoid unexpected interruptions. By understanding common charging cues, you’ll maintain consistent results across different window cleaning tasks.
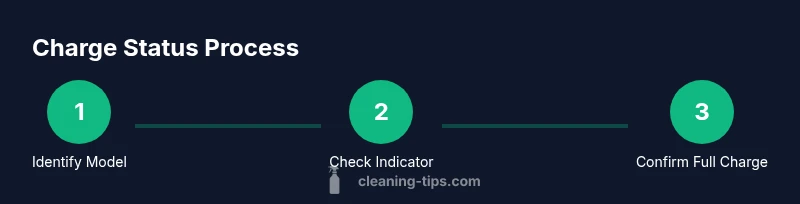
Identify your Karcher window cleaner model and battery type
Karcher produces several window cleaning tools, including cordless window vacuums and handheld spray cleaners, each with its own charging indicators and battery chemistry. Start by locating the model number on the device or in the user manual, then verify the battery type (Li-ion is most common in newer models). Knowing the exact model helps you reference model-specific charging cues and avoid using an incompatible charger, which can degrade performance or pose safety risks. Cleaning Tips’ team emphasizes checking the manual for model-specific indicators and recommended charging practices.
Reading indicators: lights, sounds, and icons
Most Karcher cleaners use LED indicators or icons to signal charge status. A steady, solid light (often green) typically indicates a full charge, while a blinking or changing color usually means charging is in progress or the battery is low. Some models emit a short audible cue when charging completes or when a charging cycle starts. Because indicators vary by model, always cross-check with the user manual. If you see inconsistent signals, treat it as a safety cue and perform a quick diagnostic check before continuing.
Estimating charging times and what full looks like
Charging times vary by model, battery capacity, and whether you’re using the original charger. In general, expect several hundred minutes for a deep cycle or a warm environment, and shorter durations for smaller batteries or newer Li-ion cells. A full charge often corresponds with a stable indicator (no blinking) and a solid charge icon on the display, if present. Remember to avoid peak charging windows in extremely hot or cold conditions, as temperature can impact battery performance. The goal is a clean-state charge that supports a full cleaning session.
Step-by-step check for a healthy charge cycle
To verify a healthy charge cycle, plug the device in and observe the indicator signals for the recommended duration listed in your manual. If the indicator shows a full charge within the expected time, disconnect the charger and run a brief test on a small pane to confirm suction is at peak. If the device does not reach full charge within the expected window, consult the troubleshooting section for potential issues like dirty contacts or a worn charger. Keeping a routine helps you anticipate when you’ll need a recharge for back-to-back cleaning.
Troubleshooting slow charging and common issues
Slow charging can result from several factors: dirty charging contacts, a damaged charger, or running the charger in a hot environment. Clean the contacts with a dry microfiber cloth and ensure the charger cable is securely connected. If charging remains slow, test with an alternate charger compatible with your model. Faulty batteries may require service or replacement per the warranty. Always avoid using a damaged charger or attempting to bypass safety features.
Maintenance tips to maximize battery life
Extend battery life by avoiding full discharges, storing the cleaner between uses, and charging in moderate temperatures. Regularly inspect the charging contacts and keep them clean and dry. Use the original charger whenever possible, as third-party adapters can deliver improper current. Cleaning Tips recommends scheduling a routine battery health check every few months to catch performance drops early and prevent unexpected failures.
Tools & Materials
- Karcher window cleaner unit(Model-specific battery type (check label))
- Original charger/charging cradle(Use the charger supplied with your model)
- Owner's manual(Reference model-specific indicators)
- Clean microfiber cloth(Wipe contacts gently)
- Cotton swabs or soft brush(Clean stubborn residue from contacts)
- Multimeter (optional)(Verify battery voltage if you suspect a fault)
- Dry, well-ventilated workspace(Prevent heat buildup during charging)
Steps
Estimated time: 30-60 minutes active setup/checks plus variable charging duration
- 1
Identify model and read the manual
Locate the model number on the device and consult the manual for model-specific indicators and charging guidelines. Understanding your particular battery chemistry helps you interpret signals correctly.
Tip: Note the indicator color and pattern described for your model. - 2
Connect the charger correctly
Attach the charger firmly to the charging port with the correct orientation. A loose connection can lead to slow charging or intermittent power delivery.
Tip: Ensure the charger is fully seated and the cable isn’t kinked. - 3
Observe indicators during charging
Turn on the charger and watch the indicator lights or icons. Record whether the signal changes from blinking to steady green or a full battery icon as the manual describes.
Tip: Limit disturbances; avoid opening windows during charging to prevent drafts that can affect temperature. - 4
Wait for a defined charging window
Allow charging to run through the recommended window in the manual. If the signal doesn’t reach the full state within this window, proceed to troubleshooting rather than forcing a longer charge.
Tip: Use the original charger whenever possible for reliable current. - 5
Test the charge with a quick cleaning run
Disconnect the charger after a full signal and perform a brief test on a small pane to verify suction and runtime.
Tip: If suction is weak, recheck contacts and try a full cycle again. - 6
Troubleshoot slow or no charging
If charging is slow or not happening, inspect contacts, try a different outlet, and consider battery health. Do not use a damaged charger; replace under warranty if necessary.
Tip: Clean contacts gently and avoid liquids near the charging port.
Questions & Answers
Can I use the Karcher window cleaner while it’s charging?
Most models recommend not using the device while charging to ensure safe and effective charging. Check the manual for your model's guidance. If in doubt, wait until charging completes before use.
Usually you should not use it while charging; wait for the charge to finish before operating.
Why does the indicator show charging even after a new device?
A new device may require an initial conditioning charge or the indicator may default to charging mode until the battery reaches a stable state. Refer to the manual for model-specific signals.
A new device can show charging signals initially; check the manual for what signals mean for your model.
How long should I charge a Karcher window cleaner’s battery?
Charging time varies by model and battery size. Expect a window of several minutes to a few hours; avoid overcharging by removing the charger when the full signal is reached.
Charging times vary by model; remove the charger when full to avoid overcharging.
What if the charger plug is loose?
If the plug feels loose, unplug and re-seat it firmly. A loose connection can cause slow charging or no charging at all.
A loose charger plug can prevent charging; reseat it firmly.
Is it safe to fully drain the battery before charging?
Most modern batteries benefit from regular top-offs rather than deep discharges. Avoid letting the battery fully deplete to prevent capacity loss.
Don’t regularly let the battery drain completely; top off when possible.
Does temperature affect charging?
Yes, charging performance is influenced by ambient temperature. Charge within the recommended temperature range listed in the manual for optimal results.
Ambient temperature matters; use the charger within the manual’s recommended range.
Watch Video
The Essentials
- Read model-specific indicators in the manual.
- Use the original charger for consistent results.
- Indicator signals help determine when charging is complete.
- Regular maintenance extends battery life.