Nespresso Clean Instructions: Step-by-Step Guide
Learn safe, thorough nespressо clean instructions for descaling, rinsing, and sanitizing your Nespresso machine. This step-by-step guide from Cleaning Tips covers tools, timing, and tips to maintain flavor and extend your brewer's life.

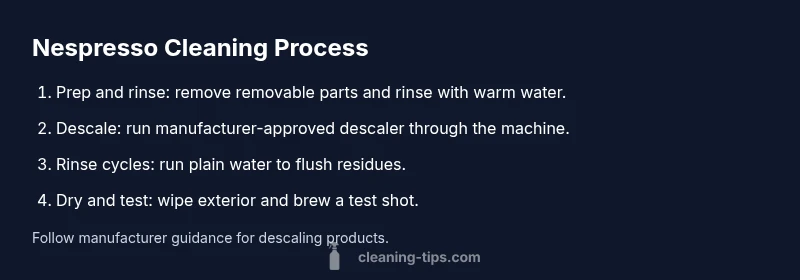
This guide explains how to clean and descale a Nespresso machine safely, using manufacturer-approved descaling products, regular rinsing, and exterior wipe-downs. You’ll need the descaling solution, water, and a microfiber cloth, plus a container for rinsing. Follow the step-by-step routine to remove mineral buildup, maintain flavor, and extend your brewer’s life.
Why Regular Cleaning Extends Nespresso Lifespan
Regular cleaning isn't just about flavor; it protects electrical components and plumbing inside your Nespresso machine. For homeowners and renters, following nespresso clean instructions helps prevent mineral buildup that can clog the brew unit and affect pressure. According to Cleaning Tips, a simple routine that blends rinsing, descaling, and exterior care can extend the life of your brewer and maintain optimal extraction. In this section, you'll learn the core reasons to keep up with maintenance, how often to clean, and how routine steps reduce downstream repairs and flavor deterioration. We'll cover frequency, what to clean first, and how to avoid common mistakes; this sets the foundation for a reliable, long-lasting brewer that consistently delivers good results.
Understanding the Cleaning Cycle Options for Nespresso Machines
Nespresso machines offer several maintenance modes: quick rinse, descale cycle, and manual cleaning of removable parts. The quick rinse helps remove loose coffee oils from the brew head, while the descaling cycle targets mineral buildup inside the plumbing. Manual cleaning of the brew group, capsule container, and drip tray prevents residue transfer to future brews. When you follow nespresso clean instructions, you’ll know which option to choose based on your model, water hardness, and flavor changes. Always reference your user manual for the exact cycle sequence and interval.
Tools and Materials You Should Gather Before You Start
Before you begin, assemble a small cleaning kit so you’re not hunting for items mid-process. Gather manufacturer-approved descaling solution or tablets, clean water, a soft microfiber cloth, a sponge or non-abrasive scrub, a dedicated rinsing container, and a small brush for tricky crevices. Having these ready reduces interruptions and helps you follow the nespresso clean instructions precisely. Optional items include a gasket brush, nitrile gloves, and a timer to track rinse durations. Keeping a timer handy ensures you don’t rush through critical rinse steps and helps you document when to descale next.
Step-by-Step Baseline Cleaning Without Descaling
Begin by removing detachable parts and washing them with warm, soapy water. Then empty the water tank and rinse it thoroughly. Refill with clean water and run a full rinse cycle to flush residual coffee oils. This baseline clean clears away surface grime and readies the machine for deeper maintenance. Remember to wipe the exterior surface and drip tray with a damp cloth to remove fingerprints and coffee splatter. Following nespress0 clean instructions with this routine keeps the brewer tidy and prevents surface buildup that could stain future beverages.
How to Descale Safely: When and How Often
Mineral buildup can affect flow and temperature. Use only manufacturer-approved descaling products chosen for your model, and follow the dosage directions exactly. Run the descaling solution through the machine, allowing the cycle to complete before rinsing with fresh water. After the descale cycle, perform at least two complete rinse cycles to ensure no descaler remains in the system. Descale more frequently in areas with hard water; the nespress0 clean instructions emphasize consistency over intensity to protect seals and lubrication. Always wear gloves when handling descalers and avoid contact with skin.
Cleaning the Brew Unit, Capsule Container, and Drip Tray
Disassemble removable parts such as the brew unit cover, capsule container, and drip tray. Rinse with warm water and a mild detergent if recommended by the manufacturer, then rinse again to remove any soapy residue. Use a soft brush to dislodge stubborn residues in hard-to-reach crevices. Dry all parts completely before reassembly to prevent mold growth. This thorough cleaning of internal components is a core part of nespress0 clean instructions and helps maintain flavor clarity and machine performance.
Exterior Care: Cleaning Stainless Steel Surfaces and Water Tank
Wipe the exterior housing with a damp microfiber cloth to remove fingerprints and coffee oils. For stainless steel panels, use a gentle circular motion and a non-abrasive cleaner recommended by the manufacturer. When cleaning the water tank, rinse thoroughly and avoid harsh cleaners that could leave residue. Dry the tank before reinstalling. Keeping exterior surfaces pristine minimizes cross-contamination and preserves the machine’s appearance over time, in line with nespress0 clean instructions.
Troubleshooting Common Issues After Cleaning
If the machine leaks or performance seems off after cleaning, double-check that all removable parts are properly seated and dry. Ensure the water tank is correctly installed and that the drip tray is not full. If you still notice inconsistent temperature or weak pressure, repeat the descaling and rinse cycles as described in the nespress0 clean instructions and consult your user manual for model-specific guidance. For persistent issues, contact customer support or a qualified technician.
Authority Sources and Further Reading
For dependable guidance on kitchen appliance cleaning and maintenance, refer to established health and safety and equipment guidelines from reputable sources. The following resources provide general best practices on hygiene, water quality, and safe handling of cleaning agents. While they are not model-specific, applying their principles helps you maintain safe, clean cooking and beverage equipment over time.
Tools & Materials
- Nespresso descaling solution or cleaning tablets(Use manufacturer-approved product; follow dosage on label)
- Clean, cold water(Filtered water if possible for best flavor)
- Soft microfiber cloth(For exterior surfaces and the brew head)
- Container for rinsing(At least 1 liter capacity)
- Cup or small brush(For rinsing the reservoir and crevices)
- Gloves (optional)(Nitrile gloves protect hands during descaling)
Steps
Estimated time: 40-50 minutes
- 1
Unplug and prep the machine
Power off the unit and unplug it from the wall. Remove the water tank, drip tray, and capsule container. Rinse detachable parts with warm water and set aside to dry. This initial prep safeguards electronics and makes cleaning easier.
Tip: Keep a sink or basin nearby to catch any spills during part removal. - 2
Empty and rinse the water tank
Take out the water tank and dump any remaining water. Rinse the tank with warm water and mild soap if needed, then rinse thoroughly to remove soap residues. Refill with fresh water for the upcoming cycles.
Tip: Dry the tank completely before reinstalling to prevent mold. - 3
Prepare descaling solution
Follow the manufacturer’s directions to mix the descaling solution with water in the container provided. Do not substitute household products, and never mix cleaners unless specified. Prepare enough solution for a full cycle as directed by the product label.
Tip: Label the container to avoid confusion during the cycle. - 4
Run the descale cycle
Place the container under the coffee outlet and start the descaling cycle as per your model’s manual. Allow the full cycle to complete; this often takes several minutes. Do not interrupt the process.
Tip: If the machine pauses or stops, pause and resume as directed by the user manual. - 5
Rinse with fresh water
After the descaling cycle, rinse by running plain water through the system. Repeat with a second rinse cycle to ensure all descaler residues are flushed out. This prevents aftertaste or corrosion of internal components.
Tip: Run at least two full rinse cycles for thorough flushing. - 6
Clean internal components
Disassemble the brew unit, capsule container, and drip tray per your model’s instructions. Wash them with warm water and a mild detergent if recommended, then rinse and dry completely before reassembly.
Tip: Use a soft brush to reach crevices and avoid abrasive tools. - 7
Wipe exterior and tanks
Wipe the machine’s exterior with a damp microfiber cloth. Clean the water tank’s exterior and ensure all surfaces are dry before reassembly. This reduces surface residue that could affect flavor and appearance.
Tip: Avoid harsh chemicals that could damage surfaces or seals. - 8
Reassemble and test brew
Reinsert all parts, fill the water tank, and run a test brew with plain water. Check for leaks, proper flow, and temperature. If everything looks good, you’ve completed a successful cleaning cycle.
Tip: Keep an eye on initial brews for any off-t flavors indicating residue. - 9
Set a maintenance cadence
Record a maintenance schedule based on usage and water hardness. Most households benefit from periodic descaling every few months, or sooner if scale buildup is evident. Maintaining a routine is key to preserving flavor and performance.
Tip: Place a reminder in a visible spot to ensure you don’t skip future cleanings.
Questions & Answers
How often should I descale my Nespresso machine?
Descale based on water hardness and usage. If you notice slower flow or off flavors, it's time to descale using manufacturer-recommended products, then rinse thoroughly.
Descale based on hardness and usage. If flow slows or flavors change, descale and rinse as directed.
Can I use vinegar to descale a Nespresso machine?
No. Vinegar can corrode seals and leave a persistent odor. Use the manufacturer-approved descaler instead.
Vinegar isn’t recommended. Use the descaler specified by the manufacturer.
Is it safe to put detachable parts in the dishwasher?
Only if the manufacturer states that parts are dishwasher safe. Otherwise, wash by hand with warm, soapy water and rinse well.
Only if your parts are dishwasher safe; otherwise wash by hand to protect seals.
Will cleaning void the warranty?
Proper cleaning using manufacturer-approved products typically does not void warranty. Follow the manual and keep receipts for descaling products.
Cleaning with approved products should not void warranty; keep receipts and follow the manual.
What if the water tank cracks during cleaning?
Stop using the machine immediately and replace the tank. Contact customer support for a compatible replacement part.
If the tank cracks, stop using the machine and get a replacement part from support.
Can I clean the milk frother with this method?
Some models have a dedicated frother cleaning routine; if not, wipe and rinse the frother attachment after cleaning the brew head.
Use model-specific frother cleaning routines; otherwise, clean and rinse after brewing.
Watch Video
The Essentials
- Use manufacturer-approved descaling products for safe maintenance
- Descale and rinse cycles remove mineral buildup effectively
- Rinse thoroughly to avoid aftertaste or residue
- Wipe exterior and clean removable parts regularly
- Create a maintenance schedule and stick to it