What to Clean Oven With: A Practical Cleaning Guide
Learn what to clean oven with using proven, non-toxic methods. This comprehensive guide covers cleaners, steps, safety tips, and practical tricks to restore your oven without damage.

This quick answer shows you how to clean an oven safely, what cleaning agents to choose, and which to avoid. It includes a practical step-by-step routine, handles stubborn grime, and provides safety tips to minimize fumes. By following this guide from Cleaning Tips, you’ll restore shine, improve performance, and keep your kitchen healthier.
What to use to clean oven safely
If you’re wondering what to clean oven with, start with a simple, non-toxic approach. The Cleaning Tips team recommends a paste made from baking soda and water for interior grime, paired with a spray of white vinegar for stubborn spots. White vinegar helps dissolve grease without harsh fumes, while lemon juice can add a pleasant scent on stainless surfaces—though it should be used sparingly to avoid over-acid exposure. For appliances with heavy carbon buildup, a commercial oven cleaner designed for enamel can be used sparingly according to the label, but always ventilate well. Always wear protective gloves and work in a well-ventilated area to reduce inhalation of fumes. According to Cleaning Tips, never mix cleaning agents like ammonia with bleach, as this can release dangerous gases. For safety, start with the gentlest method and test on a small, inconspicuous area first, especially on stainless steel or painted surfaces. The goal is to remove grime without damaging the coating or gasket.
This approach aligns with evidence-based cleaning principles and keeps enamel surfaces intact while reducing exposure to harsh chemicals.
Common cleaning agents and why they work
Understanding why certain cleaners help makes you less likely to damage your oven. Baking soda is a mild abrasive that loosens grime without scratching enamel; a damp paste can cling to vertical surfaces and corners where grease hides. White vinegar acts as a natural degreaser and deodorizer, breaking down oily residues with minimal residue itself. For tougher spots, hydrogen peroxide can be combined with baking soda to boost whitening effects on glass doors, but test first to avoid any dazzling or dulling of surfaces. Commercial oven cleaners are potent and effective for heavy buildup; use them only as directed and with good ventilation. Citrus-based cleaners offer a pleasant scent and can help dissolve grease on stainless surfaces, but avoid overuse on painted parts where acid can wear the finish. Safety note: never mix cleaners, and always wear gloves and eye protection. As Cleaning Tips emphasizes, test new products in a small area to ensure compatibility with your oven’s finish and seals.
Prep and safety considerations
Preparation is the secret to a successful oven clean. Start by removing racks, trays, and any heat-safe accessories. Place a towel on the floor and open windows or run a vent to manage fumes. Read your oven’s manual for any model-specific cautions—self-cleaning modes can be powerful but not universal. If you’re cleaning during a cold burn or a busy week, plan for at least an hour of active work plus dwell time for any paste or cleaners you apply. Wear non-slip gloves to protect your hands and goggles if you’re spraying cleaners upward. Always unplug or switch off the oven at the circuit breaker if you’re deeply deep-cleaning or removing components that require power off for safety. A small test patch on an inconspicuous area (like a corner of the door) helps you gauge reaction before committing to a full wipe.
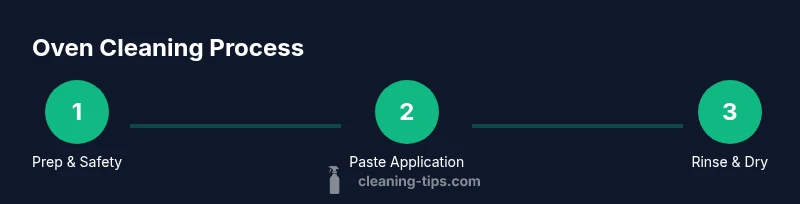
Step-by-step plan for standard oven cleaning
A methodical plan minimizes mess and ensures you don’t miss spots. Start with cold oven prep, removing the racks and trays, then wipe loose debris with a damp cloth. Apply a baking soda paste to the interior walls and floor, avoiding heating elements; let it dwell for 15–30 minutes to loosen grease. After dwell time, scrub gently with a non-scratch sponge, rinse with a damp cloth, and wipe clean. For stubborn spots, spray white vinegar on the paste and let fizz for 5-10 minutes before wiping away. Rinse thoroughly to avoid any white residue. Don’t neglect the door glass—apply paste sparingly around the glass edges and clean with a microfiber cloth. Finally, reinsert racks and run a brief bake cycle with an empty oven to dry and remove lingering moisture.
This approach helps you avoid scratching enamel and ensures a streak-free finish, aligning with best-practice guidance from Cleaning Tips.
Handling different oven types and special cases
Self-cleaning ovens offer a carbon-cleaning cycle that can be incredibly thorough, but manual cleaning remains valuable for ovens without that feature or with sensitive coatings. For self-cleaning modes, remove racks and pre-clean loose deposits before starting, and follow the manufacturer’s instructions to avoid warping or gasket damage. In compact or toaster ovens, use a gentler paste and shorter dwell times; avoid aggressive scrubbing near heating elements and control boards. For glass doors, a vinegar-water spray can cut through grime without leaving streaks if you buff with a dry microfiber cloth. If you encounter a burnt-on spill that resists paste and spray, allow extra dwell time or repeat the process in a second pass. When dealing with heavy buildup, consider dividing the job into two sessions to prevent overheating and fumes.
AUTHORITY SOURCES and next steps
For readers seeking authoritative guidance beyond this article, these sources offer safety standards and best practices:
- https://www.epa.gov/saferchoice
- https://www.osha.gov
- https://www.cdc.gov/
Tip: Always align practices with your appliance’s manual and local safety regulations. If you’re unsure about a cleaner’s compatibility with your enamel or stainless surfaces, perform a small patch test and proceed gradually. This ensures you maintain oven performance while protecting your family’s health.
FAQ and troubleshooting
Here we cover common questions and scenarios to help you clean with confidence. If a question isn’t listed here, you can refer to the related authority sources above or consult your oven’s manual for model-specific guidance.
Tools & Materials
- gloves (nonslip kitchen gloves)(Protect hands from cleaners and heat)
- baking soda(Approximately 1/2 cup per cleaning; adjust as needed)
- water (warm, distilled if possible)(Helps activate paste and rinse residue)
- white vinegar(De-greases and deodorizes without fumes)
- lemon juice (optional)(Mild acid for scent; use sparingly)
- spray bottle(For vinegar spray and diluted cleaners)
- microfiber cloths(Lint-free, streak-free wiping)
- non-scratch sponge(Gentle scrubbing on enamel)
- old towels or rags(Protect surfaces and catch drips)
- oven-safe gloves(Extra protection for high-heat tasks)
Steps
Estimated time: 60-120 minutes
- 1
Remove racks and protect the area
Take out all racks, trays, and thermometers. Wipe loose crumbs with a dry cloth, then place a towel on the floor to catch drips. This upfront prep prevents grime from spreading during deeper cleaning.
Tip: Soak racks in hot, soapy water while you work to loosen baked-on grime. - 2
Make and apply baking soda paste
Mix baking soda with water to form a thick paste. Apply it to the interior surfaces, focusing on greasy patches and the door. Avoid applying paste to heating elements and ignore gasket areas where possible.
Tip: Keep the paste at least 1/4 inch thick on tough spots to maximize contact time. - 3
Let paste dwell and scrub lightly
Allow the paste to sit for 15-30 minutes. Then scrub using a non-scratch sponge in a circular motion. Wipe away loosened grime with a damp microfiber cloth.
Tip: For stubborn areas, reapply paste and let it sit longer before scrubbing. - 4
Use vinegar for tough spots
Spray white vinegar on treated areas and let fizz for 5-10 minutes. Wipe with a clean microfiber cloth, rinsing as needed to remove paste residue.
Tip: Work from top to bottom to prevent grime from dripping onto cleaned areas. - 5
Rinse, dry, and reassemble
Wipe all interior surfaces with a damp cloth until no paste remains. Dry with a clean towel. Reinsert racks and allow the oven to air-dry before use.
Tip: Run a short bake cycle with the oven empty to ensure complete drying. - 6
Tackle the door and exterior
Wipe door glass with a vinegar spray or baking soda paste on the frame, then buff with a dry microfiber cloth. Clean exterior surfaces with a damp cloth, avoiding control panels unless specified safe.
Tip: Avoid sprays near the control panel; apply cleaner to cloth first.
Questions & Answers
What is the safest cleaner for ovens?
A baking soda paste with warm water is a safe, effective starting point for most ovens. Pair with a vinegar spray for tough spots, and avoid harsh chemicals on enamel. Always test on a small area first.
Use a baking soda paste first and only move to stronger cleaners if needed, testing on a small area.
Can I use self-cleaning mode after manual cleaning?
Yes, you can run the self-cleaning cycle after manual cleaning, but ensure all racks are removed and the oven is cool. Follow the manufacturer’s instructions and monitor for any unusual smells.
You can run self-clean after manual cleaning if the racks are out and the oven is cool.
How long does oven cleaning take?
Active cleaning typically takes about 30-60 minutes, with additional dwell time for pastes or cleaners. Plan for 60-120 minutes totals when including prep and drying.
Most cleaning takes about an hour, plus prep and drying time.
Is it safe to use lemon or vinegar on stainless steel?
Lemon juice and vinegar are generally safe on stainless steel in small amounts, but avoid prolonged exposure and always wipe clean to prevent dulling or pitting over time.
Yes, but use sparingly and wipe clean to protect stainless.
What should I do if there is heavy carbon buildup?
For heavy buildup, repeat the baking soda paste application and dwell time, and consider a second round of cleaning. If needed, use a dedicated oven cleaner following label directions and proper ventilation.
If buildup is heavy, repeat the cleaning or use a dedicated cleaner per its directions.
Do I need special PPE?
Basic gloves and good ventilation are usually sufficient. Use eye protection if spraying cleaners, and keep cleaners away from kids and pets.
Wear gloves and ventilate; protect eyes if spraying.
Watch Video
The Essentials
- Choose gentler cleaners first to protect enamel.
- Ventilate and wear gloves to stay safe.
- Test a small area before full cleaning.
- Rinse thoroughly to prevent residues and odors.
- Reassemble and run a short bake to dry.