What to Do Before a Cleaner Comes: A Practical Guide
A comprehensive, step-by-step prep guide for homeowners and renters detailing essential tasks before a cleaning service arrives, from decluttering to sharing access details, to ensure a smooth visit.

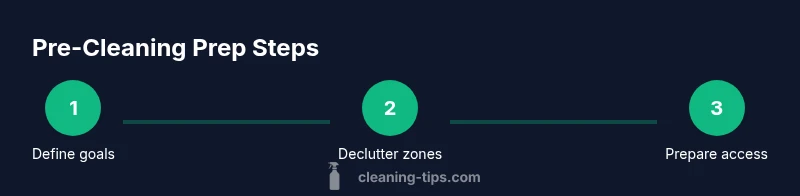
Before a cleaner arrives, define your cleaning priorities, create a simple access plan, and prepare the space by decluttering and securing valuables. Have a printed or digital checklist, note any special instructions, and share contact details with the service. This quick prep helps the cleaner work efficiently and safely.
Clarify goals and scope
According to Cleaning Tips, the first step is to clarify what you want the cleaner to focus on. Write down the rooms and tasks that matter most, such as bathrooms, kitchen counters, or dust-prone shelves. This aligns expectations and helps the cleaner allocate time effectively. If you have delicate surfaces (antique wood, silk drapes), note them explicitly to avoid accidental damage. A clear brief also helps you measure results after the visit and reduces back-and-forth questions once the cleaner is on site.
Create a practical pre-cleaning checklist
A well-made checklist acts as a roadmap for the cleaner and a personal reminder for you. Include sections for each room, high-traffic areas, and any items that require special attention (e.g., wipe down glass surfaces, vacuum under cushions). Add access details, preferred products, and any restrictions (no feather dusters on antique furniture). If you prefer digital, share a link; if paper, print and keep it in a visible place. A checklist minimizes miscommunication and makes the visit faster and more predictable.
Declutter strategically by zones
Clutter is the main obstacle to efficient cleaning. Start with high-traffic zones like the living room, entryway, and kitchen counters. Clear items from floors and surfaces so the cleaner can work without navigating obstacles. Group items into three bins: keep, relocate, and discard. This process not only speeds up the cleaning but also helps you evaluate what matters most during the service and what can be stored away for future visits. The goal is a tidy canvas that allows deep cleaning where it counts.
Secure valuables and protect privacy
Take steps to secure items you don’t want touched: jewelry, irreplaceable photos, personal documents, and expensive electronics. If privacy is a concern, communicate which areas are private (bedrooms, personal desks) and consider closing doors or using a simple room-by-room access plan. A thoughtful approach to privacy protects you and reduces anxiety for everyone. The cleaner will appreciate knowing what to avoid and what can be touched.
Prepare access details and entry logistics
Provide clear instructions for how the cleaner will enter and exit. Share any codes, key boxes, or door arrangements, and confirm whether someone will be home to greet them or if they should use a lockbox. If you rely on a neighbor or building staff, relay those contact details in advance. A smooth entry plan prevents delays and reduces the chance of miscommunication at the door. This step is especially important in multi-unit buildings where access may be gated or timed.
Pet and child safety during the visit
Pets and young children can interfere with cleaning tasks or pose safety risks. If possible, place pets in a quiet room or crate, and keep children supervised or out of the work zone. Communicate any pet allergens or sensitive areas to avoid triggering reactions. A calm, distraction-free environment helps the cleaner focus on tasks and deliver better results. If pets are essential in the home, designate a safe area where they can observe from a distance.
Organize cleaning supplies and storage space
Even though the cleaner brings their own tools, you may want to share where you store household supplies or designate a temporary space for their use. Leave a small, well-lit area with a power outlet if the cleaner needs to use any of your equipment (e.g., a steam mop). Label any cleaners you do not want touched and ensure there is enough ventilation. A tidy workspace reduces clutter and speeds up the process for everyone involved.
Set expectations for surfaces and timing
Discuss preferred products (eco-friendly, fragrance-free, or specific brands) and any surfaces that require extra care (wood floors, marble counters). Agree on the estimated duration for the visit and the order of tasks if you have priorities. If you need the cleaner to target particular problem spots (soap scum, hard water deposits), state that in advance. Clear expectations minimize rework and ensure satisfaction with the outcome.
Improve communication with the cleaner
Open lines of communication reduce confusion and help you get the results you want. Leave a note with the checklist, or send a quick message outlining the day’s priorities. During the visit, be available for quick clarifications but avoid micromanaging. Good communication supports a productive collaboration and increases the likelihood you’ll be happy with the results.
Do a quick pre-visit walk-through
Right before the cleaner starts, walk through the main areas to confirm access, note any changes since you prepared, and point out the rooms that require the most attention. This short touchpoint prevents surprises and ensures alignment. If you notice a discrepancy (e.g., a door left open or a movement of items), address it calmly before the work begins.
What to do after the cleaner arrives
Check in briefly to confirm the plan and remind them of any special instructions. Allow space for them to work and avoid lingering in the cleaning zone unless invited. After the visit, review the result against your checklist and provide feedback. A concise debrief helps the cleaner improve future visits and supports ongoing satisfaction with the service.
Authority sources
For best practices on safe, effective home cleaning and respectful service delivery, consider the following authoritative resources:
- https://www.cdc.gov
- https://www.epa.gov
- https://www.osha.gov
These sources provide general guidelines on health, safety, and workplace practices that are applicable to in-home cleaning scenarios.
Tools & Materials
- Pre-cleaning checklist (digital or printed)(List zones, access details, and special instructions)
- Pen or mobile device(To mark off tasks and store notes)
- Keys or access method (key code, keypad)(Ensure the cleaner can enter without contacting you)
- Clear storage space for supplies(Provide a space for tools or cleaners to place items)
- Pet containment gear (crate/leash)(Keep pets secure away from work areas)
- Valuables secured (jewelry, electronics)(Store in a safe place)
Steps
Estimated time: 45-90 minutes
- 1
Define cleaning priorities
Identify the rooms and tasks that matter most (e.g., bathrooms, kitchens, high-traffic living areas). Note any delicate surfaces to avoid damage. This creates a clear scope for the cleaner and helps allocate time efficiently.
Tip: Write down top 3 areas to focus on and share them with the cleaner before arrival. - 2
Declutter high-traffic zones
Clear floors and surfaces in living spaces, kitchens, and entryways. Move items away from edges to allow vacuuming and surface cleaning to reach all areas. A tidy environment speeds up the cleaning and reduces risk of missed spots.
Tip: Group items by room and place them in labeled bins for quick relocation. - 3
Secure valuables and protect privacy
Put valuables in a safe place and close private spaces. If you have sensitive documents, store them securely or in a locked drawer. Privacy and security reduce anxiety for you and the cleaner.
Tip: Consider a quick photo inventory of personal items if you’re concerned about loss. - 4
Provide access details and entry logistics
Share door codes, key locations, or neighbor contact information. Confirm whether someone will greet the cleaner or if they should use a lockbox. Clear access prevents delays and ensures the cleaner starts on time.
Tip: Test the entry method yourself a day before and note any timing quirks. - 5
Arrange pet and child safety
Relocate pets to a safe room or crate and keep kids away from the work zones. Communicate any pet allergies to the cleaner. A calm environment yields better results and reduces risk of accidents.
Tip: Provide a comfortable resting spot for pets nearby but out of the cleaning path. - 6
Prepare supplies and storage access
If you want the cleaner to use your products, designate where they are and ensure ventilation. Otherwise, rely on the cleaner’s typical products. Make sure there is space for them to place items as they work.
Tip: Label any items you do not want touched to avoid misunderstandings. - 7
Set surface and timing expectations
Communicate preferred products, fragrance levels, and any surfaces needing special care. Agree on the expected duration and preferred order of tasks. A shared plan reduces the need for mid-clean adjustments.
Tip: Ask for a quick check-in mid-visit if you have time constraints. - 8
Do a quick pre-visit walk-through
Before the cleaner begins, walk through the main areas to confirm access and identify changes since prep. This prevents surprises and ensures both parties are aligned. Address any last-minute notes calmly with the cleaner.
Tip: Keep a list of last-minute adjustments handy for reference. - 9
Post-clean debrief
After the visit, compare results with your checklist and provide feedback. Note areas that met expectations and those needing improvement. A brief debrief supports better outcomes on subsequent visits.
Tip: Document what worked well to refine future prep.
Questions & Answers
What should I tell the cleaner before they arrive?
Share your top priorities, access details, and any areas that require extra care. Mention any fragile items or rooms that should remain private.
Tell the cleaner your top priorities, how they can access the home, and any sensitive areas to avoid.
Is it necessary to be home during the cleaning appointment?
No, you can arrange access in advance and provide instructions. If you’ll be away, leave a clear, written plan and a contact method in case the cleaner has questions.
You don’t have to be there. Just set up access and leave instructions plus a contact.
Should I provide cleaning supplies or will the cleaner bring their own?
Ask the cleaner about their product preferences. If you want specific products, specify them in advance; otherwise, cleaners typically bring their own.
Ask ahead about products. If you want specific brands, tell them before the visit.
How can I keep my pets safe during the visit?
Move pets to a safe room or crate, and inform the cleaner of any pet-related concerns or allergies. Provide a quiet space to reduce stress for both you and the pets.
Keep pets away from work zones and tell the cleaner about any allergies.
What if I have privacy concerns?
Close doors to private areas and only grant access to necessary spaces. Communicate any boundaries clearly to avoid accidental access.
Close private areas and set boundaries clearly.
How should I handle special instructions or fragile items?
Document fragile items or surfaces and discuss handling with the cleaner before work begins. A quick walkthrough helps prevent damage.
Document fragile items and tell the cleaner before starting.
Watch Video
The Essentials
- Define clear cleaning priorities
- Declutter zones before arrival
- Secure valuables and protect privacy
- Provide precise access details
- Communicate expectations and special instructions
- Ensure pet and child safety