What to Do to Clean Up My Computer: A Practical Guide
Learn a step-by-step, practical method to clean up your computer—dust the hardware, tidy software, and protect data. Safe, easy actions for laptops and desktops.

Goal: Clean up your computer safely by tackling hardware dust, software clutter, and performance bottlenecks. This guide provides a step-by-step process, required tools, and safety tips to protect data while improving speed and reliability. Whether you use a laptop or desktop, follow these actions to extend lifespan and reduce overheating. It covers hardware care, software cleanup, and ongoing maintenance.
Why Cleaning Your Computer Matters
Regular cleaning isn't only about aesthetics; it directly affects performance, reliability, and longevity. If dust accumulates inside a desktop or laptop, airflow is restricted, fans must run longer, and components can overheat. Overheating may throttle CPU speed or shorten hardware life. Similarly, software clutter—temporary files, duplicate apps, and unused programs—slows responsiveness and increases boot times. By combining hardware dust removal with software tidying, you reduce noise, extend battery life on laptops, and create a healthier computing environment. According to Cleaning Tips, a disciplined cleaning routine translates into smoother operation and fewer unexpected crashes. This article provides a practical route to success that homeowners and renters can follow without specialized tools, while staying within safe guidelines for different device types.
Tools and Settings You Need Before You Start
Before you begin, set up a clean, well-lit workspace. Power down the device and unplug it from any power source. If you have a laptop, remove the charger and disconnect peripherals. Consider enabling a low-power or safe mode to minimize background processes during cleaning. This stage is about reducing risk and making each subsequent step safer and more effective. It’s also a good moment to back up important data so you don’t lose anything if something goes wrong. Keeping climate and humidity in check helps prevent moisture from condensing on sensitive electronics. By planning your approach, you’ll finish faster and with fewer mistakes.
Safety First: Protect Your Data and Yourself
Static electricity can damage sensitive components. Ground yourself by touching a metal surface or using an anti-static wrist strap. Do not spray liquids directly onto the device; apply only light moisture to a cloth. Keep liquids away from ports, keyboards, and fans. Work in a dust-free area if possible and avoid rushing steps. If you feel unsure about handling internal components, skip interior cleaning and focus on exterior surfaces and software cleanup. Following safe practices protects both your hardware and your data, and aligns with best practices that Cleaning Tips recommends for home-based maintenance.
Hardware Cleaning: Exterior Surfaces and Peripherals
Begin with the outside of the case, keyboard, mouse, and monitor frame. Use a microfiber cloth to wipe smooth surfaces. For stubborn grime, lightly dampen the cloth with distilled water or 70% isopropyl alcohol, then wipe in gentle strokes. Use compressed air to dislodge dust from keyboard crevices and vent slits, holding the can upright and short bursts to avoid moisture. A soft brush can help lift dust from fans and vents without spinning the blades. This exterior cleaning reduces the buildup that attracts more dust and helps maintain better airflow during operation. Remember, never spray liquids into openings and always allow surfaces to dry completely before powering on.
Keyboard and Peripherals Cleaning
Keyboards collect crumbs and dust quickly. Turn the keyboard gently upside down and shake to release loose debris. Use compressed air to blast between keycaps, from the back toward the keys. For stubborn grime, dampen a microfiber cloth or cotton swab with a tiny amount of isopropyl alcohol and gently rub the key surfaces. Wipe the mouse surface with the same cloth to remove oils. Do not apply liquid directly to keys or sensing areas. This careful approach keeps typing comfortable and reduces the transfer of grime to the screen or internal components.
Screen Cleaning: Techniques That Work
Screen cleaning requires extra care to avoid streaks and damage. Use a clean microfiber cloth and, if needed, a very small amount of distilled water or 70% isopropyl alcohol on the cloth (never directly on the screen). Wipe in light, circular motions, lifting dust with the cloth rather than pressing hard. For glossy screens, a second dry pass can remove remaining moisture. If you use screen protectors, follow their cleaning guidelines. This step restores clarity and reduces eye strain during longer sessions.
Internal Cleaning: When to Open the Case (Advanced)
Interior cleaning can improve cooling and prolong component life, but it’s risky. Only attempt if you feel confident and have the right tools. Discharge static, remove the power source, and carefully access the interior. Use compressed air in short bursts to remove dust from fans, heatsinks, and circuit boards, keeping the nozzle a few inches away. Do not touch motherboard circuitry with bare hands. If any fan blades resist or make unusual noise after cleaning, stop and reassemble. This step is optional and may void warranties if misperformed; consult a professional if in doubt.
Software Cleanup: Your Desktop and Laptop Health
Hardware cleanliness is important, but software health matters, too. Run a disk cleanup utility to remove temporary files and caches. Uninstall apps you no longer use to free up resources. Update your operating system and drivers to benefit from the latest security patches and performance improvements. Run a full antivirus scan and clear browser caches that slow loading times. A tidy software environment reduces startup delays and helps your hardware perform closer to its intended capacity.
Routine Maintenance Plan: Make It a Habit
Create a simple, recurring schedule to keep your system clean. Set a monthly 15-minute exterior wipe and a quarterly software cleanup. Review installed programs for bloatware and privacy-heavy apps. Maintain a data backup routine to protect your files in case of hardware issues. A steady cadence reduces the effort needed for each cleanup and makes it easier to spot problems early. This proactive approach keeps devices running smoothly and minimizes surprises.
Authoritative references
For additional guidance on electronics safety and cleaning best practices, you can consult credible, government and educational sources. Examples include guidance on electrical safety and static prevention from OSHA, general standards on cleaning and handling electronics from NIST, and environmental health considerations from the EPA. These references provide foundational safety principles that support practical home cleaning tasks while protecting people and devices.
Final checks and next steps
Before concluding, power the device back on and observe system behavior. Check for unusual fan noise, temperature spikes, or lag in response. If everything runs smoothly, you have achieved a clean, well-functioning system. If issues appear, re-evaluate the interior components or consider professional servicing. Keeping a cleanup log can help you maintain consistency over time.
Tools & Materials
- Microfiber cleaning cloth(Lint-free; dry unless advised otherwise)
- Compressed air can(Short bursts; hold upright and keep nozzle away from components)
- Soft brush (electronics brush)(Gently loosen dust from vents and fans)
- Cotton swabs(Lightly dampen with 70% isopropyl; avoid excess moisture)
- Isopropyl alcohol 70%(Use sparingly; allow surfaces to dry before power-on)
- External backup drive or cloud backup access(Back up important files before cleaning)
- Phillips and flathead screwdriver(Only needed for interior cleaning; ensure device is powered down and static-safe)
- Anti-static wrist strap(Helps prevent static discharge when opening the case)
- Soft lint-free towels(Extra padding for delicate surfaces)
Steps
Estimated time: 40-60 minutes
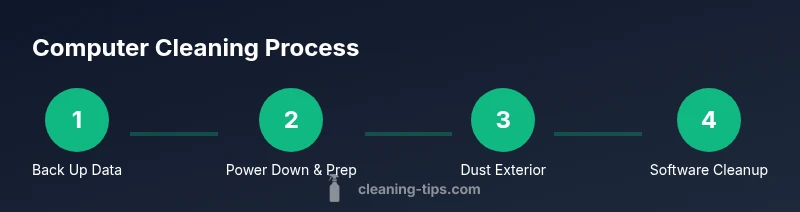
- 1
Back up important data
Begin by securing your data with an external backup drive or cloud service. This protects documents, photos, and config files in case of accidental data loss during cleaning. Verify the backup before proceeding.
Tip: Choose a backup method you trust and test restoration. - 2
Power down and unplug
Shut down the device, unplug from power, and disconnect peripherals. If possible, remove the battery on laptops. This reduces risk of electric shock and accidental short circuits.
Tip: Wait for the device to cool and ground yourself before handling internal parts. - 3
Clear external dust from surfaces
Wipe the outside of the case, keyboard, and mouse with a microfiber cloth. Use compressed air to blow dust from vents, in short bursts and with the can upright to avoid moisture.
Tip: Keep the can at a comfortable distance and avoid pointing at delicate openings. - 4
Clean keyboard and mouse
Turn the keyboard gently upside down and shake to release debris. Use compressed air between keys and wipe surfaces with a lightly dampened microfiber cloth.
Tip: Avoid liquid getting under keycaps; wipe from top to bottom. - 5
Clean the screen
Use a clean microfiber cloth and, if needed, a tiny amount of distilled water or 70% isopropyl on the cloth. Wipe in circular motions and avoid direct spraying.
Tip: Test a small area first to ensure no streaks or moisture damage. - 6
Internal cleaning (advanced users only)
If you’re comfortable opening the case, carefully remove dust from fans and heatsinks using compressed air. Hold the fan blades to avoid spinning.
Tip: Use antistatic precautions; avoid touching circuit boards with bare hands. - 7
Software cleanup
Run a disk cleanup to remove temp files, uninstall unused programs, and update OS and drivers. Run antivirus scans and clear browser caches to improve performance.
Tip: Schedule automatic updates and scans to maintain health. - 8
Final checks and test
Reconnect power, boot, and monitor for abnormal noises or temperatures. If everything runs smoothly, you’re done. If not, re-run certain steps or seek professional help.
Tip: Keep a cleanup log to track what was done and when.
Questions & Answers
Is it safe to clean my computer's interior?
Only if you have proper knowledge and precautions. Unplug and ground yourself, and avoid liquids near electronics. If you’re unsure, skip interior cleaning to prevent damage and warranty concerns.
Yes, but only if you know what you’re doing; otherwise focus on exterior cleaning and software maintenance.
How often should I clean my computer?
In dusty environments, perform exterior cleaning more often and consider quarterly software cleanups. In milder settings, aim for a yearly routine with periodic checks.
Schedule exterior cleanups monthly and software tidy-ups quarterly, adjusting for dust and heat.
Can I clean my laptop screen with water?
Use a microfiber cloth slightly dampened with distilled water or 70% isopropyl; never spray liquid directly on the screen. Wipe gently and dry with a separate cloth.
Dampen a cloth a little and wipe the screen gently—never spray water directly on it.
Is compressed air safe for electronics?
Yes, in short bursts and with the can upright. Keep it a few inches away from components and avoid spinning fans or forcing liquid moisture into openings.
Yes, but use short bursts and keep the can upright to prevent moisture.
What should I do if a liquid spills on the computer?
Power off immediately, unplug, and remove any removable batteries if possible. Let the device dry completely before attempting to power on; seek professional help for liquid exposure.
Shut it down, unplug, and let it dry completely before turning back on.
Do I need to open the case to clean inside?
Only if you are confident and comfortable with electronics. Incorrect handling can cause damage and may affect warranties. For most users, exterior cleaning suffices.
Only if you know what you’re doing; otherwise, avoid interior cleaning.
Watch Video
The Essentials
- Back up data before cleaning
- Dust and debris impair cooling and performance
- Use proper tools to avoid static damage
- Avoid liquids near ports and screens
- Schedule regular cleanups for ongoing health