How to Clean a Towel Warmer: A Practical Guide
Learn how to safely clean a towel warmer, prevent mineral buildup, and maintain efficient heating with a practical, step-by-step routine designed for homeowners and renters.

Learn how to safely clean a towel warmer to prevent buildup and mold. This quick guide covers essential safety steps, the right cleaners for stainless-steel surfaces, and a simple maintenance routine you can follow to keep your warmer efficient and hygienic. Whether mounted on a wall or freestanding, regular care reduces odors and improves heating efficiency.
What is a towel warmer and why cleaning matters
A towel warmer is a small but effective appliance designed to dry and warm towels, helping you start a cold morning with comfort. Most residential towel warmers are either electric wall-mounted units or hydronic radiators that connect to a home heating system. Over time, minerals from hard water, soap scum, and humidity can leave a slimy film, white crust, or fuzzy mildew on exterior panels and in air vents. When cleaning the towel warmer, you address not only aesthetics but also hygiene and efficiency. Regular upkeep reduces musty smells, prevents corrosion, and helps the unit heat evenly. According to Cleaning Tips, a consistent cleaning rhythm can extend the life of metal components and preserve finish quality. In many households, cleaning occurs alongside bathroom maintenance, making it a natural part of your cleaning routine. Start by inspecting the unit for any signs of rust, loose mounting, or damaged seals, as these issues influence how you clean and what products you choose. The goal is a gentle, thorough wipe-down that leaves all surfaces dry and free from residue that attracts dust. Basic maintenance can be completed quickly, while deep cleans may require a bit more time, depending on the unit’s design and location.
Safety first: unplug, prepare, and gather tools
Safety begins with turning off or unplugging the towel warmer and letting it cool. Do not clean a unit that is hot or still connected to power, as metal surfaces and electrical components can transfer heat to a wet cloth, creating the risk of burns or electrical shock. Gather your materials before you begin so you don’t interrupt the cleaning mid-task. A clean, damp microfiber cloth is usually enough for exterior panels, while a soft-bristle brush helps dislodge dust from vents and seams. If you choose to use a cleaner, select a mild, non-abrasive product and apply it to the cloth—not directly onto the device—to prevent seepage into electrical parts. Wipe away any cleaner residue with a fresh cloth and ensure the unit is completely dry before re-plugging. Post-cleaning, give the area around the towel warmer a quick check for moisture buildup in the bathroom to reduce overall humidity that could promote mold growth. These steps align with general electrical safety guidelines from trusted sources and keep you on the right side of safe cleaning practices. The Cleaning Tips team emphasizes safety as the foundation of every effective cleaning routine.
Different towel warmer types and how cleaning differs
Towel warmers come in several configurations, and the cleaning approach should match the design. Electric wall-mounted models typically have a metal shell and internal heating elements protected by a sealed cabinet. Hydronic or hot-water towel warmers, connected to your home heating system, rely on circulating hot water within a metal matrix. For most electric units, avoid using liquids that can pool in corners or seep into electrical components. When dealing with painted or plated finishes, use non-abrasive cleaners to prevent micro-scratches that accumulate grime. Stainless steel surfaces are common for their durability, but they still benefit from gentle polishing to maintain shine. Plastic-coated or enamel finishes may require different cleaners to prevent dulling or chipping. If your unit has glass doors or plastic panels, use a softer cloth and avoid solvent-based products that can fog or crack. Understanding your specific model’s manual is essential because some manufacturers warn against certain cleaners, sprays, or solvents that could void warranties. By recognizing the type, you can tailor your approach and reduce the risk of damage while keeping surfaces hygienic.
Cleaning agents and materials that are safe for towel warmers
Choosing the right cleaning agents is crucial for preserving finish and protecting electrical safety. For most exterior cleaning, a mild dish soap diluted in warm water, used with a microfiber cloth, is enough to break up oils and soap film. A spray bottle with a small amount of distilled water or a vinegar-water solution (about 1:3 vinegar to water) can tackle mineral deposits and light buildup on metal surfaces. Avoid bleach, ammonia, and abrasive powders that can corrode metal, dull finishes, or scratch seals. Do not spray cleaners directly onto vents or electrical components; apply the cleaner to the cloth first and wipe gently. After cleaning, wipe with a separate damp cloth to remove any cleaner residue and finish with a dry microfiber to prevent water spotting. If you notice mineral buildup or hard-water stains around rivets or joints, a diluted vinegar solution applied to a cloth and left for a few minutes before wiping can help. Remember to keep the treatment area well-ventilated and never allow liquids to pool near the power supply or cord.
Daily and deep-clean routines for different bathroom setups
Your cleaning cadence should reflect how often the towel warmer is used and how humid the bathroom is. In high-use or high-humidity bathrooms, a quick wipe-down once a week and a deeper clean every 4-6 weeks keeps finishes looking new and prevents musty odors. In drier bathrooms with lower usage, a monthly light wipe may suffice, with a deeper clean every 2-3 months. For display-style towel warmers or units in guest bathrooms, align the schedule with seasonal bathroom use, but don’t skip the routine entirely. Build a routine that fits your lifestyle: a 5-minute weekly wipe plus a 15–20 minute quarterly deep clean is a practical baseline. Routine tasks include dusting vents, wiping the front panel, and inspecting seals for signs of wear. If your towels tend to stay damp or mildew forms on the towel rack itself, consider adding a brief venting or dehumidifying step to reduce ambient humidity around the unit. Consistency matters: even simple, regular care can prevent buildup and extend the life of the warmer, while also reducing odors in the bathroom environment. This approach aligns with household-cleaning best practices recommended by Cleaning Tips and other reputable sources.
Troubleshooting and maintenance to prevent odor and corrosion
If you detect a musty smell, foggy panels, or mineral crust around the edges, it’s time for a targeted clean and a quick inspection. Start with a thorough exterior wipe using a mild solution, then check the vents for dust buildup that could impede airflow. A soft-bristle brush can help remove dusty deposits from slats and crevices. After cleaning, ensure all surfaces are completely dry before re-plugging or re-connecting to the power supply. Odors can indicate moisture pockets—consider leaving the unit unplugged for a longer period after cleaning to ensure complete dryness. If you notice rust around mounting brackets or joints, address it promptly; minor rust can be treated with a rust-inhibiting cleaner and a light polish, but extensive corrosion may require professional service or replacement of the unit. Regular maintenance is your best defense against long-term damage, and it also supports more efficient heating. Following these practices with clear guidelines found in energy and safety resources ensures a safer and more reliable towel warmer lifecycle.
Tools & Materials
- Microfiber cloths(Lint-free and non-abrasive for polishing surfaces)
- Mild dish soap(Dilute in warm water for exterior cleaning)
- Warm distilled water(Minimizes mineral deposits and streaking)
- Soft-bristle brush(For vents, seams, and detailing)
- Spray bottle(For vinegar solution or diluted cleaners)
- White vinegar (5% acidity)(Dilute for mineral deposits; avoid direct spray on electrical parts)
- Non-abrasive cleaner (optional)(Use only on stubborn marks; test on a hidden area first)
Steps
Estimated time: 25-40 minutes
- 1
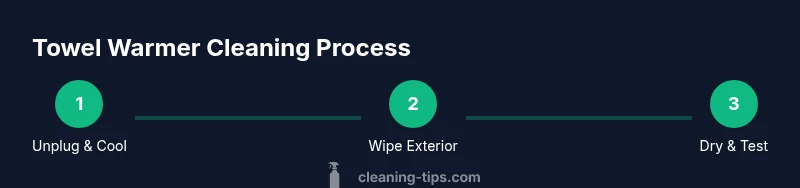
Unplug and allow to cool
Turn off the towel warmer and unplug it from the electrical outlet. Let the surface cool completely before you touch it to avoid burns or shocks. This step minimizes risk while you prepare for cleaning.
Tip: Wait 5–10 minutes for cooling; never spray liquid near the power source. - 2
Prepare your cleaning solution
Mix a few drops of mild dish soap with warm distilled water in a bowl or spray bottle. Using distilled water reduces mineral deposits that can leave spots after drying.
Tip: Keep the solution in a labeled bottle; use a damp cloth rather than soaking the unit. - 3
Wipe exterior surfaces
Dampen a microfiber cloth with the cleaning solution and wipe the exterior panels in a gentle, circular motion. Avoid oversaturation around joints and vents, which can push liquid into electrical components.
Tip: Follow the grain of any brushed metal finish to preserve the look. - 4
Address mineral deposits and tricky spots
For buildup, apply a small amount of vinegar solution to a cloth and rub gently on affected areas. Do not spray directly onto the unit or into vents. Let it sit briefly, then wipe clean.
Tip: Rinse with a clean cloth to remove any vinegar residue. - 5
Clean vents and hard-to-reach areas
Use a soft-bristle brush to remove dust from vents and corners. If the unit has slats, clean between them carefully to avoid dislodging any protective coatings.
Tip: Work slowly to avoid displacing screws or brackets. - 6
Dry, plug back in, and test
Wipe all surfaces dry with a clean cloth. Reconnect the power and run a short cycle to confirm there are no unusual noises or smells after cleaning.
Tip: Keep towels off the warmer during drying to prevent moisture on fabrics.
Questions & Answers
How often should I clean the towel warmer?
In high-use or humid bathrooms, clean weekly with a deeper clean every 4-6 weeks. In drier setups, a monthly wipe with a quarterly deep clean is usually sufficient.
Clean more often in humid or busy bathrooms, and at least monthly in drier spaces.
Can I use vinegar on a towel warmer?
Diluted vinegar is generally safe on metal surfaces when used on a cloth, not sprayed directly onto the unit. Avoid contact with electrical components and seals.
Yes, diluted vinegar is usually safe on metal surfaces if applied to a cloth and not sprayed directly.
Is bleach safe for towel warmers?
Bleach is not recommended for towel warmers because it can corrode metal finishes and damage protective seals over time.
Bleach can damage the metal finish and seals, so avoid it.
What should I do if there’s a musty smell after cleaning?
Ensure surfaces are fully dried, check vents for dust, and consider running a quick deodorizing cycle with a mild cleaner to refresh the area.
Dry thoroughly and check for ventilation issues; a quick deodorizing clean can help.
Should towels be removed during cleaning?
Yes, remove towels to prevent staining and to access all surfaces safely.
Take towels off first to clean thoroughly.
Do hydronic towel warmers require different care?
Hydronic units attach to a boiler; follow the manufacturer’s instructions and avoid interfering with the boiler or its connections.
Hydronic units need adherence to the boiler’s guidelines; check the manual.
Watch Video
The Essentials
- Unplug before cleaning and let surfaces cool
- Use mild cleaners and soft tools to protect finishes
- Dry thoroughly to prevent corrosion
- Avoid direct liquid contact with electrical parts
- Clean vents regularly to maintain airflow