When to Replace a Vacuum Cleaner: A Practical Guide
Learn when to replace your vacuum cleaner with a practical, step-by-step approach. Compare repairs, performance decline, and ownership costs to decide when an upgrade is the best move for your home.

By the end of this guide, you will know exactly when to replace your vacuum cleaner, based on performance decline, frequent repairs, loss of suction, and rising maintenance costs. You’ll also learn practical checks, cost comparisons, and a simple decision framework to decide between repair and replacement. This quick answer sets the stage for deeper, actionable steps in the body.
Why replacement threshold matters
The decision to replace a vacuum cleaner is not only about keeping floors clean; it’s about balancing performance, downtime, and long-term costs. According to Cleaning Tips, many homeowners underestimate the impact of diminishing suction, rising repair bills, and efficiency losses on household budgets. When a model struggles to maintain its original performance despite filters and belts being fresh, it often signals that a replacement may be the more reliable choice. A designed-in threshold helps homeowners avoid endless fixes and inconvenient downtime, while still allowing for a rational comparison between repair and upgrade options. A practical rule of thumb is to consider replacement when repairs would exceed a reasonable portion of a new unit’s price over its remaining expected life. By establishing this benchmark, you can approach each year with clarity and confidence. The Cleaning Tips team notes that choosing the right moment to replace improves cleaning performance, reduces energy waste, and protects indoor air quality over time, especially for households with allergies. In the long run, a timely upgrade often pays for itself through better suction, filtration, and reliability.
Common signs your vacuum needs replacement
- Persistent loss of suction after filters and belts are refreshed
- Unusual noises, burning smells, or overheating during operation
- Frequent clogs or reduced airflow that cannot be corrected with basic maintenance
- Dull filtration resulting in visible dust and poorer indoor air quality
- A model that feels heavy, hard to maneuver, or has a short cord and limited reach
- Repeated repairs that approach or exceed a sizable fraction of a new unit’s price
How to assess value: repair vs replacement
When deciding whether to repair or replace, start with a cost-clarity check. List the required parts and labor, then estimate how long the fix is expected to last. Compare that to the purchase price of a comparable new model and the projected energy use. A practical approach is to split the decision into two questions: “Will this repair extend useful life by more than a season?” and “Will a new unit offer noticeably better suction and filtration for my home?” Then weigh the results against your budget and tolerance for downtime. The Cleaning Tips analysis emphasizes considering total cost of ownership, including energy efficiency, maintenance frequency, and future reliability. If the math points toward diminishing returns on repairs, replacement becomes the smarter option.
Buying guide: choosing a replacement
Key features to evaluate include suction power consistency, filtration quality (HEPA or true-HEPA if you have allergies), weight and maneuverability for stairs, cord length, bin/bag capacity, and maintenance ease. Decide between bagless and bagged designs, considering your household dust levels and waste disposal preferences. Check the warranty length and the availability of replacement parts; a longer warranty and easy access to filters and belts can save money over time. Look for energy-efficient models and models with robust customer reviews. Budget-conscious shoppers can target mid-range options with reliable performance; premium models offer stronger filtration and quieter operation. Finally, verify compatibility with your existing attachments and cleaning routines to maximize the upgrade’s value.
Maintenance tips to extend life
Regular cleaning and preventive maintenance can postpone replacement by many months. Replace filters and belts as recommended by the manufacturer, and clean the brush roll and housing to prevent hair tangles. Store the vacuum in a dry, ventilated space to prevent mold and odor formation. Use the appropriate nozzle for different surfaces and avoid overloading the motor by avoiding prolonged, dry runs. If a smell or heat develops during use, stop and inspect for clogged ducts or a failing motor. Routine checks keep performance stable and can help you decide earlier when replacement is the better option.
Authority sources
- Energy.gov: appliance efficiency and lifecycle costs
- FTC consumer information on choosing appliances (consumer.ftc.gov)
- EPA Energy Star guidelines and consumer advice
toolMaterialsNoteColorTextBlackOnlyForLayoutBreaksShownHereOnlyPleaseIgnore
Tools & Materials
- Screwdriver set (Phillips and flathead)(Small screws on access panels and belt covers; have both sizes handy)
- Replacement belt(Match model type (flat belt for uprights; roller belts for some canisters))
- Replacement filters (HEPA or standard, depending on model)(Keep a spare on hand for easy maintenance)
- Soft cleaning cloth(For wipe-downs and housing interiors)
Steps
Estimated time: 60-90 minutes
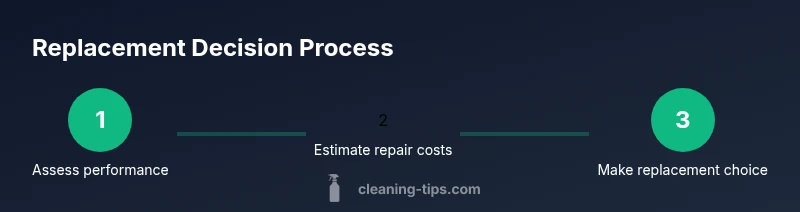
- 1
Inspect current performance
Assess suction, airflow, filter condition, and brush roll operation. Run the unit on a hard floor and on a rug to compare results. Listen for unusual noises and check for overheating.
Tip: Document issues with notes or photos to reference later. - 2
Estimate repair vs replacement
List all needed parts and labor for the fix, then compare to the price of a comparable new model. Consider the unit’s age and the expected remaining life of the replacement parts.
Tip: Ask a repair tech for a quick diagnostic estimate if you’re unsure. - 3
Run a quick ROI check
If repairs would cost close to a new unit’s price or if energy use has increased, replacement may be wiser. Include downtime and disposal costs.
Tip: Include energy savings from a newer, efficient model. - 4
Decide and purchase
Choose a model that fits your home, with reliable parts availability and a solid warranty. Check attachments compatibility and retailer return policies.
Tip: Look for models with easy-to-find parts and reputable service networks. - 5
Dispose or recycle
Recycle the old unit following local guidelines and reset any stored data or personalized settings if applicable.
Tip: Use manufacturer take-back programs when available.
Questions & Answers
How do I know if my vacuum is beyond repair?
If performance keeps declining after maintenance and repairs become frequent or expensive, replacement is often the smarter option. Consider reliability and downtime as part of the decision.
If it keeps failing after fixes, replacement is usually the smarter choice.
Is it cheaper to repair a vacuum than buy a new one?
Repairs can be cheaper for some models, especially if parts are readily available. However, recurring issues or high repair costs can outweigh the benefits of keeping an older unit.
Repairs may be cheaper at first, but recurring problems can add up.
What signals indicate I should replace soon besides repair costs?
Persistent clogging, burning smells, overheating, or sudden loss of suction after maintenance all suggest the unit may be near end of life.
If it keeps failing even after fixes, it’s probably time to replace.
Should I upgrade to a more energy-efficient model?
Upgrading to a more efficient model can reduce operating costs and improve filtration, especially for allergy sufferers.
Yes, a newer, efficient model can save energy and improve air quality.
How should I dispose of an old vacuum?
Recycle the vacuum through local electronics recycling programs or manufacturer take-back schemes when possible.
Recycle it properly to minimize waste.
How long should a typical vacuum last?
Lifespan varies by model and maintenance; with good care, many vacuums last several years, but performance naturally declines with age.
With good care, a vacuum lasts several years, but performance fades with time.
Watch Video
The Essentials
- Know your unit’s limits before repairs
- Weigh total ownership costs, not just sticker price
- Choose models with reliable parts and solid warranties
- Maintain proactively to delay replacement