How to Clean a Shower Door: The Complete Guide
Learn a practical, step-by-step method to clean a shower door, remove soap scum, and prevent hard-water stains. This Cleaning Tips guide covers safe cleaners, essential tools, and a routine that keeps glass clear and streak-free.

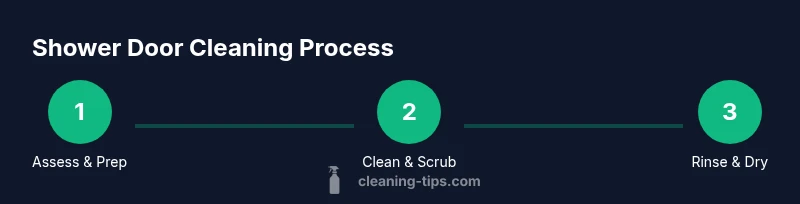
Goal: Learn a proven, safe method to clean a shower door and restore clarity, removing soap scum and mineral buildup. This guide covers glass and acrylic doors, safe cleaners, and a quick weekly routine you can repeat to keep doors streak-free. Whether you’re tackling stubborn buildup or maintaining a spotless surface after every shower, this approach minimizes scrubbing, reduces chemical exposure, and protects seals.
Understanding Shower Door Surfaces
Shower doors come in a few common materials: clear glass, coated glass, and acrylic or polycarbonate. Each surface reacts differently to cleaners. Glass is generally forgiving with gentler acids like white vinegar, but aggressive abrasives can scratch. Acrylic doors dislike harsh solvents and ammonia. The build-up you see—soap scum, mineral deposits from hard water, and algae in humid bathrooms—appears as a chalky film or cloudy patches. According to Cleaning Tips, the root causes are soap residue trapped by water spots and mineral crystals forming a thin crust on the surface. For homeowners, starting with a mild cleaner and testing on a small area helps prevent unexpected damage. The Cleaning Tips team recommends maintaining a consistent routine: dry the door after use and perform a deeper clean weekly to keep the glass clear and the seals intact. A little prevention goes a long way toward a streak-free shine.
Pre-Clean Assessment and Safety
Before you reach for cleaner, inspect the door and surrounding hardware. Look for cracked glazing, loose hinges, or worn seals that could leak and undermine cleaning efforts. If you notice mold growth around the frame or between door panels, address it separately with appropriate mold remediation steps. Wear gloves to protect skin and ensure good ventilation when using any cleaners. Always test a small, inconspicuous spot first to verify that the cleaner won’t discolor or dull the surface. If you have tinted or frosted glass, avoid solutions with strong dyes or solvents that could fade or cloud the finish. A quick spot test will save time and prevent regret after you’ve completed the main cleaning.
Everyday Cleaning Routine to Maintain Clarity
A simple, repeatable routine keeps soap scum and mineral buildup at bay. After each shower, wipe the door with a microfiber cloth or a soft squeegee to remove standing water. This reduces mineral deposition and keeps the surface looking clear. For a light weekly clean, spray a mild cleaner or a vinegar-water solution (1:1) and wipe away residue while the door is damp. Always rinse with clean water afterward to remove streak-causing residues. Dry thoroughly to prevent water spots. Consistency is key: a short daily wipe plus a weekly deeper clean is usually enough for most homes and renters.
Deep Cleaning for Mineral Buildup and Soap Scum
Hard water creates mineral deposits that embed themselves into tiny crevices on the glass or acrylic surface. For a deeper clean, spray or apply a baking soda paste (baking soda and a small amount of water) to stubborn spots and let it sit for 5 minutes. Gently scrub with a non-abrasive sponge using circular motions, then rinse well. Follow with a vinegar-water spray to neutralize any remaining film and wipe dry. If the buildup persists, repeat the paste treatment on those patches. This method balances affordability with effectiveness and minimizes potential damage to seals and coatings when used correctly.
Removing Mold and Mildew Safely
If you notice mold or mildew around the frame or on the seal, do not delay cleaning. Use a cleaner formulated for mold remediation or a diluted hydrogen peroxide solution (3%) to treat affected areas. Apply, let sit for 5–10 minutes, then scrub with a soft brush and rinse. Dry completely to prevent regrowth. Always ensure proper ventilation when dealing with mold and wear a mask if the area is particularly damp. If mold recurs despite cleaning, consider replacing affected seals or consult a professional to assess moisture levels.
Eco-Friendly Options and Safety Tips
Many households prefer eco-friendly cleaners. A vinegar-water solution is a safe, inexpensive option for glass doors and can be paired with a baking soda paste for stubborn spots. Avoid ammonia-based products on acrylics, and never mix bleach with other cleaners (especially ammonia) due to dangerous fumes. For a gentler approach, lemon juice can help brighten glass, while baking soda acts as a mild abrasive for tough residues. When choosing products, look for labels that indicate glass-safe and non-abrasive formulations. Remember to ventilate the bathroom during cleaning and rinse thoroughly to prevent residue buildup that can attract more dirt.
Finishing Steps for a Streak-Free Shine
Finish with a thorough rinse and a microfiber-drying pass to prevent streaks. Use a squeegee to remove excess water from the top to bottom, then wipe corners and tracks with a dry cloth. If any water spots remain, buff them with a clean microfiber cloth using gentle pressure. For best results, wipe after each shower and do a deeper clean once a week. Streak-free glass not only looks better, but it reduces the need for harsh scrubs in the long run.
Troubleshooting Common Issues
If you notice persistent spots or a cloudy film, review your cleaning sequence: ensure you’re using a non-abrasive pad for scrubbing, and avoid mixing cleaners that can react negatively. If mineral buildup is heavy, repeat the baking soda paste treatment a second time and increase dwell time slightly. For mold near seals, consider replacing degraded seals, improving ventilation, and using a mold-inhibiting spray routinely. Streaks can be caused by hard water, soap residue, or improper rinsing—carefully re-rinse and re-dry, focusing on edges and tracks where buildup accumulates.
Quick Fixes for Different Door Types
Glass doors respond best to mild acids and gentle abrasives, while acrylic doors require milder formulas and non-abrasive tools to avoid scratching. For tempered glass, standard glass cleaners are typically safe, but avoid acetone-based products. If you have frosted glass, avoid window cleaners with oils that can leave residue. For all door types, always test cleaners in a hidden area first and use circular motions rather than aggressive scrubbing to protect coatings and seals.
Tools & Materials
- Glass-safe cleaner or white vinegar(Choose a formula labeled safe for glass; dilution may be 1:1 with water)
- Baking soda(For paste or gentle scrubbing power on spots)
- Microfiber cloths(2-3 plush cloths; lint-free and reusable)
- Non-abrasive sponge or scrubber(Soft sponge; avoid steel pads)
- Squeegee (with rubber blade)(12 inches or longer for efficient passes)
- Rubber gloves(Protect skin from cleaners)
- Bucket or spray bottle(For mixing or applying cleaners)
- Old toothbrush or small brush(Target tracks and corners)
Steps
Estimated time: 60-90 minutes
- 1
Clear the area and protect the floor
Remove all items from the shower enclosure and lay a towel or mat to catch drips. This keeps the floor dry and prevents cleaners from slipping onto the tub or floor. A clear space also helps you work with both hands and avoid missing spots.
Tip: Place a shallow tray under the door to catch drips during cleaning. - 2
Prepare cleaning solution
Mix a vinegar-water solution in a spray bottle (1:1) or prepare a mild glass cleaner. For tougher spots, have a baking soda paste ready. Label your bottle if you’re using multiple cleaners to avoid mix-ups.
Tip: Warm water improves cleaning efficiency but avoid hot water on acrylic doors. - 3
Spray and let sit
Spray the door generously, focusing on mineral spots and soap scum. Let the solution dwell for 3–5 minutes to soften residues before scrubbing. This short dwell time reduces scrubbing effort later.
Tip: Don’t allow the solution to dry completely on the surface. - 4
Apply baking soda paste to stubborn spots
Dampen a small area and apply a baking soda paste to stubborn patches. Let sit for 5 minutes to loosen hard-water deposits. Use a non-abrasive sponge to gently rub in circular motions.
Tip: Always test a hidden patch before applying paste to the visible surface. - 5
Scrub with a non-abrasive sponge
Gently scrub the door using smooth, circular motions. Work from the top down to minimize drips. Focus on corners, tracks, and any etched areas where buildup hides.
Tip: Switch to a clean portion of the sponge frequently to avoid re-depositing grime. - 6
Rinse thoroughly
Rinse the door with clean water, ensuring all cleaner residues are washed away. Residual cleaner can attract dirt and leave streaks if not rinsed completely.
Tip: Use warm water to improve rinse efficiency and reduce streaking. - 7
Dry with microfiber and squeegee
Wipe dry with a microfiber cloth, then run a squeegee from top to bottom. Pay attention to edges, corners, and door tracks where water tends to collect.
Tip: Finish with a quick buff to remove any remaining watermarks. - 8
Inspect and re-clean if needed
Check for any missed spots. If you see mineral spots left, repeat steps 4–7 on those areas. Repeat until the surface is clear and streak-free.
Tip: Don’t rush; taking a little extra time yields better results. - 9
Prevent future buildup and protect seals
Regularly dry after use and perform a light weekly clean. Consider sealing rigid tracks or replacing worn seals if you notice recurring buildup or leaks.
Tip: Set a weekly reminder to maintain consistency and protect the door’s longevity.
Questions & Answers
What is the best cleaner for shower doors?
A vinegar-water mix is effective for most glass doors, and baking soda paste helps with mineral spots. For acrylic, avoid ammonia and use soft scrubbing methods.
Vinegar and water work well on glass; use baking soda paste for spots. For acrylic, skip ammonia and scrub softly.
Can I use bleach on shower doors?
Bleach can degrade seals and discolor surfaces over time. Avoid using it on sealed or tinted glass and always ventilate the bathroom.
Bleach can damage seals and tint; ventilate and avoid it on sealed glass.
How often should I clean a shower door to prevent soap scum?
Wipe down after each shower and perform a deeper clean weekly. A light weekly routine prevents heavy buildup.
Wipe after every shower, and do a deeper clean once a week.
Is a squeegee safe on glass doors?
Yes. A rubber-blade squeegee is safe and effective for removing water and minimizing streaks.
Yes—use a rubber-blade squeegee for best results.
What should I do about acrylic shower doors?
Use non-abrasive cleaners and avoid acidic solutions; wipe gently to prevent scratching.
Be gentle and avoid harsh acids on acrylic doors.
How can I remove hard water spots without scratching?
Soak with vinegar, then scrub, and if needed, apply a baking soda paste to stubborn spots.
Soak with vinegar, then scrub; repeat with baking soda paste if needed.
Watch Video
The Essentials
- Pick the right cleaner for glass or acrylic doors.
- Dry after use to prevent water spots and buildup.
- Use baking soda paste for stubborn spots.
- Always test cleaners first on a hidden area.
- Regular maintenance keeps doors looking clear.