Clean or Dirty Hair for Highlights: A Practical Guide
Explore whether clean or dirty hair yields better highlights, how to prep, step-by-step techniques, and aftercare tips for healthier color results.

This guide clarifies when clean or dirty hair is preferable for highlights, and how to prep regardless of method. You’ll learn practical prep steps, timing considerations, and aftercare that help protect color. The goal is to help both DIY enthusiasts and salon clients achieve even, lasting results.
The question you’re asking: clean or dirty hair for highlights
At first glance, the question of clean or dirty hair for highlights seems simple, but the answer depends on the technique, the product strength, and your scalp sensitivity. The Cleaning Tips team often hears clients wondering whether oil on the scalp or a fresh wash will improve or hinder lightening results. In practice, many pros prefer a slightly clarified scalp and hair that isn’t coated in heavy styling products, while some techniques tolerate a bit of natural oil. The goal is to balance dimensional color with scalp comfort and even processing. As you consider your upcoming appointment, remember that the best approach aligns with your chosen method and your hair’s unique condition. This is especially true if you’re aiming for balayage, foils, or single-foil highlights, where the texture and oil distribution can influence color placement and lift.
According to Cleaning Tips, planning ahead and communicating your hair status to your stylist can prevent surprises and ensure more predictable results.
wordCountBlock1
Tools & Materials
- Gloves(Protect skin from chemicals)
- Plastic cape or old towel(Prevent stains on clothing)
- Sectioning clips(Create clean, even sections)
- Tail comb(Precise parting and weaving)
- Foil or balayage board(Optional for foil highlights)
- Brushes and mixing bowl(For even product application)
- Clarifying shampoo (optional)(Remove buildup before appointment)
- Deep conditioner or bond builder(Support hair after lightening)
- Timer or clock(Track processing time)
- Leave-in conditioner or serum(Post-treatment protection)
Steps
Estimated time: 60-90 minutes
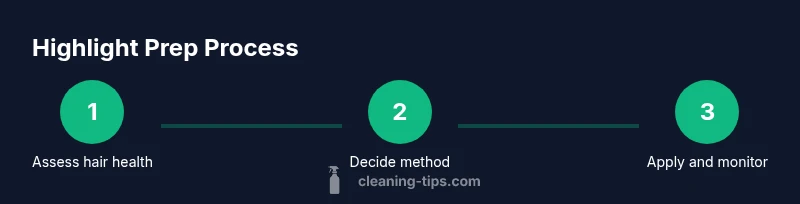
- 1
Assess hair condition and plan
Begin by inspecting hair health, porosity, and any previous chemical treatments. Note areas that are unusually porous or prone to breakage. Decide whether to DIY or book a salon appointment based on risk and desired lift. This initial check helps set expectations for processing time and end results.
Tip: If you see split ends or significant damage, postpone processing until you’ve treated hair health first. - 2
Patch test and porosity check
Perform a small patch test to gauge sensitivity and potential reaction to the product. Do a quick porosity test by placing a strand in water to see how fast it sinks; high porosity strands absorb color faster, affecting lift and tone. Document results to share with your stylist if needed.
Tip: A simple porosity test can save color misfires and ensure more predictable results. - 3
Choose method and prepare hair
Decide on the method (balayage, foil, or single-foil) based on hair cleanliness and the desired look. Section hair into its planned application zones, keeping everything tidy to avoid overlapping color. Apply a protective barrier along the hairline to minimize scalp irritation.
Tip: Clear sections prevent color bleed and help you achieve precise placement. - 4
Mix product according to instructions
Follow the product’s guidance for mixing ratios and timing. Use a clean bowl and brush, and record the development time in a timer. Avoid guessing—accurate mixing ensures even lift and reduces the risk of over-processing.
Tip: If you’re unsure, consult the product’s official guidelines or a professional. - 5
Apply lightener to targeted strands
Carefully apply lightener or color to chosen strands, keeping scalp area free from direct application whenever the method requires. For balayage, focus on mid-shaft to ends, blending upward to create a natural gradient. Maintain even saturation to avoid patchiness.
Tip: Maintain consistent saturation and avoid applying near the scalp if not specified by the technique. - 6
Monitor processing and rinse
Check the lift at intervals and choose the appropriate stage (lift or tone). Rinse thoroughly with lukewarm water once the target lift is reached. Use a gentle shampoo and a conditioning treatment designed for color-treated hair.
Tip: Rinsing too soon or too late can shift the final color tone or density. - 7
Tone and adjust as needed
Apply a toner if the color needs neutralizing or enhancing warmth. This step helps refine the final shade and prevent unwanted brassiness. Rinse again and start a specialized conditioning routine to restore moisture balance.
Tip: Toning is often as important as lifting for achieving the desired hue. - 8
Post-care and maintenance
Follow up with a hydrating conditioner and a bond-building treatment if available. Schedule the next color maintenance based on growth rate and lifestyle. Use UV protection sprays to preserve color and minimize fading.
Tip: Consistency in aftercare yields longer-lasting highlights and healthier hair.
Questions & Answers
Does washing hair before highlights affect the result?
Washing hair beforehand helps remove oils and styling residues that can impede even lightening. However, overly clean hair or using heavy silicone-based products directly before processing can also create a slick surface that affects color uptake. A balanced approach—clean hair without weighing it down—yields more predictable results.
Washed hair helps color take evenly, but avoid heavy products right before processing.
Can I highlight dirty hair at home?
Highlighting dirty hair is generally not recommended because extra oils and buildup can affect lift and evenness. If you must, use a clarifying wash and dry completely before applying color, and consider a salon appointment for consistent results.
Dirty hair can interfere with even lifting; a quick clarifying wash helps.
Why would a salon prefer clean hair?
Salons often prefer clean hair to avoid product interference and to achieve precise placement. Clean hair reduces slip, allowing colorists to see the exact strands to treat and helps control processing times. It also protects the scalp from chemical irritation when masking or foiling.
Clean hair helps the stylist place color precisely and manage timing.
What should I avoid before highlighting?
Avoid heavy oils, silicones, or waxy products near the scalp for at least 24 hours before highlighting. These can create a barrier that slows color penetration. Also avoid washing with conditioner on the day of coloring, as extra residue can affect lift.
Skip heavy oils near the scalp a day before coloring.
How can I test for hair porosity at home?
A simple method is the water test: place clean hair in a glass of water and observe how fast it sinks. Fast sinking indicates high porosity, which will lift faster and may require shorter processing. Use this insight to adjust timing and toning.
A quick porosity test helps tailor processing time.
Watch Video
The Essentials
- Plan based on method and hair condition
- Patch tests reduce risk and improve predictability
- Proper saturation ensures even lift and tone
- Post-care preserves color longevity
- Ask for professional advice if unsure