Clean Tiles After Grouting: A Step-by-Step Guide
Learn proven methods to remove grout haze, restore tile brightness, and protect grout lines after grouting. This Cleaning Tips guide covers supplies and steps for tiles.

Learn how to clean tiles after grouting with a clear, step-by-step plan. This guide covers how to remove grout haze, protect tile finishes, and seal grout for long-lasting results. It uses safe cleaners, common tools, and practical timing to restore brightness in bathrooms and kitchens.
Why tiles look dull after grouting and the science behind grout haze
Grout haze forms a thin chalky film on tile surfaces as cement-based grout dries. The haze can cling to tile glaze and lighten color, leaving a dull, milky look. Root causes include mineral residue, leftover grout, and insufficient cleaning before the grout fully cures. In bathrooms that run humid, haze can set quickly if surfaces aren’t wiped during the initial clean. According to Cleaning Tips, recognizing these factors helps you pick a strategy that preserves tile finish and grout integrity, rather than relying on aggressive scrubbing that can scratch or wear the grout. When haze is fresh, a damp microfiber cloth or a soft sponge may remove it; once dry, you’ll want a mild cleaner and light agitation. This section helps you identify haze early and choose the right approach for different tile types.
The science behind grout haze is straightforward: mineral salts and cement dust bind to the tile surface as water evaporates. The result is a film that is difficult to remove with water alone. This is why prep work and the choice of cleaner matter as much as brute scrubbing. By understanding the film, you can select gentler methods that remove haze without dulling the glaze or loosening grout.
Together with proper technique, recognizing haze early reduces total cleaning time and minimizes risk to your tiles and grout.
Safety and prep: protect yourself and surfaces
Cleaning tiles after grouting requires protecting both you and your surfaces. Begin by ventilating the area and wearing gloves, goggles, and old clothing to guard against splashes. Cover nearby finishes, countertops, and painted surfaces with a drop cloth or plastic sheeting to avoid cleaner contact. Test any cleaner on a small, inconspicuous spot to ensure it won’t dull or scratch the tile glaze. If you’re cleaning natural stone, check whether the cleaner is pH-neutral, as acidic products can etch stone. By taking these precautions, you reduce the risk of chemical irritation and damage to non tiled surfaces while you tackle the haze. Cleaning Tips analysis shows that prepared homeowners are more likely to finish with a bright tile surface and intact grout seams.
Tools and materials overview
Having the right tools on hand makes grout haze removal faster and safer. Essential items include microfiber cloths for buffing and drying, a nonabrasive sponge, a bucket for rinsing, a spray bottle to apply cleaners, a soft nylon scrub brush, an old toothbrush for grout lines, nitrile gloves for chemical protection, and safety goggles for splash protection. You’ll also want a pH-neutral tile cleaner or a grout haze remover product, plus clean water for rinsing. Optional extras include a damp mop, a squeegee for wet surfaces, baking soda paste for stubborn spots, and a tarp or protective sheet to catch splashes. Gather these before you start so you can move through steps without interruption. This kit helps you maintain control over the cleaning process and reduces the chance of accidental damage to tile surfaces.
Observing a clean, organized workstation reduces chaos and increases the likelihood of consistent results. A tidy setup also minimizes time spent walking back and forth for supplies, which helps keep the cleaning plan on track.
Cleaning solutions: picking the right cleaners
For most grout haze on glazed ceramic tiles, a gentle, pH-neutral cleaner or a dedicated grout haze remover works well. A paste of baking soda and water can help lift light haze, while white vinegar or acidic cleaners should be avoided on sensitive tile surfaces and epoxy grout. If you choose a commercial product, follow the label directions and perform a small-area test first. For natural stone tiles, use only stone-safe cleaners recommended by the brand. After applying cleaner to the grout lines, let it sit briefly to moisten residues so brushing becomes more effective. Always rinse thoroughly with clean water to prevent re-depositing residue. In some cases, a neutral cleaner paired with a nylon brush yields the most reliable results for a uniform finish. Cleaning Tips emphasizes avoiding harsh acids on delicate tile finishes to prevent etching and dulling over time.
If you are unsure about your grout type (porcelain, ceramic, glass tile, or natural stone), check the tile manufacturer’s cleaning guidelines before proceeding. This helps prevent accidental damage and ensures your tile life remains long and bright.
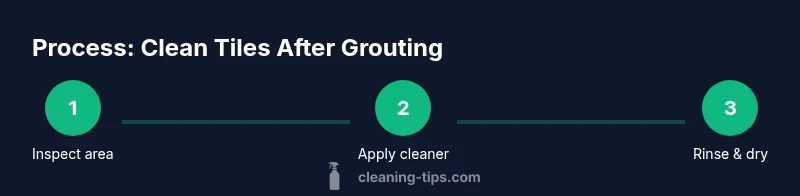
Step-by-step approach to remove grout haze and restore shine
Follow this sequence to tackle grout haze methodically. Start by inspecting the grout and the surrounding tile to plan your approach. Gather your tools and set up a workspace that keeps splashes off cabinets and electronics. Apply cleaner to the grout lines and let it sit for a short period so the residue loosens. Use a nylon brush or an old toothbrush to scrub along the grout lines with gentle pressure. Wipe the tile surfaces with a damp microfiber cloth to remove lifted haze as you go. Rinse the area with clean water, then inspect and repeat if needed. Dry the surface with a microfiber towel to prevent water spots and allow the grout to dry fully before any sealing. Tip: work in small sections to avoid drying cleaner on the surface.
This approach minimizes the risk of leaving cleaner on tile overnight and helps you maintain a consistent finish across the entire tiled area.
Dealing with stubborn haze and color variations
Some tiles show persistent haze even after initial cleaning. In these cases, reapply cleaner and increase contact time for the haze film. Lightly dampen the area and re-scrub with a nylon brush, using short, vertical strokes to lift residues. If color variations appear, avoid aggressive scrubbing that can wear glaze or loosen grout. Instead, switch to a gentler approach, wipe away residue, and allow more time to dry before evaluating whether a second pass is needed. Cleaning Tips recommends testing any new product on a hidden area first to prevent unexpected color changes. Persistent haze requires careful, patient work rather than heavy-handed scrubbing.
Patience and small-section focus often yield the best long-term results for color consistency across tile surfaces.
Dealing with mold, mildew, and soap scum
Mold and mildew thrive in damp grout lines, especially in bathrooms. For these spots, use a solution that inhibits mold growth or a cleaner designed for mold removal. Apply to the affected lines, let sit briefly, and scrub with a nylon brush. Rinse thoroughly and dry completely. If you prefer natural options, a hydrogen peroxide solution or a baking soda paste can help, but always rinse away all residues. Prevent mildew by improving ventilation, wiping down tiles after showers, and using a squeegee or dry cloth to remove water from surfaces. Regular focus on moisture control dramatically reduces mold-friendly conditions and helps keep grout healthier over time.
If you notice recurring mildew, consider adding a mild mold-preventive product to your routine and re-checking ventilation in high humidity rooms.
This block emphasizes the ongoing maintenance needed to keep mold from undermining tile cleanliness and grout integrity.
Finishing touches: sealing grout and maintaining tiles
After cleaning and drying, wait for the grout to cure fully before applying a penetrating grout sealer. Sealing helps repel stains and makes future cleanups easier. Follow product directions, apply evenly with a brush or spray bottle, and wipe away any excess to avoid pooling on tile surfaces. Once sealed, establish a maintenance routine: quick daily wipe-downs, weekly cleaning with a gentle cleaner, and periodic checks for any new haze. This proactive approach keeps tiles bright and grout strong for longer. Proper sealing reduces future staining and simplifies routine maintenance, especially in high-traffic zones and moisture-prone areas.
Maintaining tiles with a consistent schedule prevents soap scum buildup and keeps grout lines looking new longer. A simple check of grout color and surface brightness during routine cleaning helps catch issues before they escalate.
Maintenance routines to keep tiles pristine longer
Consistency is key when maintaining grout cleaning results. Create a simple weekly routine: wipe high-use tiled areas with a damp microfiber cloth, scrub grout lines with a soft brush every few weeks, and rinse after cleaning to prevent soap residues. Dry, dry, dry: always finish with a towel or microfiber cloth to minimize water spots. Consider a light dose of preventive care like a pH-neutral cleaner or a home-safe grout sealer as needed. Regular maintenance helps you avoid heavy cleaning later and keeps tile grout looking fresh. By staying proactive, you minimize the need for aggressive scrubbing and preserve tile brightness over time.
A steady rhythm beats sporadic deep cleans in preserving the tile finish and grout health.
Common mistakes to avoid and troubleshooting tips
Avoid mixing cleaners that can produce harmful fumes or residues. Do not use steel brushes or dense abrasive tools on glazed tiles as they risk scratches. Never leave cleaners on tile for extended periods; rinse promptly. If haze returns, reassess the cleaning products you are using and consider a specialized grout haze remover following the label. For persistent issues, check that you are drying surfaces completely after cleaning and that you are not using too much cleaner, which can leave a film. If color changes occur, stop using a product and test alternatives on a hidden area before committing to the whole surface. Troubleshooting often comes down to aligning cleaner type with tile finish and ensuring complete drying before sealing.
Authority sources and further reading
For additional guidance, consult reputable sources:
- EPA Indoor Air Quality (https://www.epa.gov/iaq) for safe cleaning practices and product selections.
- NTCA - The National Tile Contractors Association (https://www.ntca.org) for tile installation and maintenance insights.
- This Old House cleaning and tile care guides (https://www.thisoldhouse.com) for practical step-by-step tips.
The Cleaning Tips team recommends using these resources as a foundation for safe, effective tile care and to stay updated on best practices.
Tools & Materials
- microfiber cloths(Lint-free; use several for different surfaces)
- nonabrasive sponge(Soft sponge to avoid scratching glaze)
- bucket(For rinsing and mixing cleaners)
- spray bottle(Apply cleaner evenly; ~16-32 oz sizes work well)
- soft nylon scrub brush(Gentle bristles; avoid metal brushes)
- old toothbrush(Detail work in narrow grout lines)
- nitrile gloves(Protect hands from cleaners)
- safety goggles(Prevent splashes to eyes)
- pH-neutral tile cleaner(Safe for most tiles; check tile type)
- grout haze remover(Follow label; test first)
- baking soda(Optional paste for stubborn spots)
- white vinegar(Avoid on epoxy or natural stone)
Steps
Estimated time: 60-90 minutes
- 1
Survey area and gather supplies
Begin by inspecting the tiled area and identifying any fragile surfaces nearby. Collect all required tools and cleaners so you can move through the process without interruptions. This helps you plan the cleaning sequence and reduces the chance of re-cleaning the same spots.
Tip: Lay out tools in order of use to minimize walking and time. - 2
Protect surrounding surfaces
Cover adjacent countertops and cabinets to prevent contact with cleaners. Ventilate the room by opening a window or turning on an exhaust fan. Put on protective gloves and goggles to guard against splashes.
Tip: Mask off nearby edges with painter's tape for clean lines. - 3
Dampen tiles to prep the haze
Lightly mist the tile surface with water to keep dust down and soften residues. This makes brushing more effective and reduces the risk of scratching glaze when you scrub.
Tip: Avoid soaking; you want a damp surface, not a pool. - 4
Apply cleaner to grout lines
Direct cleaner onto grout lines using a spray bottle or brush. Focus on the cement film that forms the haze, not the tile faces. Allow a brief dwell time so residues loosen.
Tip: Keep cleaner off the tile glaze to avoid streaks. - 5
Scrub grout lines
Use a nylon brush or old toothbrush to scrub along the grout lines with steady, circular motions. Work in small sections to maintain consistent results. Do not apply excessive pressure that could erode grout.
Tip: Move from top to bottom in each section to control runoff. - 6
Wipe tile surfaces
As you lift haze from the grout, wipe the adjacent tile faces with a damp microfiber cloth. This prevents haze from redepositing on clean areas. Rinse cloths frequently to avoid spreading residue.
Tip: Keep a separate cloth for rinsing to prevent cross-contamination. - 7
Rinse thoroughly
Rinse the cleaned sections with clean water to remove cleaner residues. Inspect for any remaining haze and repeat steps if needed. Proper rinsing reduces the chance of a dull film returning.
Tip: Use warm water for better residue removal. - 8
Dry thoroughly
Dry the tiles and grout completely with a microfiber towel. Moisture left on grout can slow curing and promote mold growth in humid spaces.
Tip: Dry from top to bottom to prevent drip lines. - 9
Seal the grout (if applicable)
Apply an appropriate penetrating sealer after the grout has dried per product directions. Sealing helps repel stains and eases future cleanings. Do not seal wet or still-dry grout.
Tip: Choose a sealer compatible with your grout type and tile material. - 10
Final inspection and cleanup
Check for any missed spots and wipe again if necessary. Remove protective coverings and clean up the workspace. Note any areas that may need touch-up cleaning in the following days.
Tip: Take a quick photo to track progress over time.
Questions & Answers
What is grout haze and why does it appear after grouting?
Grout haze is a thin film of cement residue left on tile surfaces as grout dries. It can dull the tile and leave a cloudy film. Proper cleaning during the initial cure helps prevent it from setting in.
Grout haze is a thin film of cement residue that forms as grout dries. It can make tiles look dull, but proper cleaning can prevent it from becoming permanent.
Can I use vinegar on epoxy grout?
Acidic cleaners can break down epoxy grout. Use pH-neutral cleaners or products recommended for epoxy grout, and test first on a small area.
Avoid acidic cleaners on epoxy grout. Use pH-neutral cleaners and test a small area first.
Is grout haze safe on ceramic tiles?
Yes, but choose gentle cleaners and test on a small area first. Ceramic tiles tolerate mild cleaners better than some natural stones.
Ceramic tiles are generally safe with gentle cleaners; always test first.
How long should I wait after grouting before cleaning?
Follow the grout manufacturer's guidelines. Generally, begin cleaning when the grout has started to set and haze becomes noticeable, not while it is fully soft.
Wait until the grout has begun to set and haze forms, then start cleaning per the product directions.
What tools work best for haze removal?
A nylon brush, microfiber cloths, and a non-abrasive sponge are typically most effective. Avoid steel wool or metal brushes that can scratch tiles.
Nylon brushes plus microfiber cloths are usually best; avoid metal brushes.
When should I seal the grout after cleaning?
Sealing should occur after the grout dries according to the product directions. Ensure the area is clean and completely dry before applying sealer.
Seal only after the grout is fully dry as directed by the product.
Watch Video
The Essentials
- Identify haze early to tailor cleaning.
- Use a pH-neutral cleaner for tile safety.
- Scrub with nylon brushes, not metal.
- Rinse thoroughly and dry completely.
- Seal grout after it cures to prevent stains.