How to Clean Grout: A Practical Step-by-Step Guide
Learn how can i clean grout with safe, effective methods. This Cleaning Tips guide covers DIY cleaners, tools, and pro tips to restore tile grout without damage.

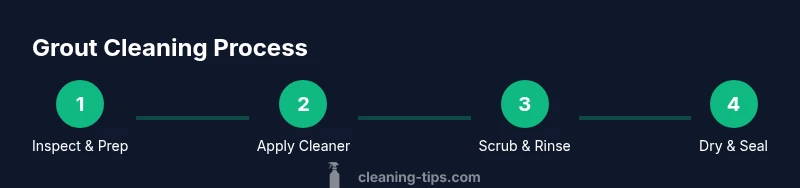
Learn how to clean grout effectively using common household cleaners, a scrub brush, and a grout sealer. This quick answer outlines the exact steps, tools, and safety tips you need to restore dingy grout, remove deep stains, and prevent mold growth in bathrooms or kitchens. You’ll minimize scrubbing time by applying pre-treatments and choosing the right cleaner for your grout type.
Understanding grout and why it gets dirty
Are you wondering how can i clean grout effectively without harsh chemicals? The answer starts with understanding what grout is and why it traps dirt. Grout is a porous cement-based or epoxy material between tiles that soaks up spills and soap scum. Over time, mineral deposits, mold, and dirt embed themselves in the tiny pores. This means a single rinse won't fully restore whiteness. According to Cleaning Tips, grout is porous and stains easily, so pre-treating with a technique that targets both surface grime and embedded stains is essential. The best approach combines mechanical action with a safe cleaner, followed by sealing to lock in results. In many homes, grout sits at eye level in showers and backsplashes, so investing in a proven system pays off with a brighter, healthier space. The Cleaning Tips team emphasizes consistency—clean grout regularly to keep tile lines looking fresh rather than letting stains compound.
Types of grout and how they affect cleaning
Grout comes in several formulations, and the cleaning approach changes based on whether you have cement-based grout, cementitious grout, or epoxy grout. Cement-based grout is most common in kitchens and bathrooms and accepts a wide range of cleaners. Epoxy grout is tougher and resists staining but can be damaged by acidic cleaners. When choosing a method, identify your grout type and test any cleaner on a small, inconspicuous patch first. Cleaning Tips data suggests that epoxy grout benefits from non-acidic, non-abrasive options to prevent micro-scratches that trap dirt later. For large areas, consider mixing gentle cleaners with a dedicated grout brush to minimize wear while maximizing lift.
Safe cleaning products for grout
Safe grout cleaning relies on proven, non-toxic choices. Baking soda paste with a splash of hydrogen peroxide is a classic, effective option for many grout types. Oxygen bleach products can brighten grout without harsh abrasives. White vinegar is useful for mineral deposits but should be avoided on epoxy grout and natural stone. For stubborn stains, a commercial grout cleaner labeled safe for your grout type can be effective when used as directed. Always test a small patch first and avoid mixing cleaners, which can create dangerous fumes. Cleaning Tips recommends starting with the gentlest option and escalating only if needed. Remember: never use bleach on epoxy grout unless the manufacturer confirms it’s safe, as it can degrade the resin matrix.
Pre-cleaning prep: surfaces, protection, and safety
Before you dive in, prepare the area and protect yourself. Remove nearby items to prevent splashes, lay down towels or plastic sheeting, and ventilate the space well. Put on gloves and eye protection, especially when using stronger cleaners or oxygen-based bleaches. For tiled showers, place a floor mat to prevent slips and use a trusted grout brush or old toothbrush for precision. Test the cleaner on a small patch, wait a few minutes, and observe for any discoloration or bubbling. If you notice damage or crumbling grout, address those patches separately before deep cleaning; this helps prevent staining from spreading to neighboring tiles. Consistent pre-cleaning setup reduces cleanup time and protects your fixtures.
Common grout stains and how to spot test solutions
Stains vary from everyday residue to mold-blackened grout. Coffee and tea leave tannin marks; mineral-rich hard water can leave chalky rings; mold and mildew create dark patches that look gloomy but can be treated with appropriate cleaners. Always perform a patch test in a hidden corner to ensure the cleaner won’t etch or discolor the grout. If discoloration remains after a single pass, reapply the cleaner and give it more dwell time, up to 5–10 minutes for stubborn stains. Baking soda paste often lifts surface grime, while hydrogen peroxide helps lift deeper stains. If you’re dealing with mold, consider a cleaner with oxidizing action and ensure thorough rinsing to prevent re-growth.
Pro tips for small bathrooms vs large kitchens
In small bathrooms, you’ll want to minimize wet time to avoid slippery floors. Work in tight sections, use a narrow brush, and dry the grout between passes with a microfiber cloth to monitor progress. In larger kitchens or expansive showers, break the job into zones to avoid fatigue and ensure even cleaning. Consistency matters more than brute force: you’ll achieve better results by steady, targeted scrubbing rather than a single aggressive pass. Remember, routine maintenance—like a quick weekly wipe-down and a quarterly deeper clean—helps prevent stubborn staining and keeps tile lines bright.
Quick comparisons: baking soda paste vs hydrogen peroxide
A baking soda paste (baking soda + water) is gentle and effective on surface grime, especially when paired with a soft brush. Hydrogen peroxide adds oxidizing power and is great for deeper stains, especially if you’re working with light-colored grout. For epoxy grout, avoid strong acids or bleach-based products; instead, rely on non-abrasive cleaners and mechanical agitation. If you’re unsure, begin with a small test patch on a less visible area. Cleaning Tips notes that combining irradiation (light scrubbing) with mild chemistry yields the best long-term results and reduces the need for repeated cleaning sessions.
How to avoid damaging grout and tile sealers
Avoid acidic cleaners on enamel or marble tile and never mix cleaners—this can release dangerous fumes. Use non-abrasive brushes and soft sponges to prevent scrapes that invite dirt to cling. Do not steam-clean grout lines; steam can soften cementitious grout over time and foster cracking. After cleaning and drying, apply a grout sealer to shield against future staining. Follow the sealer’s instructions for cure time and number of coats. By protecting grout with a sealant, you extend the life of your tile work and reduce future maintenance.
Maintenance after cleaning: sealing and long-term care
Once grout is clean and fully dry, sealing is the best defense against future staining. Use a penetrating grout sealer and apply according to manufacturer directions, typically in a well-ventilated area. Re-seal every 1–2 years depending on traffic and cleaning frequency. Maintain indoor humidity levels and wipe down tiles after showers to slow mineral buildup. Regular light cleaning between deep cleans keeps grout whiter longer and reduces the heaviness of scrubbing sessions. The Cleaning Tips team emphasizes that a simple, proactive routine beats aggressive, infrequent scrubs.
Tools & Materials
- Grout brush or old toothbrush(Firm nylon bristles; wedge brush for corners)
- Non-abrasive grout cleaner or baking soda paste(Gentle on grout; avoid harsh acids on epoxy)
- Hydrogen peroxide (3%)(Useful for stubborn stains; test first)
- White vinegar(Use only on cement-based grout; avoid epoxy)
- Squirt bottle(For easy application of cleaners)
- Spray bottle with clean water(Rinse after scrubbing)
- Microfiber cloths or sponge(For drying and wiping surfaces)
- Gloves(Protect hands from cleaners)
- Eye protection(Optional but recommended for splash risk)
- Sealer for grout(Penetrating sealer; applies after drying)
- Bucket(For rinsing or mixing paste)
Steps
Estimated time: 60-120 minutes
- 1
Inspect grout type and damage
Begin by identifying whether your grout is cement-based or epoxy, and look for cracks or crumbling. This determines what cleaners you can safely use and whether deeper repairs are needed before cleaning. A damaged grout may require patching or replacement rather than cleaning.
Tip: Document any damaged areas with a quick photo to track repairs. - 2
Prep area and protect yourself
Clear the space, lay down towels, and ventilate. Put on gloves and eye protection when using cleaners. Testing a small patch before full application reduces the risk of damage.
Tip: Ventilate for 5–10 minutes before applying cleaners to minimize fumes. - 3
Dry brush to remove surface debris
Use a dry grout brush or stiff-bristled brush to lift loose dirt from grout lines. Dry brushing prevents mud from turning into mud in your cleaner and helps you see the true stain level.
Tip: Work in small sections to prevent runoff into clean tile surfaces. - 4
Apply cleaner to grout lines
Apply your cleaner along the grout lines, ensuring full coverage. For light stains, a baking soda paste works well; for deeper staining, add a small amount of hydrogen peroxide.
Tip: Do not mix cleaners; apply one product at a time and wait briefly if needed. - 5
Scrub with grout brush
Scrub grout lines with a circular motion, giving extra attention to discolored areas. For tight corners, use the brush tip to reach the grout bevels.
Tip: Use moderate pressure; excessive force can wear grout or scratch tiles. - 6
Rinse and inspect
Rinse the area with clean water and inspect grout color. If stains persist, repeat the cleaning step or move to a more powerful yet safe cleaner.
Tip: Keep a damp microfiber cloth handy to wipe away residue as you go. - 7
Dry and evaluate color
Dry the grout with a microfiber cloth and evaluate the result. If the grout looks uniform and clean, you can proceed to sealing after full drying.
Tip: Wait 24 hours before sealing to ensure complete dryness. - 8
Seal grout (optional but recommended)
After the grout is fully dry, apply a penetrating sealer following the product directions. Sealing reduces future staining and makes maintenance easier.
Tip: Apply thin coats evenly and wipe off excess to avoid hazing.
Questions & Answers
Is bleach safe for grout?
Bleach can whiten grout but may weaken cement-based grout over time and should not be used on epoxy grout. Always follow manufacturer guidelines and test first.
Bleach can whiten grout, but it may damage epoxy grout and cement grout if used improperly. Check the grout type and test first.
Can I use vinegar on epoxy grout?
Vinegar is acidic and can damage epoxy grout. Use non-acidic cleaners or products labeled safe for epoxy instead.
Vinegar isn’t ideal for epoxy grout; choose gentler cleaners labeled safe for epoxy.
How long does grout sealing last?
Sealing typically lasts 1–2 years, depending on traffic and cleaning frequency. Reapply as needed to maintain stain resistance.
Sealers usually last one to two years with regular use; reapply when grout begins to stain again.
Should I hire a professional for stubborn stains?
For very stubborn stains or damaged grout, a professional can assess repair needs and provide advanced cleaning options without risking tile damage.
If stains won’t lift or grout is crumbling, a pro can help without risking tile damage.
Is baking soda paste safe for all grout types?
Baking soda paste is generally safe for most cement-based grout but can be abrasive over time. Test and use sparingly on delicate grout.
Baking soda paste works for many grout types, but test first and don’t scrub too hard.
Does hot water help grout cleaning?
Hot water can improve rinse effectiveness and help dissolve residues, but it won’t remove deep stains alone. Combine with a proper cleaner and brushing.
Hot water helps rinse away grime, but you still need a cleaner and scrubbing to lift stains.
Watch Video
The Essentials
- Inspect grout type before cleaning
- Start with gentlest cleaners and test first
- Dry thoroughly before sealing grout
- Seal grout to extend results
- Avoid acidic cleaners on epoxy grout