How to Clean a Jetted Tub: A Practical Guide
Learn to clean a jetted tub safely and effectively, removing residue and odors. Prep, jet circulation, scrubbing, and a thorough rinse for a healthier bath.

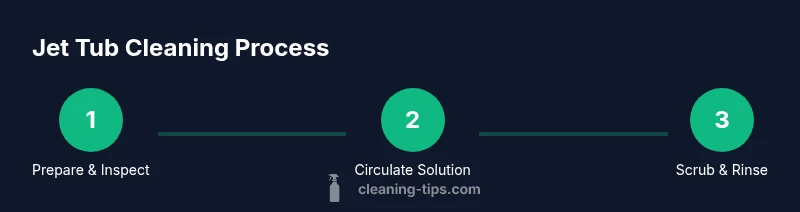
This how-to guides you through safely cleaning a jetted tub, from prep to maintenance. Gather mild cleaners, a non-abrasive brush, towels, and a bucket, then circulate cleaner through the jets, scrub the surfaces, and finish with a thorough rinse. You’ll restore jet power, reduce odors, and prevent mold with a simple, repeatable routine.
Why Regular Cleaning of a Jetted Tub Matters
Regular cleaning of a jetted tub matters for hygiene, performance, and longevity. The Cleaning Tips team notes that soap scum, mineral deposits, and biofilm can build up inside the jet lines, reducing flow and creating odors. By cleaning on a regular schedule, you reduce the risk of mold growth and keep jet action consistent. Here are key reasons to keep a routine:
- Hygiene: Jets push water through narrow channels; any residue can harbor bacteria. A quarterly wipe-down helps maintain a healthier bath space.
- Performance: Mineral buildup narrows jet outlets, diminishing spray force. Circulating a cleaning solution helps dissolve deposits.
- Longevity: Harsh or neglected cleaners can degrade seals and plastics; using gentle products preserves components.
According to Cleaning Tips, routine maintenance saves time and effort in the long run. A simple baseline routine—prepping the tub, circulating a cleaning solution through the jets, scrubbing, and a thorough rinse—can be completed in under an hour with a bit of patience. Always check your tub’s manual for any specific recommendations about cleaner compatibility or jet maintenance. When in doubt, opt for milder cleaners and avoid abrasive pads that can scratch acrylic surfaces. If you notice persistent odors or cloudy water, escalate to a more thorough clean and consider inspecting the drain and filter screens for clogs.
How Jet Systems Work and What to Clean
Jet systems pull water from the tub, force it through small nozzles, and mix with air to create a massage-like spray. Over time, mineral deposits, soap scum, and biofilm can build up in the intake screens, hoses, and jet housings. Cleaning should target the entire circuit: the drain area, suction intakes, jet outlets, and the surfaces around the jets. Start with a gentle approach: avoid abrasive pads that can scratch acrylic and plastics. A mild cleaner and a soft brush are usually enough to dissolve deposits without harming seals. If your tub has a manufacturer-recommended cleaner, follow those guidelines. In many cases, simple solutions such as white vinegar and baking soda can soften residue, while avoiding harsh solvents that can degrade metals and plastics. Regular cleaning also reduces odors and helps the tub recover full jet strength for a satisfying soak.
Step-by-Step Prep Before Cleaning
Before you begin, gather your supplies and prepare the bathroom space. Remove any items from around the tub, ensure good ventilation, and place towels within reach to catch drips. Check that the drain is fully closed or blocked to prevent losing cleaning solution. Put on gloves to protect your hands from cleaners and splashes. If you have kids or pets, set a brief rule to avoid the bathroom until the job is done. Finally, read your tub’s manual for cleaner compatibility and any jet-specific warnings. A quick visual inspection of the jet outlets and intake screens will help you plan where to start the cleaning process.
Cleaning the Jets: The Core Process
Fill the tub with warm water and add your chosen cleaner according to the product directions. A common approach is to circulate the cleaning solution through the jets for 5–10 minutes; this helps loosen buildup in the lines. After circulation, turn off the jets and let the solution sit for a few minutes to work on tough deposits. Then, use a non-abrasive sponge or a soft-bristled brush to scrub around jet housings and interior surfaces. For hard-to-reach areas, a soft toothbrush can clean around individual jet ports. Rinse the tub thoroughly, refill with clean water, and run the jets again to flush out any remaining cleaner. Finally, drain and wipe the surfaces dry to prevent water spots and mold.
Tip: If your jets are stubborn, you can repeat the circulation step with a fresh batch of cleaning solution, but avoid mixing cleaners with high-strength solvents.
Rinse, Dry, and Prevent Mold
Drain the tub completely and rinse the entire interior with clean water. Refill with fresh water and run the jets for another 3–5 minutes to flush any residual cleaner from the line. Wipe down all surfaces with a microfiber cloth and dry the jets and surrounding area thoroughly. Leaving moisture in jet housings can promote mold growth, so ensure the area around the tub is well-ventilated and dry. Consider running a quick, cooler rinse after drying to maintain a comfortable temperature while you finish. A quick check of pillows, towels, and any exposed filters ensures there’s no leftover moisture in hidden crevices. Regular drying is a simple but effective mold-prevention measure.
Maintenance tip: Set a recurring reminder to perform a light clean between deeper cleans, especially if you use the tub frequently or shower products with oils in the water.
Troubleshooting and Maintenance Tips
If jets still feel weak after cleaning, inspect the intake screens for clogging or debris, and verify the drain and plumbing connections for leaks. A persistent odor after cleaning may indicate hidden buildup or trapped moisture; re-clean and dry thoroughly, or consider replacing worn seals. For acrylic tubs, use non-abrasive cleaners and avoid harsh solvents that can dull the surface. If you have persistent problems such as unusual noises, reduced spray strength, or recurring mold, a professional inspection can identify issues with the pump, seals, or jets. Finally, establish a simple maintenance routine: quick wipe-down after each use, a deeper clean every 1–3 months, and a full service every year, depending on usage.
Tools and Materials
- Drain stopper or plug (required)
- White vinegar (required)
- Baking soda (required)
- Mild dish soap (required)
- All-purpose cleaner (optional)
- Non-abrasive sponge (required)
- Soft-bristled brush (required)
- Toothbrush (optional)
- Bucket (required)
- Measuring cup (optional)
- Microfiber cloth (required)
- Gloves (required)
- Towels (required)
Tools & Materials
- Drain stopper or plug(Essential to trap cleaning solution in tub during circulation)
- White vinegar(Mild descaler for mineral deposits)
- Baking soda(Soft abrasive for gentle scrubbing)
- Mild dish soap(Base cleaner for surfaces)
- All-purpose cleaner(Optional for heavy buildup)
- Non-abrasive sponge(Avoid scratching acrylic)
- Soft-bristled brush(Jets and housings)
- Toothbrush(Clean tight gaps around jets)
- Bucket(Mix cleaners and catch drips)
- Measuring cup(Pre-measure cleaners)
- Microfiber cloth(Dry and polish surfaces)
- Gloves(Protect hands from cleaners)
- Towels(Drying aid and spill control)
Steps
Estimated time: 60-90 minutes
- 1
Prepare and Protect the Tub
Clear the surrounding area, close the drain, and ensure ventilation. Put on gloves and lay towels to catch drips. This protects surfaces and keeps the workspace safe.
Tip: Use a damp cloth to wipe any accidental splashes before they dry. - 2
Inspect Jets and Screens
Look over jet outlets and intake screens for clogs or hair. Remove obvious debris with your fingers or a soft brush before circulating cleaner.
Tip: A quick glance can prevent bigger blockages later. - 3
Circulate Cleaning Solution
Fill the tub with warm water and add your cleaner. Run the jets for 5–10 minutes to push cleaner through the lines and loosen buildup.
Tip: Keep an eye on suds and water level; top up if needed so jets stay submerged. - 4
Scrub Jets and Surfaces
Turn off jets, use a sponge or soft brush to scrub jet housings and surrounding tub surfaces. Use a toothbrush for tight gaps.
Tip: Do not scrub acrylic surfaces with abrasive pads. - 5
Rinse and Flush
Drain the tub, refill with clean water, and run jets again to flush out cleaner. Repeat if residue remains.
Tip: A second rinse helps remove hidden cleaner in hard-to-reach areas. - 6
Dry and Maintain
Dry all surfaces thoroughly and wipe down the area to prevent mold. Schedule regular maintenance cleans and keep vents open.
Tip: Set a reminder to repeat the process every 1–3 months depending on use.
Questions & Answers
Can I use bleach in a jetted tub?
Most manufacturers advise against using bleach in jet systems; it can damage seals and surfaces. Use milder cleaners and follow the tub’s manual.
Bleach is usually not recommended for jetted tubs; check your manual and use gentler cleaners.
How often should I clean the jets?
Clean the jets every 1–3 months depending on usage, and more often if you use bath oils or lotions in the water.
Clean the jets every 1–3 months, more if you use bath products.
Is it safe to run jets with plain water?
Running with plain water helps remove loose debris but is less effective for descaling. A cleaning solution improves results.
Water helps, but a cleaner works better for buildup.
What about mold or musty odors in jets?
Mold requires thorough cleaning and thorough drying. If odors persist, inspect seals and consider a professional service.
Mold needs thorough cleaning and drying; persistent odors may need pro help.
What cleaners are safe for acrylic tub surfaces?
Use mild cleaners like dish soap, vinegar, or baking soda. Avoid abrasive pads and strong solvents that can scratch or dull surfaces.
Choose mild cleaners and avoid rough pads for acrylic.
Should I hire a professional for jet system cleaning?
Consider a pro if you notice persistent clogs, weak jets, or odors after DIY cleaning. They can inspect pumps and seals.
Get a professional if problems persist after a DIY clean.
The Essentials
- Schedule a 60–90 minute clean every 1–3 months.
- Ventilate the bathroom and wear gloves during cleaning.
- Rinse thoroughly to prevent residue and mold.
- Use mild cleaners and avoid abrasive pads on acrylic.