How to Clean Onyx Shower Safely: A Step-by-Step Guide
Learn how to clean an onyx shower safely with neutral cleaners and soft tools. Protect the stone while removing soap scum and mineral deposits in a step-by-step guide.

This guide shows you how to clean an onyx shower safely, removing mineral buildup without dulling the surface. You’ll rely on neutral, stone-safe cleaners, soft cloths, and gentle scrubbing tools. Start with a spot test and follow with a light, regular cleaning routine to protect the stone’s translucence.
Why Onyx Surfaces Require Care
Onyx is a soft, calcite-based natural stone that can be etched or dull if exposed to harsh cleaners or acidic compounds. Because shower environments constantly involve steam and moisture, residues and mineral deposits can become stubborn quickly. According to Cleaning Tips, onyx is particularly sensitive to acids and abrasive scrubbing, so you must use neutral, stone-safe products and soft tools. Regular, gentle cleaning preserves the translucence and luster that make onyx shower surfaces appealing. The Cleaning Tips team found that frequent, light maintenance is more effective than aggressive deep cleans, especially for high-humidity bathrooms. In practice, plan a routine that blends quick daily rinses with a deeper clean every 1–2 weeks, depending on water hardness and usage. This approach minimizes staining and keeps the stone looking pristine without risking etching.
What You Need Before You Start
Before you apply any cleaner, ensure the bathroom is well ventilated and you have all required tools ready. Test a hidden corner of the onyx with your chosen cleaner to confirm no adverse reaction occurs. If the test spot passes for a few minutes without discoloration or etching, proceed to clean the visible surfaces. Keep an eye on grout lines and softer edges where mineral deposits tend to accumulate most. Cleaning Tips recommends scheduling a brief wipe-down after every shower to prevent soap scum from becoming baked-on residue.
Safe Cleaning Agents for Onyx Showers
Always opt for pH-neutral cleaners designed for stone surfaces. A mild, non-abrasive cleaner mixed with warm water works well for daily maintenance. For stubborn spots, use a small amount of neutral dish soap diluted in water. Avoid acids like vinegar, lemon juice, or commercial bathroom cleaners labeled acidic—they can etch the onyx over time. If you encounter stubborn mineral buildup, a stone-safe solvent recommended by Cleaning Tips can be used sparingly, followed by thorough rinsing. Never apply abrasive pads or metal tools that could scratch the stone. Remember: gentleness yields the best long-term shine.
Removing Stains and Mineral Buildup Without Damage
Begin by spraying your neutral cleaner onto the affected area and letting it sit for 1–2 minutes. Use a soft microfiber cloth to wipe in gentle, circular motions, then switch to a non-abrasive sponge for textured areas like edge joints. For grout lines, a soft-bristled brush can dislodge mineral dust without scratching the stone. If stains persist, repeat the treatment and consider a second pass with a stone-safe solvent, ensuring you rinse thoroughly afterward. Always work in small sections to control moisture and avoid pooling.
Rinsing, Drying, and Aftercare
Rinse each cleaned area with plenty of fresh water to remove all cleaner residues that could dull the surface over time. Dry the surface with a clean microfiber towel or a lint-free cloth to prevent water spots and mineral deposits from reforming. Drying also helps you spot any remaining residues that require a second pass. Periodically inspect for etching or dull patches; if you notice color changes, consult a stone care professional. Maintaining a dry, clean surface between cleans helps preserve the onyx’s natural glow.
Maintenance Routine to Keep Onyx Shiny
Adopt a light, regular cleaning schedule that fits your bathroom’s humidity and water hardness. A 5–10 minute weekly wipe-down after showers—using a neutral cleaner and microfiber cloth—reduces buildup dramatically. Consider sealing onyx surfaces when recommended by a stone care professional; sealing can slow water penetration and mineral deposition, but it must be compatible with onyx and applied by a trained installer. Cleaning Tips analysis shows that consistent, gentle care yields the best long-term results and reduces the need for aggressive polishing.
Common Mistakes to Avoid
Avoid acidic cleaners, abrasive pads, and aggressive scrubbing on onyx. Do not use bleach or ammonia-based products that can dull or etch the surface. Don’t skip rinsing; cleaner residues can leave a cloudy film and attract more deposits. Finally, never seal without professional guidance, since improper sealing can trap moisture and cause discoloration. By staying disciplined with neutral products and light tools, you protect both finish and value.
Tools & Materials
- pH-neutral stone cleaner(Choose a formula labeled safe for calcite-based stones; avoid acidic ingredients.)
- microfiber cloths(Use clean, lint-free cloths to prevent scratching and residue transfer.)
- non-abrasive sponge(Gentle scrubbing for smooth surfaces; avoid rough sponges.)
- soft-bristled brush(Use on grout lines and textured areas; avoid metal bristles.)
- spray bottle(For even application of cleaners; label and clean after use.)
- warm water(Rinse thoroughly to remove cleaner residues.)
- gloves( protects skin during cleaning; optional but recommended)
- stone-safe sealer (optional)(Consult a professional first; proper sealing depends on stone type)
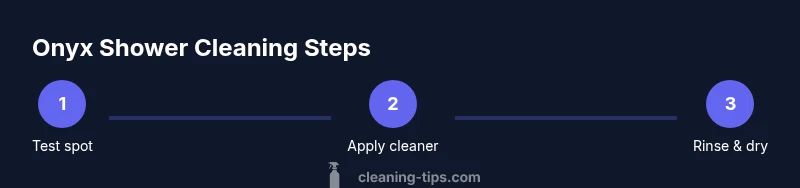
Steps
Estimated time: 30-45 minutes
- 1
Test a hidden spot
Dampen a microfiber cloth with neutral cleaner and press it on a small, inconspicuous area. Wait 1–2 minutes to check for color change or etching. If no adverse reaction occurs, you can proceed to cleaning larger areas.
Tip: Testing first helps prevent unexpected damage on visible surfaces. - 2
Apply cleaner to the surface
Mist or apply a thin layer of the neutral cleaner to the shower panels and grout. Let it sit for 1–2 minutes to loosen soap scum and mineral buildup without drying out the stone.
Tip: Keep cleaner away from the grout edges too aggressively to avoid seepage. - 3
Gently scrub with care
Wipe with a microfiber cloth using light circular motions. For stubborn spots, use a non-abrasive sponge or soft-bristled brush on the grout lines only.
Tip: Avoid aggressive scrubbing that can dull the surface. - 4
Rinse thoroughly
Rinse each section with clean, warm water until all cleaner residue is gone. Inspect the surface to ensure no film remains that could cause dullness over time.
Tip: Rinsing is as important as cleaning; residue invites new buildup. - 5
Dry the surface
Use a dry microfiber cloth to wipe away moisture and prevent water spots. Drying helps reveal remaining spots that may need a second pass.
Tip: Drying reduces the chance of mineral deposits reforming. - 6
Address persistent stains
If stains persist, reapply a small amount of cleaner to the area and repeat steps 3–5. For stubborn stains, consult a stone-care professional before attempting solvents.
Tip: Never mix cleaners; use one product at a time. - 7
Consider sealing if advised
If a professional recommends sealing, arrange for a certified installer to apply a stone-safe sealant. Sealing is not universal for all onyx types and must be compatible with your stone.
Tip: Sealing should be done after a thorough cleaning and drying period. - 8
Establish a maintenance rhythm
Set a recurring cleaning schedule—light weekly wipe-downs and a deeper clean every 1–2 weeks depending on humidity and water hardness. This builds a habit that protects the stone.
Tip: A regular routine prevents heavy buildup that’s harder to remove.
Questions & Answers
Can I use vinegar to clean an onyx shower?
No. Vinegar is acidic and can etch onyx. Use pH-neutral stone cleaners instead. If unsure, test a small area first.
No, avoid vinegar on onyx. Use a neutral cleaner and test on a hidden spot first.
Should I seal an onyx shower?
Sealing may help some onyx types, but it should be done only if recommended by a stone professional. Not all onyx surfaces need sealing.
Sealing can help some onyx surfaces, but consult a professional first.
How often should I clean an onyx shower?
Perform a light wipe-down after every shower and a deeper clean every 1–2 weeks, depending on humidity and water hardness.
Do a quick wipe after each shower, and deep clean every couple of weeks.
What if I notice dull spots or etching?
Cease using cleaners that cause changes, rinse well, and consult a stone-care professional if etching is suspected. Avoid DIY solvents on affected areas.
If you see dull spots or etching, stop cleaning with unknown solvents and seek a pro.
Is bleach safe on onyx?
Bleach and ammonia-based products are generally not recommended for onyx surfaces as they can damage the finish.
Bleach isn’t recommended for onyx; use stone-safe cleaners instead.
Watch Video
The Essentials
- Use neutral cleaners designed for stone surfaces.
- Avoid acids and abrasive pads that can etch onyx.
- Test a hidden spot before full cleaning to prevent damage.
- Rinse and dry completely to prevent new buildup.
- Establish a regular maintenance routine for long-term shine.