How to Clean Shower Glass: A Practical Guide
Learn how to clean shower glass effectively, remove soap scum and hard water stains, and keep doors crystal clear with safe, proven methods you can repeat weekly.

Want sparkling, stain-free shower glass? This guide shows you practical, proven steps to remove soap scum and mineral deposits without harsh chemicals. You'll learn safe cleaners, how to test surfaces, and a routine you can repeat weekly to prevent heavy staining. Follow the step-by-step method below and tailor it to your glass type for best results.
Why Clean Shower Glass Matters
Keeping shower glass clean isn't just about aesthetics; it reduces the buildup of soap scum, mineral deposits, and mold/mildew that can affect bathroom hygiene and the life of seals. A clear shower door also makes the space feel bigger and brighter, and it helps you notice leaks or damage earlier. According to Cleaning Tips, regular cleaning routines minimize stubborn buildup and protect your glass over time. Start with simple routines: wipe down after showers, dry the glass, and spot-clean spots weekly to prevent heavy staining. In this section we’ll explore the science behind soap scum, how mineral content in water interacts with cleaners, and why patience matters when you’re dealing with hard water challenges. We’ll also outline the key factors that determine which cleaning method to choose, including glass type, frame material, and nearby grout or tiles. By understanding the problem, you’ll pick the most effective method rather than trying products blindly. This foundation prepares you for the step-by-step method that follows, with safety considerations and tips aligned to home cleaning best practices.
What Causes Soap Scum and Mineral Deposits
Soap scum forms when soaps, shampoos, and minerals in hard water mingle on glass to form an film that sticks to surfaces. Over time, this film becomes more tenacious, making cleaning increasingly difficult. Mineral deposits, often called limescale, are calcium and magnesium salts that left behind when water evaporates. In bathrooms, these deposits show up as white, chalky spots or crusty edges along edges and corners. In Cleaning Tips analysis, the combination of soap film and minerals is the primary culprit behind cloudy glass, especially in regions with hard water. The good news is that you can reduce buildup with a consistent cleaning routine and by choosing the right cleaner for your water type. We’ll compare common cleaners—acidic, alkaline, and enzymatic—so you can decide what works best for you. In addition, we’ll discuss how to test a cleaner on a small area to avoid damage.
Cleaners and Tools: DIY vs Store-Bought
There are two broad paths to clean shower glass: DIY cleaners you mix at home, and ready-to-use commercial products. DIY solutions—like vinegar, baking soda, and dish soap—are affordable and effective when used correctly, but they require proper mixing ratios and contact times. Store-bought cleaners are convenient and designed for glass surfaces, often including rinsing aids and anti-streak formulations. When choosing, consider your water hardness, the presence of mineral buildup, and the type of glass (tempered vs. non-tempered). A simple rule is to test any cleaner on a small, inconspicuous area first. For minimal risk with heavy deposits, enzymatic cleaners can help break down organic residue without harsh acids. Whatever you choose, always read labels and follow safety guidelines. According to Cleaning Tips analysis, pairing a gentle cleaner with a microfiber cloth yields the most consistent, streak-free results across most homes.
Testing and Surface Preparation
Before applying any cleaner, prepare the space to prevent damage to surrounding materials. Remove shampoo bottles, razors, and soap dishes, then ventilate the bathroom. Wearing gloves protects skin from cleaners and reduces irritation. Wipe the glass with a dry microfiber cloth to remove loose dust, then perform a patch test on a small area (like a corner) to confirm it won’t etch the surface or discolor nearby grout. If you’re using acidic cleaners, limit exposure to a few minutes and never let the product dry on the glass. For particularly delicate finishes or tinted glass, consider a milder approach or a non-acid cleaner to preserve the sealant and coating.
Common Mistakes and How to Avoid Them
Many homeowners over-wet glass or use abrasive tools that scratch the surface. Avoid metal scrapers on tempered glass and skip steel wool, which can mar the glaze or strip coatings. Don’t mix cleaners unless the label explicitly says it’s safe; combining bleach with ammonia or vinegar with bleach can release toxic gases. Rinse thoroughly and don’t let cleaning solutions dry on the glass, as this can cause spots. Finally, don’t forget to dry the glass after rinsing—water droplets left to air-dry leave mineral trails that are harder to remove later.
Maintenance Plan to Keep Glass Clear
Consistency is key to maintaining crystal-clear shower glass. Create a simple weekly routine: after every shower, wipe the glass with a microfiber cloth and squeegee away excess water. Once a week, perform a deeper clean using a mild cleaner and a soft sponge, then rinse and dry. If you live in a hard-water region, consider applying a preventive rinse or a water-softening treatment to reduce mineral buildup. Keeping the door tracks and frames clean also helps prevent soap residue from migrating onto the glass. By maintaining this routine, you’ll minimize heavy staining and extend the life of the glass and its seals.
Adapting Methods for Different Glass Finishes
Shower glass finishes vary from clear pane to lightly frosted or seeded glass. Flat, clear glass is usually the easiest to clean, while etched or decorative panels may require gentler methods to avoid scratching. For frost or texture, a softer brush or cloth is often enough to avoid micro-scratches that catch residue. If you notice etching or dulling, switch to a milder cleaner and test on an inconspicuous area before proceeding. Remember that the cleaner choice should align with the surface finish and any protective coatings applied by the manufacturer.
Tools & Materials
- Microfiber cloths (2–3)(Soft, lint-free for streak-free finish)
- Squeegee (rubber blade)(Wide blade for efficient drying)
- Spray bottle(For mixing cleaners and applying solution)
- Non-abrasive sponge or pad(Avoid scratching glass)
- Baking soda(For gentle scrubbing on tough spots)
- White distilled vinegar(Dilute 1:1 with water for mineral deposits)
- Dish soap(Weak degreasing action for organic residues)
- Old toothbrush or small brush(Clean corners and tracks)
- Gloves(Protect skin from cleaners)
- Towel or absorbent cloth(Dry edges and frames after cleaning)
- Razor blade (optional,) caution(Only on dares with tempered glass and guidance; prone to scratching)
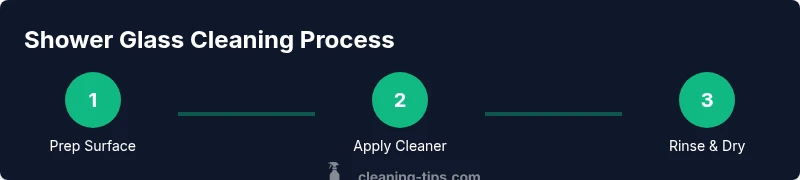
Steps
Estimated time: 25-40 minutes
- 1
Prep the area
Remove all items from the shower and place a towel on the floor to catch drips. Open a window or turn on the exhaust fan to improve ventilation. Wear gloves to protect skin from cleaners and moisture.
Tip: Clear the area completely to prevent accidental transfers of cleaner to metal fixtures. - 2
Choose your cleaner
Decide between a DIY solution (vinegar, baking soda, dish soap) or a store-bought glass cleaner. For heavy mineral buildup, a diluted acidic cleaner works best, but test first on a hidden spot.
Tip: If your water is very hard, plan for a second pass with a milder cleaner to avoid surface damage. - 3
Apply the cleaner
Spray the cleaner generously on the glass, focusing on stains and the edges where buildup collects. Do not let cleaners dry on the surface. Allow 3–5 minutes for contact time, or follow product directions.
Tip: A short dwell time loosens residue and reduces scrubbing effort later. - 4
Scrub with a non-abrasive pad
Gently scrub in circular motions over stains and curves, then switch to vertical strokes on vertical surfaces. Pay special attention to corners and door tracks.
Tip: Use a light touch to avoid micro-scratches that attract more grime. - 5
Rinse thoroughly
Rinse with warm water from a handheld shower head or cup, ensuring all cleaner residues are removed. Residue can cause streaking if not fully rinsed.
Tip: Keep the rinsing angle low to avoid splashing onto surrounding tiles. - 6
Dry and inspect
Wipe dry with microfiber cloth and use a squeegee for a final pass. Inspect for remaining spots and repeat the treatment on stubborn areas only.
Tip: Drying prevents new water spots and keeps glass clearer longer.
Questions & Answers
How often should I clean shower glass for best results?
Aim for a quick wipe-down after each shower and a deeper clean weekly or biweekly, depending on water hardness and usage. Regular maintenance prevents stubborn buildup.
Clean shower glass weekly and wipe after showers to prevent buildup.
Can I use vinegar on all glass types?
Vinegar is effective for mineral deposits on many glass surfaces, but avoid it on specialty coatings without checking manufacturer guidance. Always dilute and test first.
Vinegar works on most glass but test first and avoid special coatings.
Is it safe to use a razor blade on shower glass?
Razor blades can scratch glass, especially tempered or coated surfaces. Only use if you are experienced and it’s recommended by the manufacturer.
Avoid using a razor blade unless you’re sure it’s safe for your glass.
Will steam cleaning damage glass or seals?
Steam cleaning is generally safe for glass if used briefly, but excessive heat or direct steam on seals can cause damage over time. Follow device instructions.
Steam can be safe if used briefly and as directed; avoid prolonged exposure to seals.
What should I do about persistent hard-water stains?
Apply a stronger cleaner with longer dwell time or repeat the process. For persistent mineral buildup, consider a dedicated mineral remover and thorough rinsing.
For stubborn stains, reapply with longer contact and rinse well.
Are eco-friendly cleaners as effective as chemical ones?
Many eco-friendly cleaners are effective for routine maintenance, but very heavy buildup may require stronger cleaners. Test and tailor to your glass and water type.
Eco cleaners can work well for routine cleaning; heavy buildup may need stronger products.
Watch Video
The Essentials
- Establish a weekly wipe-down routine.
- Test cleaners on a small area first.
- Use non-abrasive tools to prevent scratching.
- Rinse and dry completely after cleaning.