Car Clean Interior: A Step-by-Step Home Guide to a Fresh Cabin
Learn a proven, at-home method to clean your car interior. This step-by-step guide covers fabrics, leather, dashboards, and odor control with practical tools and routines for a healthier, cleaner cabin.

In this guide you’ll learn how to clean your car interior thoroughly, from fabrics to dashboards, using safe, effective methods. You’ll need basic cleaning tools, smart stain removal tips, and a simple routine to keep the cabin fresh between cleanings. By following these steps, you’ll reduce odors and allergens while protecting surfaces.
Why a clean car interior matters
A clean car interior isn’t just about looking tidy. It reduces dust, allergens, and irritants that accumulate in fabrics and vents during daily driving. The Cleaning Tips team notes that regular interior cleaning helps preserve upholstery finishes and maintain a comfortable cabin environment. A well-kept interior also supports safer driving by reducing distractions caused by clutter and malodors. When you invest time in a thorough clean, you protect your vehicle and promote a healthier living space for you and your passengers. This guide offers a practical, at-home approach to car clean interior that works for most vehicles and budgets. It covers the basics, surface-specific tips, odor control, maintenance routines, and troubleshooting for stubborn stains. Whether you drive a sedan, SUV, or compact car, the steps are scalable and safe when you use the right products and techniques.
According to Cleaning Tips, clean interiors help minimize dust and improve air quality inside the cabin. This aligns with broader home-cleaning principles that prioritize gentle, surface-safe products and proper ventilation. As you read, remember that consistency beats peri-odic deep cleans, and even quick touch-ups yield better results over time.
Key takeaway for homeowners and renters: a regular car clean interior routine protects materials, improves comfort, and supports a healthier driving environment.
Surfaces in your car interior and how to treat them
Car interiors combine a variety of materials: fabric upholstery, leather or vinyl seats, hard plastics on the dash, glass on the windows, rubber floor mats, and carpeting. Each surface responds differently to cleaners and requires specific care to avoid damage. Fabrics benefit from gentle fabric cleaners or a steam approach, while leather needs pH-balanced leather cleaners and occasional conditioning. Plastics and vinyl are generally forgiving but can discolor or crack with harsh solvents. Glass should be cleaned with a streak-free formula to maintain visibility. The goal is to use surface-appropriate products in light, controlled applications. Before you start, test any cleaner on a hidden inconspicuous patch to ensure there’s no color transfer or surface damage. Practically, use microfiber cloths to lift dirt without scratching surfaces, and avoid saturating fabrics or leather, which can lead to mildew or stiffness over time. Adopting a color-coded cloth system reduces cross-contamination between surfaces and keeps your process efficient.
In this context, consider the climate you drive in. Humid conditions can accelerate mold growth in carpets and mats, so ventilation and timely drying matter. When you choose cleaners, favor water-based formulas for fabrics and alcohol-based sprays for hard surfaces, ensuring you don’t mix incompatible products. For owners who want a greener approach, look for products labeled as safer or eco-friendly. Cleaning Tips emphasizes that using appropriate products for each material minimizes damage and extends interior life.
Cleaning sequence: from dirty to pristine
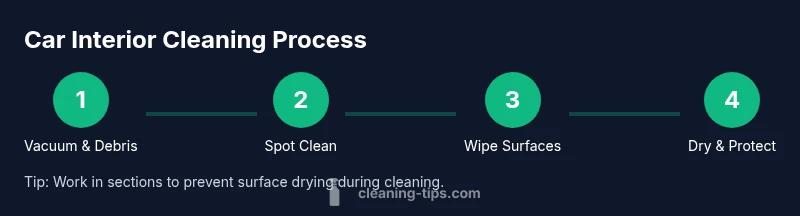
A logical cleaning sequence maximizes efficiency and minimizes re-cleaning. Start with dry debris removal, then vacuum with attachments to reach crevices. Move to spot-cleaning stains on upholstery and carpets, followed by wiping dashboards, door panels, and other hard surfaces. Clean windows last to avoid tracking cleaner onto freshly cleaned surfaces. If your car has floor mats, remove and clean them separately so you can clean the carpet beneath more effectively. Finally, deodorize with a safe interior spray and apply a protective finish where appropriate. This order helps prevent re-soiling and ensures that every layer stays clean longer. Remember, a clean cabin not only looks better but also reduces irritants that affect passengers with allergies or asthma.
A practical tip from Cleaning Tips: use a two-bucket system for fabrics—one for soiled cloths and another for clean ones—to avoid spreading dirt and grime across surfaces. This discipline yields a more consistent result across the entire interior.
Fabric care: upholstery, seats, and carpets
Fabric seats and carpeting require gentler care than vinyl or leather. Start with a thorough vacuum to remove loose debris. Then apply a fabric-specific cleaner to stained areas, letting it penetrate before blotting with a clean cloth. For stubborn stains, repeat treatment in small sections rather than saturating the fabric. Steam cleaners are effective for embedded dirt but ensure the fabric is compatible with heat. After cleaning, allow fabrics to air-dry completely to prevent mildew. For carpeted areas, a light mist of diluted cleaner followed by brushing can lift soils from the fibers. When you replace floor mats, shake them out, beat off debris, and vacuum both sides before placing them back. The goal is to minimize moisture exposure and avoid overwetting; moisture trapped in fibers invites odors and mold growth, especially in humid climates.
To protect fabrics, consider applying a fabric protector or Scotchgard-type spray after cleaning. These products create a barrier that resists future stains without altering texture. Always follow label directions, and avoid overspraying onto leather or rubber components.
Leather and vinyl care: seats, trims, and dashboards
Leather and vinyl require surface-specific cleaners to preserve suppleness and prevent cracking. Use a pH-balanced leather cleaner or a designated vinyl cleaner, applying with a microfiber cloth using gentle, circular motions. Avoid harsh cleaners and abrasive scrubbers that can strip oils or color. After cleaning, apply a conditioner designed for the material type to maintain flexibility and prevent drying. For dashboards and hard trims, select a cleaner that removes dust and fingerprints without leaving a sticky residue. Wipe in the direction of the grain if leather has visible texture to maintain its natural appearance. A light final wipe with a dry microfiber helps remove any remaining moisture. If your vehicle has perforated seats, clean around seams carefully to avoid pushing cleaners into the foam beneath. Cleaning Tips cautions against saturating seams, as trapped moisture can lead to mildew or odors.
Pro tip: keep a small color-coded brush for leather seams to dislodge dirt without scratching. Use light, even pressure and test any cleaner in a hidden area first.
Carpets and floor mats: a deeper clean approach
Carpets and floor mats accumulate dirt from shoes, spills, and tracked-in debris. Start by removing mats to clean them outside the vehicle. Shake or vacuum both sides thoroughly to lift surface dirt. For mats, a cleaner appropriate for rubber or carpeted materials works best—avoid bleach on colored mats, which can discolor. After applying cleaner, scrub with a soft brush and rinse if the product allows. Allow mats to dry completely before reinstalling to prevent moisture from seeping into the carpet. For the carpet itself, a targeted upholstery cleaner or a steam-cleaning approach can pull deep-seated dirt from fibers. Work in small sections and extract as much moisture as possible with a dry towel or a wet-dry vacuum if available. Drying time depends on humidity and airflow; use a fan or open doors to speed up the process while keeping the car interior safe from dust during drying.
Regular mat cleaning reduces wear and prevents odor-causing bacteria from taking hold in the floor surface.
Odors, stains, and mold prevention: keeping the cabin fresh
Odors in a car interior often stem from moisture, spills, and food particles. Start with a deep vacuum and a quick wipe-down of all surfaces to remove the initial odor source. For lingering smells, apply a baking soda paste to stains or leave an open box of baking soda in the cabin overnight to absorb moisture. You can also use activated charcoal bags or a car-specific odor absorber placed under the seats. If you detect a musty smell, check for moisture in carpets and under seats; moisture problems may indicate a leak or improper ventilation. In humid climates, run the air conditioner on fresh-air mode for 5–10 minutes after cleaning to help dry out the system and reduce mildew risk. Avoid strong air fresheners that mask odors with overwhelming fragrances; instead, use a light, breathable deodorizer.
The Cleaning Tips team notes that addressing moisture and odor at the source yields longer-lasting freshness than masking odors with sprays. Regular preventive steps—vacuuming, mat cleaning, and vent maintenance—help prevent odors from returning and maintain a healthier cabin environment.
Tools & Materials
- Vacuum cleaner with crevice tool(Essential for deep debris removal in seats, seams, and mats)
- Microfiber cloths (set of colors)(Use color-coding to avoid cross-contamination)
- All-purpose cleaner (surface-safe)(For plastics, trims, and non-fabric areas)
- Fabric or upholstery cleaner(For seats and carpeted surfaces)
- Leather cleaner and conditioner(If your car has leather seats, treat them separately)
- Glass cleaner(Streak-free formula for windows and mirrors)
- Soft detailing brushes(Used for vents, seams, and textured surfaces)
- Gloves (protective)(Prevents skin irritation from cleaners)
- Trash bags / container(Clear out litter and keep clutter minimized)
- Dry towels or microfiber for drying(Promotes quick drying to prevent mildew)
- Baking soda or activated charcoal(For odor control if needed)
Steps
Estimated time: 60-90 minutes
- 1
Gather supplies
Collect vacuum, cloths, cleaners, brushes, and mats. Arrange a clean workspace and ensure good ventilation. This setup saves time and prevents redoing steps.
Tip: Check product labels and test cleaners on a hidden area first. - 2
Remove trash and mats
Take out all litter and exterior mats. Shake mats well and set them aside for outside cleaning. This reduces surface dirt and makes the next steps easier.
Tip: Use a trash bag to separate debris and avoid reintroducing dirt. - 3
Vacuum interior thoroughly
Vacuum seats, carpets, and mats, staying systematic: start from the top and work down. Use crevice tools to reach seams and under seats. This step removes most dry soil before any wet cleaning.
Tip: Vacuum slowly to pull out embedded dirt. - 4
Spot-clean upholstery
Apply fabric cleaner to stained areas, allow to dwell briefly, then blot with a clean cloth. Avoid saturating; work in small sections.
Tip: Test on inconspicuous area first and avoid bleach-based products on fabric. - 5
Wipe hard surfaces
Spray an all-purpose cleaner on microfiber cloth and wipe the dash, door panels, and trims. Dry surfaces thoroughly to prevent streaks and moisture buildup.
Tip: Move in circular motions along the grain of any leather or vinyl for best results. - 6
Clean carpets and floor mats
Treat carpeted areas with an appropriate cleaner. Scrub gently and rinse if recommended by product instructions. Ensure mats are completely dry before reinstalling.
Tip: For stubborn stains, repeat treatment rather than over-saturating fibers. - 7
Clean windows and deodorize
Finish with glass surfaces for streak-free visibility. Lightly deodorize using a car-friendly spray and allow air to circulate for quick drying.
Tip: Open doors or windows during cleaning to maximize airflow. - 8
Final check and maintenance
Inspect all surfaces for missed spots. Reinstall mats and wipe any residue. Establish a weekly quick-clean routine to keep the cabin fresh.
Tip: Keep a small kit in the glove compartment for quick touch-ups.
Questions & Answers
How often should I clean my car interior?
Aim for a light weekly wipe-down and a deeper clean every 1–3 months depending on usage. High-traffic vehicles may need more frequent sessions, especially in wet or muddy seasons.
For most drivers, a quick weekly wipe and a deeper clean every couple of months keeps the cabin fresh. If you have kids or pets, clean more often.
Is it safe to use household cleaners on leather seats?
Not all household cleaners are safe for leather. Use a dedicated leather cleaner and conditioner, and test first in a hidden area. Avoid ammonia-based products that can dry out leather.
Leather needs gentle cleaners. Test first, then condition to keep it supple.
What’s the best way to remove coffee stains from fabric seats?
Blot up excess liquid, apply a fabric-safe cleaner, and blot again. For tough spots, repeat and consider a light steam treatment if fabric permits. Avoid scrubbing hard to prevent fiber damage.
Blot, apply a fabric cleaner, and repeat. Steam only if your fabric allows it.
Can I use air fresheners after cleaning?
Use light, car-safe deodorizers rather than strong aerosols that mask odors. Airing out the car or using a natural odor absorber tends to work best.
Choose a gentle deodorizer and let the car air out for best results.
How can I prevent mold in the car interior?
Keep interiors dry, fix leaks promptly, and ensure carpets and mats dry completely after cleaning. Use ventilation and avoid soaking fabrics during cleaning.
Dry surfaces well, fix leaks, and ventilate after cleaning.
Watch Video
The Essentials
- Plan your clean to prevent repeat work
- Use surface-appropriate products to protect materials
- Dry thoroughly to prevent mold and odors
- Maintain a simple routine for lasting freshness