Clean My Closet: A Practical Guide to Organization
A comprehensive, practical guide to clean my closet: audit, declutter, organize by zones, and establish a maintenance routine for a calmer, more efficient wardrobe.

Goal: You will clean your closet by auditing what you own, removing items you no longer wear, and reorganizing by category with accessible storage. Key steps include sorting into keep, donate, and recycle; choosing durable hangers; and establishing a simple weekly maintenance routine. This approach saves time, reduces clutter, and supports a healthier, more organized home.
Why Cleaning Your Closet Improves Daily Life
According to Cleaning Tips, a well-organized closet saves time, reduces decision fatigue, and supports a calmer morning routine. If you want to clean my closet, this guide provides a practical, step-by-step approach that respects your space and budget. A tidy closet makes it easier to find outfits, keeps clothes in better condition, and minimizes the impulse to buy duplicates. In this section, we’ll explore the broader benefits of closet cleaning, from mental clarity to fabric care, and set expectations for what you can achieve in a single weekend or a focused afternoon. By framing the task as a series of small, repeatable tasks, you’ll stay motivated and avoid overwhelm. Let’s begin with a simple plan that you can adapt to any closet size or layout.
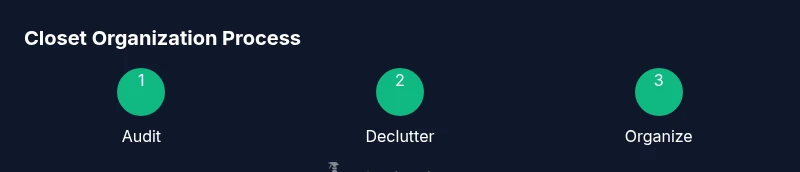
Start with a Quick Audit: What Fits, What Goes
Before you touch a hanger, take a quick audit of your wardrobe. Remove everything from the closet and place it on a bed or floor where you can sort easily. Create three piles: keep, donate/sell, and repair or recycle. For each item, ask: Do I love it? Do I wear it at least once per season? Does it fit comfortably? If an item hasn’t been worn in a year or shows wear that cannot be repaired, move it to the donate or recycle pile. As you sort, measure a few key items (shelf depth, hang height) if you plan to install new organizers. Your goal is to free up space and reveal your actual wardrobe needs. Recording a quick inventory can help you decide what to replace or upgrade later.
Decluttering: Keep, Donate, Sell, Recycle
Decluttering is the heart of a functional closet. Start by separating items into four clear categories: keep, donate, sell, and recycle. Be ruthless with items that no longer fit, are out of style, or are rarely worn. For each keep item, consider whether it will fit into your new layout and how often you actually wear it. For donations, choose reputable charities in your area and bag items promptly to avoid second-guessing yourself. If you plan to sell, set a modest price and designate a drop-off day. Recycling should be reserved for items that cannot be donated or sold. The goal is to reduce bulk and create space for items you actually use.
Organizing Principles: Zones, Accessibility, and Visual Cues
Successful closet organization relies on clear zones: daily wear near the front, work attire within reach, and seasonal items stored higher or in labeled bins. Use uniform hangers to maintain a tidy line and maximize space. Visual cues, like color-coded sections or labeled bins, make it easy to find items quickly and encourage you to maintain order. Consider alternate storage for accessories: a hanging organizer for belts and scarves, shallow bins for sunglasses and small items, and shelf dividers to keep stacks neat. Finally, plan for accessibility: place the most-used items at chest height and keep rarely worn items out of immediate reach.
Storage Solutions for Small Closets
Small closets benefit from vertical solutions and modular components. Options include slim velvet hangers to save width, stackable bins, door-mounted organizers, and adjustable shelves. If you have high ceilings, install a second rod to double hanging space. Use shelf liners to keep items in place and reduce slipping fabrics. Clear bins let you peek at contents without rummaging, while labels speed up reassembly after a season change. Tailor these solutions to your closet dimensions and budget, prioritizing durability and ease of maintenance.
Seasonal Wardrobe Rotation and Long-Term Planning
Seasonal rotation keeps closets compact and relevant. Move out-of-season items to higher shelves or offsite storage if possible, and rotate frequently worn items back into the front. Use a simple calendar reminder to audit your wardrobe every few months; this keeps you conscious of what you actually wear and reduces closet volume over time. Build a small shopping list based on observed gaps rather than impulse purchases. A controlled approach to rotation helps you keep the closet functional year-round.
Cleaning and Freshening: Odors, Dust, and Fabric Care
Closet cleaning includes dusting shelves, wiping down surfaces, and ensuring airflow to prevent musty smells. Vacuum or dust the floor, wipe down baseboards, and clean the closet door tracks if present. For fabrics, air out items briefly before returning them to the closet, especially after wearing or storage in humid spaces. Consider fabric fresheners or sachets in labeled bins for light fragrance. Periodic fabric care, like lint removal and occasional light washing or dry cleaning of certain garments, helps maintain garment longevity.
Maintenance Routine: Weekly, Monthly, Seasonal
A simple maintenance plan prevents backsliding. Allocate a 10-minute weekly reset to return items to their zones, adjust hangers, and refile accessories. Do a deeper monthly tidy: review a subset of items, reassess zones, and adjust storage as needed. Seasonally, re-evaluate your wardrobe, donate items that are outgrown or underused, and refresh shelf organization. The goal is to build a habit so that the closet stays organized with minimal effort day-to-day.
A Practical 2-Hour Closet Clean-Out Plan (Preview)
If you’re short on time, use a two-hour block to create a clean, usable result. Start with preparation: gather supplies, empty the closet, and sort items into keep/donate/recycle. Then, reconfigure the space with zones for daily wear, workwear, and seasonal pieces. Finish with light cleaning and labeling of storage bins. This plan prioritizes quick wins while setting you up for longer-term organization. Remember, you don’t need perfection—consistency beats an all-at-once reset.
Quick-Reference Checklist for Afterward
Keep these prompts handy: Do I have a dedicated place for each category? Are the most-used items easily accessible? Are there labels on bins and shelves? Is the layout still comfortable for daily use? Keeping a simple checklist helps sustain the gains you’ve made and makes future refreshes straightforward.
Tools & Materials
- Non-slip hangers (slim)(16- to 17-inch fit; color prefers dark or neutral)
- Hanging rods (adjustable)(If adding a second rod, measure before purchase)
- Storage bins with lids(Clear plastic preferred for visibility)
- Shelf dividers(Helpful for stacking tops and jeans)
- Label maker or masking tape + marker(Label zones and bins clearly)
- Storage boxes for seasonal items(Label by season and year)
- Lint roller or fabric brush(For quick fabric refresh)
- Vacuum or small broom(Clean floor and corners)
- Measuring tape(Useful for planning new shelves)
- Trash bags/Donation bags(Have ready near the closet)
Steps
Estimated time: 60-120 minutes
- 1
Gather supplies and prep space
Collect all tools and materials in one place and ensure the closet area is clear. This minimizes back-and-forth trips and keeps momentum. A prepared space reduces decision fatigue and sets the tone for a productive session.
Tip: Place a trash bag nearby to capture quick discards; this speeds up the process. - 2
Empty the closet completely
Take everything off shelves and hangers. This gives you a true sense of volume and helps you see what you actually own. It also prevents missed items when sorting.
Tip: Group items roughly by type on the bed or floor to speed sorting. - 3
Sort into keep, donate/sell, recycle
Create distinct piles: keep items that fit, are in good condition, and you actually wear; donate/sell items you no longer need; recycle items that are damaged beyond repair. This clarifies your wardrobe and frees space.
Tip: Be decisive—if you’re unsure about an item after a quick check, place it in a temporary 'maybe' bin and revisit later. - 4
Try items for fit and condition
Try on items in the keep pile to confirm fit and comfort. Set aside items that require alterations or cleaning. Decide promptly about items needing repairs.
Tip: If alterations extend beyond a reasonable timeframe, move the item to the donate bin instead. - 5
Clean closet surfaces
Dust shelves, wipe down walls and doors, and vacuum the floor. A clean base makes the reorganization look (and feel) fresh and helps extend garment life.
Tip: Use a gentle cleaning solution compatible with your closet materials to avoid damage. - 6
Assign zones and hang items
Designate zones for daily wear, workwear, and special occasion pieces. Hang items by category, and use uniform hangers to maximize space and readability.
Tip: Keep outfits as complete units: hang top and bottom together when possible. - 7
Label and store seasonal items
Store off-season pieces in labeled bins or on higher shelves. This reduces visual clutter and speeds current wardrobe access.
Tip: Include care instructions on labels for quick reference. - 8
Review and adjust layout
Stand back and assess the flow. If you reach for certain items less often, consider swapping their position for better accessibility.
Tip: Take before/after photos to track progress and motivate future maintenance.
Questions & Answers
What is the first step to clean my closet?
Begin with a quick audit: remove everything and sort into keep, donate, and recycle. This sets the foundation for a focused, effective clean. Don’t rush the sorting—quality decisions save time later.
Start with an audit, then sort into keep, donate, and recycle. It makes the rest faster and clearer.
How long does a typical closet clean-out take?
A compact closet can be refreshed in under two hours with a prepared plan. Larger spaces may take 2–4 hours, especially if you add new storage or reconfigure shelving.
Most people refresh in under two hours; larger closets may take a few more hours.
Should I color-code outfits or organize by item type?
Organize by item type for speed and consistency, then add color cues within each category if you find it helpful. The key is predictability and ease of access.
Organize by type first, add color cues if it helps you find things faster.
What should I do with items I rarely wear?
Move rarely worn items to a secondary storage area or seasonal bins. Revisit them after a few months to decide if they should stay or go.
Put rarely worn items in a seasonal bin and reassess later.
How do I prevent clutter from returning?
Maintain with a weekly 10-minute reset, a seasonal wardrobe review, and clear decision criteria for new purchases.
Do a quick weekly reset and seasonal reviews to prevent new clutter.
What if I have a very small closet?
Prioritize vertical storage and multi-use solutions like slim hangers, door organizers, and labeled bins. Keep only items you truly use and love.
In a small closet, maximize vertical space and keep only what you love and use.
Watch Video
The Essentials
- Audit first to reveal true wardrobe needs
- Create clear zones for quick access
- Use uniform hangers and labeled bins
- Rotate seasons to maintain relevance
- Maintain with a simple weekly reset