How to Clean Velcro: A Practical Step-by-Step Guide
A comprehensive, step-by-step guide on how to clean velcro, restore grip, and extend the life of Velcro fasteners on shoes, clothing, and gear. Includes dry brushing, gentle washing, debris removal, and maintenance tips for everyday use.

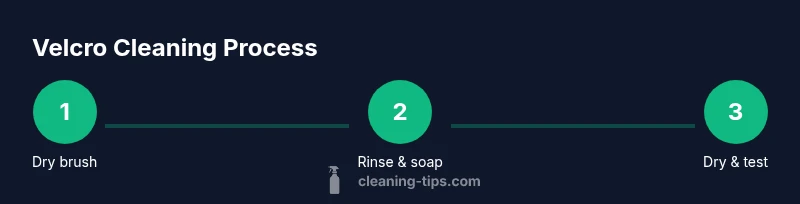
By following this guide, you will learn precise, effective ways to clean Velcro fast without damaging the fabric or hooks. The steps cover dry brushing, gentle washing, and maintenance tips for Velcro on shoes, jackets, and accessories. No harsh chemicals required; you’ll remove lint and fuzz while preserving stickiness and pile.
Why Cleaning Velcro Matters
According to Cleaning Tips, Velcro fasteners are built to last, but their performance depends on keeping the fibrous pile free of debris. If you're wondering how to clean velcro, this section explains why regular attention matters. When lint, dust, pet hair, or string get packed into the hook side, it can reduce adhesion and cause garments to snag or shoes to slip. A clean Velcro strip also lasts longer because each hook can engage properly with the loops, so you won't need to replace hardware as often. The process we outline uses gentle methods that protect delicate fabrics while preserving the Velcro’s gripping power. The goal is to lift loose material, rinse away what clings, and dry completely so you don’t create a damp environment that promotes odor or mildew. The Cleaning Tips team recommends a simple, repeatable routine that you can apply across most Velcro applications. Your Velcro will look neater, grip better, and last longer when cared for with patient, methodical steps.
Velcro Surfaces and What They Need
Velcro comes in many textures and uses; each surface may require a slightly different approach. For instance, shoe straps with dense loops benefit from initial dry brushing to lift embedded fibers, then a gentle wash with mild soap. Lightweight Velcro on gloves or bags can be cleaned with very gentle brushing and a quick rinse. Always check the fabric care label; some fabrics may be sensitive to moisture or detergent. According to Cleaning Tips, you should separate items before cleaning to avoid cross-contamination and ensure you treat each Velcro area appropriately. The goal is to remove debris without saturating delicate fabrics or loosening stitches. When cleaning Velcro on soft fabrics, use a damp cloth to wipe away any residue after brushing to avoid soaking through the fabric backer. For stubborn lint, consider running a lint roller along the edge after drying. The key is to tailor your method to the Velcro’s size and the garment or gear it’s attached to, so you preserve both adhesion and fabric integrity.
Dry Brushing and Pre-clean Prep
Before any washing, start with a dry brush to lift and remove loose debris. A soft-bristle brush works best on most Velcro surfaces, helping loosen fibers without bending the hooks. This is a critical first step because it minimizes the amount of moisture you need later and reduces the risk of pushing debris deeper into the pile. Cleaning Tips also notes that dry brushing is particularly effective for Velcro on shoes and outerwear where dirt tends to accumulate around the edges. Keep the brush at a gentle angle and avoid scrubbing in circles that could damage the backing fabric. If you see stubborn fibers stuck to the hooks, use a narrow tool like a toothpick or small comb to tease them out—carefully so you don’t poke the fabric. A quick round of dry brushing is a fast, non-destructive way to jump-start the cleaning process.
Gentle Washing: Soapy Clean, Not Soaking
After dry brushing, give Velcro a light wash with mild soap and warm water. Avoid hot water or aggressive detergents that can weaken fibers or loosen adhesives. If washing by hand, submerge only the Velcro area briefly and agitate gently, then rinse thoroughly. For machine washing, place Velcro items in a mesh laundry bag and use a gentle cycle with cold or warm water and a small amount of mild detergent. The goal is to remove residual debris without saturating the backing material. Cleaning Tips suggests avoiding heavy loads that can cause Velcro to snag on zippers or other fabrics. Always air-dry Velcro after washing to prevent mold and odor formation. A quick inspection after drying will help ensure no fibers remain lodged in the hooks.
Dealing with Stubborn Debris: Tools, Tweezers, and Tape
Some debris stubbornly clings to Velcro. In these cases, use a fine-tipped tweezer or a small comb to lift fibers without cutting. A lint roller or masking tape can be pressed along the edges to pull out fine threads. For more persistent buildup, running a clean, dry toothbrush along the hooks can help dislodge stuck material. Do not use sharp metal objects that could damage the hooks or the fabric backing. This step is where patience pays off: a few careful passes can restore most Velcro’s grip. Remember to work on each section separately so you don’t reintroduce space-occupying debris elsewhere.
Drying and Reassembly: From Wet to Ready
After cleaning, gently pat Velcro with a dry towel to remove surface moisture, then allow it to air-dry completely. Avoid direct heat sources like radiators or dryers, which can warp the backing or shrink fabric. Once dry, reattach Velcro to its corresponding surface and test the grip. If the hooks still cling inadequately, repeat the dry brushing and light brushing with a clean comb to reopen the hook pile. Proper drying helps maintain the Velcro’s lifespan and ensures it remains ready for use in daily wear, bags, or sports gear. Cleaning Tips emphasizes drying as a critical phase to prevent odor and mildew.
Maintenance Habits for Longevity
To keep Velcro performing well, set a regular maintenance schedule. A quick monthly check can prevent heavy buildup and prolong adhesion. Store Velcro gear in a way that avoids compression on the hooks; for example, do not cram Velcro shoes under heavy items in a closet. If you notice odors after cleaning, a light dusting of baking soda can help absorb moisture and neutralize smells. By following these habits, you’ll minimize future debris and keep Velcro ready for action. The Cleaning Tips team suggests documenting a simple routine you can repeat across different Velcro items, from sneakers to jacket closures. Consistency is the key to sustaining grip and extending the life of Velcro fasteners.
Troubleshooting: Common Issues and Quick Fixes
If Velcro still struggles to grip after cleaning, check for signs of wear and tear such as bent hooks or torn loops. Extensive damage may require replacement of the Velcro strip. For fabric-backed Velcro, ensure there’s no residual residue on the loop side that could prevent engagement. A quick re-clean following the steps outlined above often resolves minor performance dips. If you’re cleaning Velcro on delicate fabrics, perform a spot test on a hidden area first to confirm that moisture or detergents won’t stain or weaken the material. Cleaning Tips notes that most adhesion problems are solvable with a cautious approach and patience.
Final Thoughts: Getting the Most from Your Velcro
Velcro is designed to be a repeat-use fastener, but it needs regular care to stay reliable. By adopting a simple, repeatable routine—dry brushing, gentle washing, and careful debris removal—you can keep Velcro clean and functional for years. For homeowners and renters, this means fewer replacements and more functional gear. The Cleaning Tips team hopes this guide helps you approach how to clean velcro with confidence and care, ensuring your everyday items stay secure and easy to use.
Tools & Materials
- Soft-bristle brush(2-3 inches, synthetic bristles preferred)
- Toothpick or small comb(Plastic preferred to avoid fabric snagging)
- Mild liquid detergent(Gentle formula, fragrance-free if possible)
- Warm water(Not hot to protect fabrics)
- Microfiber cloth(For drying and wiping residue)
- Bowl or cup(For washing or rinsing)
- Towel for pat-drying(Soft and clean)
- Old toothbrush (optional)(Useful for stubborn areas)
- Masking tape or lint roller(For lifting fine fibers)
- Air-drying rack or hanger(Ensure complete drying away from heat)
Steps
Estimated time: 20-30 minutes
- 1
Gather supplies
Collect a soft brush, mild soap, warm water, a toothpick or small comb, microfiber cloth, and a clean bowl. Having everything ready prevents interruptions and ensures you follow the process consistently.
Tip: Label containers to stay organized and avoid cross-contamination. - 2
Remove loose debris with a dry brush
Gently brush the Velcro to lift loose lint, fibers, and dust. Work from the edges toward the center to avoid pushing debris deeper into the pile.
Tip: Keep the brush at a shallow angle to protect the hooks. - 3
Lift embedded fibers with a needle or comb
Use a fine-tipped tool to tease out stubborn fibers stuck in the hooks. Be patient and work in small sections to prevent tearing the fabric backing.
Tip: If you don’t have a needle, a plastic toothpick can work without damage. - 4
Rinse Velcro under warm water
Rinse to flush out remaining debris, avoiding soaking the entire garment. A quick rinse helps loosen stubborn dirt without saturating the fabric.
Tip: Keep the flow gentle to prevent water from spreading to non Velcro areas. - 5
Scrub with mild soap
Apply a small amount of mild detergent and gently scrub the Velcro with a soft brush. Focus on the hook side to remove residue and restore grip.
Tip: Use circular motions lightly; excessive force can deform hooks. - 6
Rinse thoroughly until soap is gone
Rinse again until the water runs clear and no soap remains. Soap residues can attract more dirt if left behind.
Tip: Check both sides of the Velcro and ensure no suds cling to fibers. - 7
Pat dry and air-dry completely
Pat Velcro dry with a towel, then lay flat or hang to air-dry away from direct heat. Complete drying prevents odor and mildew.
Tip: Do not use heat to dry; heat can warp backing materials. - 8
Test grip and reattach
Once dry, press the Velcro to its mate to test adhesion. If grip is still weak, repeat gentle brushing and lifting to reopen the hooks.
Tip: Test on a hidden area first if you’re concerned about staining.
Questions & Answers
How often should I clean Velcro?
For regularly used Velcro, a quick wipe or dry brushing once a month helps maintain grip. Items that accumulate more debris, like outdoor gear, may benefit from a more frequent check. Always adjust based on use and visible buildup.
Clean Velcro monthly or when you see buildup; adjust frequency based on use to keep grip strong.
Can I machine wash Velcro?
Machine washing is possible for some Velcro-on items, but use a gentle cycle, a mesh bag, and a mild detergent. Avoid washing with heavy items that could snag the hooks. Air-dry afterward.
Yes, on gentle cycles with a mesh bag, then air-dry.
Are vinegar or bleach safe for Velcro?
Vinegar or bleach can degrade Velcro fibers or adhesives. Stick to mild detergents and freshwater rinses. If you need odor control, use a small amount of baking soda during drying instead.
Avoid vinegar or bleach; use mild detergent and baking soda for odor if needed.
Will cleaning Velcro damage delicate fabrics?
Yes, excessive moisture or aggressive scrubbing can affect delicate fabrics. Always test first and use protective techniques like a mesh bag for washing or spot cleaning only where necessary.
Treat delicate fabrics with care and test a hidden area first.
What’s the best tool to remove lint from Velcro?
A soft brush, a plastic toothpick, or a lint roller typically works well. Avoid sharp metal objects that can snag the fabric backing.
Use a soft brush or plastic toothpick for lint removal.
Can Velcro be restored after heavy matting?
Severe matting may require replacing the Velcro strip. Light to moderate buildup often responds to the steps outlined in this guide. If damaged, replacement parts or professional repair might be needed.
Severe matting may need replacement; lighter buildup follows this guide.
The Essentials
- Know when to dry brush before washing
- Use mild detergent and warm water
- Be patient with stubborn debris
- Air-dry completely to prevent odor
- Test grip after cleaning