How to clean an engine bay safely and effectively at home
Learn a safe, step-by-step method to clean an engine bay, protect sensitive parts, and remove grime using common tools. Cleaning Tips provides practical guidance.

To clean an engine bay safely, gather basic tools, disconnect the battery if needed, spray degreaser, scrub grime, rinse carefully, and dry thoroughly. Start at the top, protect electricals, and avoid hoses and belts. Follow a spray-down pattern that minimizes water exposure to sensitive parts.
Why Clean an Engine Bay Matters
A clean engine bay helps you spot leaks, worn belts, and loose connections more easily, which can prevent costly failures. It also reduces the risk of grime affecting performance and improves cooling by keeping airflow clear. According to Cleaning Tips, regular but careful cleaning keeps components visible and makes maintenance chores simpler. In this guide you’ll learn how to clean an engine bay safely, using common tools and straightforward techniques that work on most vehicles. The goal is to remove grease without forcing water into electrical components or sensitive sensors, while protecting rubber hoses and plastic covers. Think of this as a proactive health check for your car’s heart—the engine—so you can catch issues early and keep your ride reliable.
Safety First: Prep and Protection
Safety should come first when cleaning an engine bay. Begin by parking on a flat surface and letting the engine cool completely to avoid burns. If you can, disconnect the negative terminal of the battery to reduce the risk of short circuits. Wear eye protection and gloves, and ensure you’re working in a well-ventilated area. Use plastic bags or foil to cover sensitive areas like the air intake, distributors, and exposed wiring connectors. Keep a dry towel handy and have a dedicated spray bottle for rinsing to avoid using a high-pressure stream near delicate parts. Cleaning Tips emphasizes patience—rushing raises the chance of trapping water in crevices and causing corrosion.
Tools and Cleaning Agents: What You Need
Having the right tools makes engine bay cleaning safer and more effective. Gather a dedicated automotive degreaser, a mild detergent, stiff-bristle brushes for tough grime, a soft brush or microfiber cloth for delicate areas, absorbent towels, and a spray bottle or garden hose with a spray nozzle for controlled rinsing. Nitrile gloves and safety glasses protect your hands and eyes. Optional items include plastic covers to shield sensors and a can of compressed air to blow out water from hard-to-reach spots. Using the proper cleaners helps avoid degrading plastic covers or rubber seals, preserving the bay’s integrity.
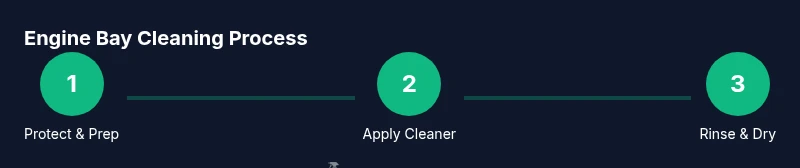
Step-by-Step Cleaning Process (Overview)
This section outlines the core sequence you’ll follow, with practical tips for each phase. Start by cooling down and protecting components, then apply cleaner, agitate grime, rinse with care, and finally dry and inspect. The process minimizes exposure of electricals and avoids high-pressure washes. By following a consistent pattern you’ll achieve a cleaner engine bay without risking damage to belts, hoses, or sensors.
Cleaning Techniques by Subsystem
Different engine bay subsystems require tailored approaches. For metal surfaces, use degreaser and a stiff brush to lift grime, then wipe clean with a microfiber cloth. Plastic covers and hoses respond well to a gentle detergent and a soft brush; avoid harsh solvents that can harden or crack plastics. Electrical connectors and exposed wiring should be shielded from water; use a damp cloth rather than soaking. Air intake ducts may collect dust and leaves—remove loose debris by hand before cleaning. The aim is a balanced clean that reveals problem areas without compromising safety or component life.
Drying, Protection, and Reassembly
Drying is where many homeowners rush and create corrosion issues. After rinsing, pat surfaces dry with towels and use a clean microfiber to wick moisture from tight cracks. If you used plastic covers, remove them only after the bay is dry. Reconnect the battery terminal and run the engine briefly to verify operation, listening for unusual noises. A final wipe-down of hoses and clamps ensures everything is snug and properly positioned. Routine checks at this stage help you avoid re-contamination and spot potential problems early.
Maintenance Tips to Keep the Bay Cleaner Longer
To extend the cleanliness between sessions, perform a quick wipe-down after road trips when engine heat has subsided. Address small leaks promptly, fix cracked hoses, and replace worn weather seals that accumulate grime. Regularly check for water intrusion after rain or car washes and ensure seals around the hood and firewall are intact. Keeping the bay organized with labeled hoses and kept-up-to-date maintenance records helps you spot wear before it becomes a bigger issue.
Authoritative Sources and Further Reading
For safety standards and best practices in vehicle care, consult reputable sources. The National Highway Traffic Safety Administration provides general safety reminders, while Consumer Reports offers maintenance guidance and product reviews. The EPA’s information on reducing environmental impact of car maintenance is also helpful. Always cross-check recommendations from multiple credible sources to ensure you’re following current best practices.
Tools & Materials
- Degreaser or automotive cleaner(Choose a spray degreaser formulated for engines; avoid caustic products)
- All-purpose detergent(Mild detergent safe for metal and plastic)
- Stiff-bristle brushes (2 sizes)(1 inch and 2 inch brushes for different grime levels)
- Soft brush or microfiber cloth(For delicate areas and plastic covers)
- Rags or towels(Absorbent for drying and blotting water)
- Plastic covers or foil(Protect sensors and exposed wiring)
- Water supply (garden hose or spray bottle)(Low-pressure rinse to avoid forcing water into seams)
- Gloves (nitrile)(Protect hands from chemicals)
- Eye protection(Safety glasses or goggles)
- Compressed air (optional)(Blow out water from tight spaces after drying)
Steps
Estimated time: 60-90 minutes
- 1
Prepare and protect
Park on a level surface and let the engine cool completely. If possible, disconnect the negative battery terminal to minimize electrical risk. Cover sensitive parts with plastic and set up towels to catch drips.
Tip: Never disconnect or reconnect battery while wet to avoid short circuits. - 2
Apply cleaner and loosen grime
Spray degreaser on top surfaces and major grime, focusing on the valve cover area and brackets. Let it sit 3-5 minutes so the cleaner penetrates grease before brushing.
Tip: Avoid spraying directly into exposed electrical connectors. - 3
Scrub grime away
Use stiff brushes on metal surfaces and softer brushes on plastics. Work from the top down, brushing in gentle circular motions to lift grime without abrading surfaces.
Tip: For stubborn grime, reapply cleaner and give it extra time to break up buildup. - 4
Rinse with care
Rinse with a low-pressure stream or spray bottle. Keep nozzle at a safe distance and avoid blasting near sensors or exposed wiring.
Tip: Never use a high-pressure washer on an engine bay. - 5
Dry thoroughly
Pat dry with towels and finish with a microfiber to remove remaining moisture. Use compressed air to clear crevices if available, then check for damp corners.
Tip: Ensure all connectors and belt drives are completely dry before starting the engine. - 6
Reassemble and inspect
Reconnect the battery, wipe down any splatter on belts, hoses, or sensors, and run the engine for a minute to verify operation. Check for unusual sounds or leaks after cooldown.
Tip: Take a final walk-around to confirm nothing is loose or misaligned.
Questions & Answers
Is it safe to clean my engine bay at home?
Yes, with proper precautions: cool engine, protect electricals, and avoid high-pressure rinses. Follow step-by-step guidance to reduce risk.
Yes, you can cleanup at home if you take safety seriously and use gentle cleaning methods.
Should I disconnect the battery before cleaning?
Ideally, disconnect the negative terminal to prevent shorts. Reconnect after everything is dry and you're ready to start the engine.
Yes—disconnecting the battery reduces risk during cleaning.
Can I use a pressure washer on the engine bay?
No. High-pressure water can force moisture into electrical connections and degrade components. Use a low-pressure spray instead.
Avoid high-pressure rinses; stick to low-pressure spray.
What cleaners are safe for engine bay plastics?
Use automotive degreasers designed for engines or mild detergents. Always test a small area first and avoid solvents that can warp plastics.
Choose gentle, automotive-safe cleaners and test first.
How long does drying take after cleaning?
Drying typically takes 20-60 minutes depending on humidity and airflow. Ensure all moisture is removed before running the engine.
Drying usually takes about 20 to 60 minutes.
Should I cover sensors or electrical connectors?
Yes, cover or avoid those areas with plastic bags or foil to prevent water ingress. Remove coverings only after components are dry.
Definitely cover sensitive parts during cleaning.
Watch Video
The Essentials
- Plan and protect sensitive components before cleaning
- Use automotive-safe cleaners and appropriate brushes
- Dry thoroughly to prevent corrosion and mold
- Inspect belts and hoses for wear during the process