How to Clean Car Headlights with Toothpaste: A Practical DIY Guide
A practical, safety-focused guide on using toothpaste to clean car headlights. Learn step-by-step methods, materials, safety tips, and maintenance to restore brightness without costly products.

This quick guide explains how to clean car headlights toothpaste safely. You’ll learn the essential steps, materials, and safety tips to avoid damaging the lens coatings while restoring brightness. While not a professional replacement, this method offers a budget-friendly DIY option that many homeowners try first. Follow the steps and safety cautions for best results: toothpaste, gentle scrubbing, rinse, and dry.
Why Toothpaste for Headlights Is Controversial
According to Cleaning Tips, toothpaste is a widely discussed DIY option for restoring headlight clarity because it is inexpensive and readily available. The question many homeowners ask is: can anything as everyday as toothpaste genuinely improve hazy plastic on car headlights? This guide explains why some people reach for toothpaste to clean car headlights toothpaste, and why it can be both helpful and potentially harmful if misused. Toothpaste acts as a mild abrasive, which can smooth the cloudy surface slightly. However, aggressive scrubbing or using the wrong type of toothpaste can scratch or dull the plastic lens and may affect any protective UV coatings on modern headlights. The intent here is practical, not sensational: use a gentle, methodical approach and stop if you notice obvious scratching. The Cleaning Tips team emphasizes careful, incremental attempts over heavy scrubbing.
Safety First: When Not to Use Toothpaste
Toothpaste is not a universal fix. It works best on minor hazing and older, UV-degraded plastics, but it can worsen clouding on certain materials or coatings. If your headlight lens is cracked, cloudy due to severe oxidation, or if you see signs of delamination, avoid toothpaste and seek professional restoration. Never apply toothpaste to freshly painted surfaces or the surrounding bodywork. Always test on a small, inconspicuous area first and monitor for any adverse effects like discoloration or rough patches. The goal is to improve visibility without creating new damage. The key takeaway from Cleaning Tips is to treat this as a low-risk, short-term maintenance step rather than a guaranteed fix for deeply oxidized headlights.
What You Need Before You Start
Gather your tools and materials in advance to keep the work steady and organized. You’ll need plain, non-gel toothpaste, a soft microfiber cloth, a soft-bristle toothbrush or sponge, a spray bottle or cup of water, and masking tape to protect adjacent paint. Work in a shaded area to prevent the paste from drying too quickly and to better see any hazing. Have a clean, dry towel ready for final drying. If you wear gloves, choose simple latex or nitrile gloves to keep your hands clean while you work. Preparing the surface—rinsing, drying, and laying out protective tape—pays off with fewer wipe marks and a steadier, more controlled scrub. Cleaning Tips recommends a calm, patient approach rather than rushing through the steps.
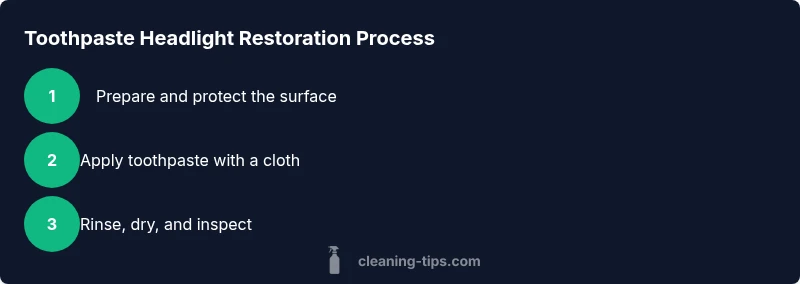
Step-by-Step Process: Preparing the Headlights
- Rinse the headlights with water to remove loose dirt. Pat dry with a clean microfiber cloth and inspect for hairline cracks or deep scratches. 2) Apply masking tape around the edge of the headlight to protect the paint and trim. 3) If you have deeper oxidation around the lens edges, consider washing the area with mild soap and water again to remove any residues before applying toothpaste. 4) Keep the surface damp during scrubbing to prevent micro-scratches and to maintain a uniform surface for testing. This preparation reduces the risk of stray paste getting into crevices and keeps the working area clear for better visibility while you work.
Step-by-Step Process: Applying the Toothpaste
- Squeeze a small amount of plain toothpaste onto a microfiber cloth or onto the headlight directly with care. It’s best to use a pea-sized amount for each section of the headlight. 6) Using gentle circular motions, rub the toothpaste into the plastic surface for 60–90 seconds per section. Avoid pressing hard; the goal is light abrasion with consistent coverage. 7) Periodically wipe away the paste with a clean part of the microfiber cloth to monitor progress and to prevent buildup that can leave streaks. The tactile feedback from the cloth helps you gauge when the haze is diminishing and when to proceed to rinse.
Step-by-Step Process: Rinsing and Drying
- Rinse the headlight thoroughly with clean water to remove all toothpaste residue. 9) Dry the lens completely with a new, dry microfiber cloth to prevent water spots. 10) Inspect the results in a bright light; if hazing remains, you can repeat the gentle scrub once or twice more, but avoid excessive repetition. 11) Consider applying a UV protective sealant or wax to help slow future oxidation after drying. This finishing step helps preserve the improvement and provides a more even shine across the lens.
Troubleshooting: Common Problems and Fixes
If you notice micro-scratches after the first pass, stop and switch to a lighter touch or take a break to reassess. Repeated aggressive scrubbing can worsen the surface. If the paste leaves streaks, switch to a fresh microfiber cloth and wipe in a consistent direction rather than circular motions. Some headlights may respond better to 2–3 light passes spaced over several minutes rather than one long, intense scrub. Keep expectations realistic: toothpaste is a DIY option that can improve appearance modestly but may not restore a perfectly clear lens in all cases.
Alternatives and Maintenance Tips
If toothpaste fails to make a noticeable difference, you have alternatives: a dedicated headlight restoration kit, a professional service, or a glazing product designed for polycarbonate lenses. For maintenance, rinse the headlights after each car wash, dry them, and periodically inspect for haze or dirt buildup. UV protection films or wax coatings can slow future oxidation, while parking in shaded areas or garages reduces UV exposure. Regular cleaning with a soft cloth and gentle products helps extend the life of the headlight surface. The Cleaning Tips team suggests combining gentle cleaning with preventive care for best long-term results.
Tools & Materials
- Plain, non-gel toothpaste(avoid whitening gels; plain paste is safer for mild abrasives)
- Soft microfiber cloth(2–3 cloths to buff and dry; use one for application and another for wiping)
- Soft-bristle toothbrush or foam sponge(for gentle circular scrubbing in tight areas)
- Water source (spray bottle or faucet)(cool water; avoid hot water which can cause quick drying)
- Masking tape(optional edge protection to prevent paste from touching paint)
- Latex or nitrile gloves(optional to keep hands clean and prevent slippage)
Steps
Estimated time: 15-30 minutes
- 1
Prepare the headlights
Rinse the headlight with clean water to remove surface dirt. Dry gently and inspect for deep scratches or cracks. Apply masking tape around the edges to protect the paint. This setup helps you see haze clearly and avoids accidental contact with adjacent areas.
Tip: Masking tape provides a clean working boundary and reduces risk of paste on paint. - 2
Apply a small amount of toothpaste
Dab a small amount of plain toothpaste onto a microfiber cloth or directly onto the headlight if you’re careful. Use a pea-sized amount for each section; this keeps the paste from drying too quickly and makes control easier.
Tip: Less is more – a tiny amount distributes evenly and minimizes residue. - 3
Scrub gently in circular motions
Rub the toothpaste into the plastic using gentle circular motions. Do not press hard, as aggressive scrubbing can scratch the surface. Cover the entire headlight in small sections to ensure even abrasion and consistent results.
Tip: Keep the surface slightly damp to avoid dragging dry paste. - 4
Wipe away and reapply as needed
Wipe the paste away with a clean microfiber cloth to monitor progress. If hazing remains, repeat the toothpaste application with the same light touch and shorter scrub cycles. Reapply paste only to areas needing attention.
Tip: Wipe often to prevent paste from drying into the surface. - 5
Rinse thoroughly
Rinse the headlight well with clean water to remove all residue. Any leftover paste can cause streaking or film deposits that dull clarity. Inspect the lens under bright light to judge the improvement.
Tip: A thorough rinse is essential for a clean finish. - 6
Dry completely and assess
Dry with a fresh microfiber cloth until no moisture remains. Check for remaining haze; if necessary, repeat the gentle steps once more. If you’re satisfied, finish with a light UV-protective coating to slow future oxidation.
Tip: Drying completely prevents water spots and uneven shine. - 7
Optional conditioning for longevity
Apply a UV-rated protectant or wax designed for plastics. This forms a barrier that reduces future yellowing and fogging from sun exposure. Keep expectations reasonable; toothpaste is a short-term fix, not a permanent cure.
Tip: Protective coatings can extend the life of the improvement.
Questions & Answers
Is toothpaste safe for all headlight plastics?
Toothpaste can pose a scratching risk on some plastics, especially if the headlight is older or has a degraded coating. Always test on a small area first and avoid aggressive scrubbing. If you notice dulling or roughness, stop and explore other options.
Toothpaste can scratch some plastics, so test a small area first and stop if you see roughness.
Will toothpaste restore yellowed headlights completely?
In many cases, toothpaste improves clarity for light hazing but may not fully restore severely oxidized or deeply yellowed lenses. Consider professional restoration or kits for deeper damage.
It often improves hazing but may not fully restore heavily oxidized lenses.
What’s the best alternative if toothpaste doesn’t work?
Dedicated headlight restoration kits or professional services are the next step for stubborn hazing. These options typically use specialized compounds and UV protection to restore clarity more reliably.
If toothpaste doesn’t work, try a dedicated headlight kit or a pro service.
Can I apply toothpaste directly to the headlights?
Direct application can make a mess and is harder to control. It’s better to apply toothpaste to a cloth or sponge for even coverage and to minimize contact with surrounding surfaces.
Apply toothpaste to a cloth, not directly to the headlight.
Should I seal the headlight after cleaning?
Yes. A UV-rated sealant or wax helps protect against future oxidation and keeps the lens clearer longer. Reapply as part of regular car maintenance.
Yes, seal after cleaning to slow future hazing.
Watch Video
The Essentials
- Toothpaste can improve light hazing on headlights with care.
- Use a soft cloth and light pressure to avoid scratches.
- Rinse and dry fully; consider protective coatings for maintenance.