How to Clean a Dry Erase Board: A Practical Guide
Learn practical, safe methods to clean a dry erase board, remove ghosting, and maintain a pristine writing surface with tips from Cleaning Tips. This guide covers surfaces, cleaners, maintenance, and troubleshooting for healthier home and office spaces.

Goal: restore a clean, ghost-free dry erase board and keep it performing well. You’ll learn safe cleaning methods, the best products to use, and how to prevent ghosting in the future. Gather a mild cleaner, microfiber cloth, distilled water, a soft scrubber, and a dry erase marker for test writing. Avoid harsh solvents on painted boards and aluminum frames.
Why Clean Dry Erase Boards Matter
For households and home offices, a clean dry erase board keeps notes legible and reduces frustration from ghosted marks. According to Cleaning Tips, regular care extends surface life and prevents stubborn stains. In this guide we share practical, field tested strategies that are safe for most whiteboards, including painted surfaces and aluminum frames. Start by assessing the board type, then apply gentle cleaners and proper wiping techniques to restore clarity and maintain readability on every write. A well kept board improves organization, reduces wasted time, and supports healthier, neater spaces. The Cleaning Tips team emphasizes that a plan you can stick to daily quick wipes and a monthly deep clean yields the best long term results.
Understanding board surfaces
Boards vary in composition from porcelain enamel to painted steel and melamine coatings. Each surface reacts differently to cleaners, which means selecting the right product is essential. Porcelain enamel boards resist staining but can be damaged by harsh solvents, while melamine boards are more forgiving yet can still ghost if residue remains. If possible, check the manufacturers label or stitching on the edge for surface type. Cleaning Tips notes that surface knowledge helps determine whether to use mild cleaners or specific formulations. Test any cleaner on a small corner first, then proceed with confidence. By understanding your board you protect warranties and avoid costly mistakes.
Common causes of ghosting and stains
Ghosting happens when ink particles linger after erasing. It can result from marker quality, frequent erasing on older boards, or residue left by cleaners. In humid environments, ghosting may appear more quickly as moisture helps ink bind to the surface. Stains from permanent markers or from contact with caps can be stubborn, especially on porous surfaces. Using the wrong solvent can smear ink or dull colors. Cleaning Tips notes that consistent cleaning routines reduce buildup and preserve surface brightness. Avoid aggressive scrubbing with abrasive pads that can scratch the coating and void warranties.
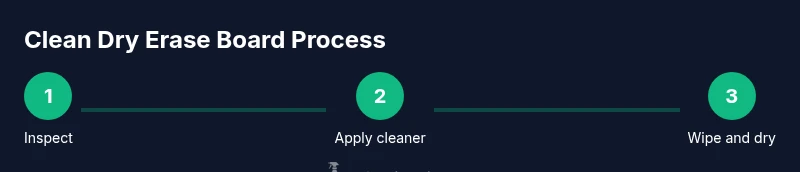
Cleaning methods: stepwise approach
Begin with a gentle, surface safe routine. 1) Inspect the board and identify the surface type. 2) Apply a small amount of cleaner to a microfiber cloth rather than directly on the board. 3) Wipe in a circular motion starting from the top left and moving across to remove dust and loose ink. 4) For stubborn ghosting, apply a little cleaner to a fresh area and let it sit briefly before wiping again. 5) Dry the surface with a clean, dry microfiber cloth to prevent streaks. 6) Re-test with marker ink to confirm clarity and even color. 7) If needed, repeat the process or use a mild paste for deeply set stains. Pro tip: never use abrasive pads on glossy or painted boards as they can scratch the surface permanently.
DIY cleaners: safe options and why
Most boards respond well to mild cleaners such as dish soap and water or a dedicated non ammonia cleaner. A solution of mild soap and distilled water is often enough for routine maintenance. White vinegar diluted with water can be effective for mineral buildup but test first to ensure it does not affect finish. Isopropyl alcohol in small amounts can help with tough stains, but avoid using it on painted or sealed boards without checking the manufacturer guidelines. Baking soda paste applied gently can address stubborn marks but rinse well to prevent residue. Always choose products labeled safe for whiteboards and avoid ammonia rich cleaners on painted surfaces. Cleaning Tips recommends keeping a simple kit ready and using consistent motions rather than heavy scrubbing.
Maintaining a clean surface between cleanings
Establish a quick daily wipe routine to prevent ghosting buildup. Keep a dedicated microfiber cloth in the same room as the board. Use a light spray or damp cloth and wipe in a consistent direction to avoid streaks. Store markers away from the board when not in use to reduce leakage onto the writing surface. Periodically rotate markers to ensure even ink flow and replace dry erase markers that skip or smear. Regular maintenance not only improves legibility but also prolongs the life of the board and its frame, especially in high-traffic spaces.
Troubleshooting tricky spots
If ghosting persists after routine cleaning, consider a deeper pass with a slightly stronger but manufacturer approved cleaner. Avoid harsh solvents that may lift coatings. For stubborn streaks, gently buff with a clean microfiber in a circular motion. If the problem continues, there may be an underlying coating wear issue or marker compatibility problem. Always document your cleaning steps for future reference and consult the manufacturer if you notice discoloration or peeling that goes beyond surface marks.
Long-term care and replacement considerations
Over time the coating on a dry erase board can wear, leading to more ghosting and reduced brightness. If cleaning fails to restore acceptable performance, evaluate the cost and benefits of replacement versus deep resurfacing or refinishing offered by some brands. Regular, mild cleaning can extend the useful life of a board, especially in classrooms or offices with heavy use. Consider protective covers or dedicated writing surfaces if the current board shows persistent wear. Cleaning Tips suggests monitoring wear indicators and planning a replacement schedule aligned with usage and environment.
Quick-start checklist for daily use
- Wipe the board with a damp microfiber cloth daily
- Test cleaners on a hidden corner first
- Use mild cleaners and avoid harsh solvents
- Keep markers capped and store away from the board when not in use
- Schedule a deeper clean monthly or after long periods of heavy use
Tools & Materials
- microfiber cloth(soft, lint-free; use in dry and damp forms)
- distilled water(use for dilution and to reduce mineral residue)
- mild cleaner (non ammonia)(choose product labeled safe for whiteboards)
- spray bottle(for applying cleaner in a controlled way)
- soft sponge or pad(non abrasive; use for tougher spots if needed)
- dry erase markers for testing(test ink on a corner after cleaning)
Steps
Estimated time: 60-75 minutes
- 1
Identify board surface type
Begin by locating the manufacturers label or inspecting the finish to determine if the board is porcelain enamel, painted steel, or melamine. Surface type dictates which cleaners are safe and how aggressively you should wipe. A quick test on a hidden corner helps prevent accidental damage.
Tip: Know your surface before cleaning to avoid wasting effort or causing damage. - 2
Prepare cleaning solution
Choose a mild, non ammonia cleaner or a soap and water mix. Avoid over saturating the board; a lightly damp cloth is enough. If you are testing a cleaner, apply it to a small area first and observe for adverse reactions.
Tip: Keep solutions away from metal frames that could corrode. - 3
Wipe the surface
Gently wipe in a consistent pattern from top to bottom using a microfiber cloth. Use circular motions on stubborn areas but avoid scrubbing with abrasive pads. Regular wiping reduces dust and ink buildup over time.
Tip: Use a fresh cloth for every major section to prevent re-depositing ink. - 4
Address stubborn ghosting
If ghosting remains, reapply the cleaner to a clean area and let it sit briefly before wiping again. For particularly stubborn marks, repeat in small sections rather than trying to erase everything at once.
Tip: Patience beats brute force on delicate coatings. - 5
Rinse and dry
Rinse the cloth with distilled water and wipe again to remove cleaner residue. Dry the surface with a dry microfiber to prevent streaks and water spots, ensuring the board is completely dry before writing again.
Tip: Residual cleaner can smear ink if not fully dried. - 6
Test with new marker
Write a few lines with a fresh marker to verify clarity and ink flow. If lines still appear dull, repeat cleaning cycle on those sections or plan a deeper treatment.
Tip: Fresh ink offers the best assessment of surface readiness.
Questions & Answers
What is the best cleaner for a dry erase board?
Choose a mild, ammonia-free cleaner or a simple soap and water solution. Avoid harsh solvents that can damage coatings or leave residues.
Use a mild cleaner or soap and water to avoid coating damage and ghosting.
Can I use household vinegar on a whiteboard?
Diluted vinegar can work for mineral buildup, but test first as it can affect some finishes. If in doubt, stick to milder cleaners recommended by the board manufacturer.
Diluted vinegar can help, but test first on a corner to be safe.
Why is there ghosting after cleaning?
Ghosting usually means ink residue remains or the surface is worn. Use a deeper cleaning method and consider replacement if the surface shows persistent wear.
Ghosting happens when residue sticks or the surface is worn; deeper cleaning or replacement may be needed.
Is rubbing alcohol safe on all boards?
Rubbing alcohol can help with tough stains on some boards, but it may damage others. Always verify with the manufacturer before using on your board.
Alcohol can help some boards; check your manufacturer guidelines first.
How often should I clean my whiteboard?
Aim for a quick wipe daily and a deeper clean monthly or after heavy use to prevent buildup and ghosting.
Daily quick wipes plus a deeper monthly clean works well for most spaces.
Should I erase before cleaning?
Yes, erase as much as possible before applying cleaners. This reduces ink buildup and makes the cleaning more effective.
Erase first to remove fresh ink, then clean for better results.
Watch Video
The Essentials
- Use mild cleaners on all surfaces
- Test cleaners first to protect coatings
- Wipe with microfiber for best results
- Maintain a simple daily routine to prevent ghosting