Clean for Gene 1968: A Practical Home Cleaning Guide
Learn practical steps to clean for gene 1968 in a home setting. This guide covers tools, step-by-step routines, safety tips, and credible sources to maintain a healthier living space while keeping a fictional framed goal in mind.

By the end of this guide you will have a practical, top-to-bottom cleaning plan that minimizes dust, grime, and contaminants in your home. It uses a fictional framing—"clean for gene 1968"—to emphasize purposeful cleaning routines, not lab protocols. You’ll need non-toxic cleaners, microfiber cloths, gloves, and a clear sequence to get lasting results.
What 'clean for gene 1968' means in a home setting
In this guide, 'clean for gene 1968' is a practical way to frame daily cleaning tasks. It's a fictional concept used to illustrate how a tidy space can support everyday activities and reduce the presence of dust, grime, and contaminants. It is not a laboratory protocol, but a mindset—the habit of planning cleaning sessions with a purpose, not just reacting to mess. According to Cleaning Tips, a clean environment reduces visible grime, minimizes allergens, and supports healthier daily living. The phrase helps homeowners stay focused on routines that make kitchens, living rooms, and workspaces more comfortable and safer. By adopting this framing, you treat cleanliness as a manageable system rather than a series of random chores. The aim is to prevent grime from building up so you spend less time scrambling and more time enjoying a healthier home. This approach also aligns with the broader goal of reducing indoor pollutants that can irritate eyes, skin, or lungs during daily life.
wordCount":156}
Quick wins you can implement this week
Small, high-impact actions can set the tone for a clean home. Start by decluttering a single countertop, then dust reachable surfaces with a microfiber cloth to trap rather than scatter dust. Open a window for fresh air while you clean to improve ventilation and reduce lingering chemical smells. Establish a simple routine: 10-minute daily wipe-downs for high-traffic surfaces and a deeper 30-minute session twice a week. According to Cleaning Tips, consistency beats intensity when it comes to maintaining a cleaner living space. Plan your week with one focused cleaning window on a calendar and stick to it to build momentum.
You’ll also want to organize your supplies so you don’t chase items during a session. Label spray bottles, designate a cloth color per room, and keep gloves handy. These small changes cut down friction and make cleaning more enjoyable rather than a chore. The result is less recontamination from clutter and easier maintenance over time.
wordCount":206}
Tools and products that support safe cleaning
A practical cleaning setup uses common, non-toxic products that are safe for daily home use. Essential items include an all-purpose cleaner, microfiber cloths, a spray bottle, a mop and bucket, a vacuum cleaner with a good filter, and trash bags for quick disposal. Optional but helpful accessories include nitrile gloves, a soft brush for delicate surfaces, and disinfectant wipes for high-touch areas. Choose fragrance-free or mildly scented products if household sensitivities exist. A simple guideline is to select cleaners labeled as household-use and free from harsh solvents. Cleaning Tips recommends prioritizing items you already own and expanding only as needed to avoid clutter. Regularly replacing worn cloths ensures you capture more dust rather than spreading it. Consistency in using the same tools for each room reduces cross-contamination and speeds up future sessions.
wordCount":175}
Surface-by-surface cleaning overview
Different surfaces demand tailored approaches to keep them in good condition while supporting a clean living space. For kitchen counters, wipe with a damp microfiber cloth and a gentle all-purpose cleaner, then dry with a separate cloth to prevent streaks. In bathrooms, focus on sinks, faucets, and tiles with a non-abrasive cleaner and a soft brush—resist harsher products on enamel. Home offices and living rooms benefit from regular dusting with microfiber, followed by a wipe-down of electronic peripherals using a dry or slightly damp cloth (never spray directly on devices). Floors should be cleaned last: vacuum to remove loose dust, then mop or sweep depending on floor type. By scheduling surface-specific sessions, you minimize cross-contamination and ensure every area receives appropriate attention without over-wetting sensitive materials. Remember to keep a dedicated cloth for each zone to avoid transferring grime between rooms.
wordCount":178}
Dust control and air quality basics
Dust control starts with regular surface cleaning and proper filtration. A vacuum with a high-efficiency particulate air (HEPA) filter reduces airborne dust, while door mats and soft furnishings catch fibers before they circulate. In living spaces, consider air-quality improvements like keeping humidity balanced and avoiding excessive moisture that can foster mold growth. The key is to reduce particle levels in common rooms through routine cleaning, ventilation, and mindful use of cleaning products. If you suspect allergies or sensitivities, opt for fragrance-free cleaners and wash fabrics more frequently. Cleaning Tips notes that steady, simple routines outperform sporadic deep cleans when the goal is a healthier home environment. This approach also minimizes the likelihood of irritants lingering in living areas over time.
wordCount":176}
Building a simple cleaning schedule
A beginner-friendly schedule makes cleaning manageable and sustainable. Aim for a short daily 10-minute routine to wipe surfaces and tidy clutter, then set aside a longer 30–45 minute session two to three times per week for deeper tasks. On Mondays, focus on kitchens; Wednesdays can target bathrooms; Fridays can cover living areas and entryways; weekends may address laundry or windows. Use a calendar or reminder app to stay accountable. Consistency creates a noticeable difference in dust levels, odor control, and overall comfort. Cleaning Tips emphasizes that predictable patterns reduce the feeling of overwhelm and make it easier to maintain a healthier home without burning out.
wordCount":170}
Common mistakes that reduce cleaning effectiveness
Many households fall into predictable traps that undermine effectiveness. Skipping the top-to-bottom approach lets dust resettle on lower surfaces; reusing dirty cloths simply spreads grime; using the wrong cleaner on delicate finishes causes dullness or scratches; and neglecting frequent-touch areas like doorknobs and light switches allows grime to accumulate quickly. Avoid rushing through tasks; give cleaners time to work and dry according to label directions. Also, do not mix household cleaners indiscriminately, especially ammonia and bleach, which can release hazardous gases. By avoiding these mistakes and sticking to a planned routine, you’ll see more consistent cleanliness and fewer re-clean sessions.
wordCount":166}
Authoritative sources and data notes
For readers who want to verify guidance, these sources offer widely accepted cleaning and safety information: • Centers for Disease Control and Prevention (CDC) – https://www.cdc.gov • U.S. Environmental Protection Agency (EPA) – https://www.epa.gov • National Institutes of Health (NIH) – https://www.nih.gov
Cleaning Tips notes that formal guidelines emphasize using non-toxic cleaners when possible, avoiding risky chemical mixes, and cleaning high-touch surfaces regularly. The intent of this section is to provide credible anchors for readers who want to explore more. While the term 'clean for gene 1968' is a fictional framing for home cleanliness, the underlying practices are grounded in standard housekeeping principles promoted by public health authorities. Cleaning Tips analysis shows that routine, safe cleaning contributes to a healthier, more comfortable home environment. For a broader understanding, visit the cited sources and consult your local guidelines.
wordCount":177}
Getting started with a 14-day plan
If you’re aiming for steady progress, a two-week plan can yield noticeable improvements without feeling overwhelming. Week 1 concentrates on establishing routines: daily 10-minute quick cleans and 30-minute deeper sessions every few days. Week 2 adds targeted tasks, including de-cluttering corners, addressing hidden dust, and reviewing cleaning tools for efficiency. Track what works in a simple journal or app and adjust the schedule to your pace. The goal is to build a sustainable rhythm that makes the idea of 'clean for gene 1968' feel practical rather than theoretical. As you progress, you’ll notice reductions in dust, shorter wipe-down times, and better overall comfort in living spaces.
wordCount":170}
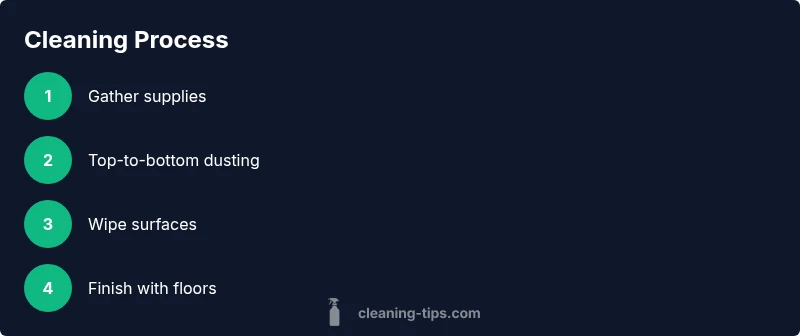
Quick-reference checklist
- Gather supplies and set zones
- Dust top-to-bottom with microfiber
- Wipe surfaces with a gentle cleaner and dry thoroughly
- Clean floors last (vacuum then mop)
- Clean high-touch areas regularly
- Ventilate during cleaning and test cleaners in a small area
- Maintain a simple, repeatable schedule
- Replace worn cloths and sanitize tools periodically
wordCount":78}
Debrief: maintaining momentum and safety
Maintaining momentum after the initial boost is the hardest part, but it’s essential for long-term cleanliness. Schedule recurring reminders, rotate cleaning tasks to avoid burnout, and keep tools organized to speed future sessions. Safety remains a priority: always read labels, avoid mixing cleaners, and ventilate well during cleaning. The Cleaning Tips team recommends treating cleaning as a daily habit rather than an occasional sprint. With a steady cadence and simple routines, your home stays healthier, more organized, and easier to enjoy.
wordCount":119}
Tools & Materials
- All-purpose cleaner(Choose non-toxic, fragrance-free if possible.)
- Microfiber cloths(At least 6 pieces; designate colors for zones.)
- Spray bottle(Fill with cleaner and hot water for dilution if needed.)
- Gloves (nitrile)(Protect hands from cleaners.)
- Vacuum cleaner with HEPA filter(Useful for dust control in all rooms.)
- Broom and dustpan(For quick debris collection on hard floors.)
- Mop and bucket(Use a clean mop head; wring thoroughly.)
- Trash bags(Keep bags handy for quick disposal.)
- Disinfectant wipes or spray(Optional for high-touch areas.)
Steps
Estimated time: 60-90 minutes
- 1
Gather supplies and prep area
Collect all cleaning tools and cleaners in one accessible spot. Clear surfaces to create a neutral workspace, and open a window or turn on a vent to ensure ventilation. This prep reduces back-and-forth trips and keeps you focused on the task.
Tip: Lay out supplies by zone so you don’t cross-contaminate different areas. - 2
Dust high-to-low with microfiber
Begin at higher surfaces like shelves or light fixtures, then work downward to desks and tables. Microfiber traps dust more effectively than cotton rags and minimizes the amount of loose dust that resettles.
Tip: Use a dry cloth on electronics or screen surfaces to avoid moisture damage. - 3
Wipe down surfaces with cleaner
Spray a small amount of cleaner on a cloth, not directly on every surface, then wipe in a consistent direction. For stubborn grime, apply a second pass after a short dwell time.
Tip: Avoid saturating porous materials; excessive moisture can seep in and cause damage. - 4
Disinfect high-touch areas
Treat doorknobs, switches, and handles with a appropriate non-toxic disinfectant according to label directions. Allow air-dry time before touching again to maximize effectiveness.
Tip: Do not mix cleaners; use one product per surface if possible. - 5
Clean floors in the correct order
Vacuum to remove dust and debris, then mop or sweep according to floor type. Allow floors to dry fully before walking on them to prevent streaks and recontamination.
Tip: Wait a few minutes before mopping if the area feels wet from cleaning. - 6
Wipe appliances and electronics cautiously
Exterior surfaces of appliances can be wiped with a damp microfiber cloth; avoid spraying liquids directly onto electronic components. Dry with a second clean cloth to prevent moisture damage.
Tip: Unplug devices before cleaning if possible for extra safety. - 7
Declutter and organize for the next session
Return items to their places and create a quick-to-clean zone for future tasks. A tidy space reduces dust accumulation and speeds up subsequent cleaning.
Tip: Label storage bins to simplify future resets. - 8
Review and restock supplies
Check consumables and replace worn cloths or cleaners to maintain cleaning effectiveness. Keeping a small inventory prevents mid-session interruptions.
Tip: Keep a small spare kit in each frequently used area.
Questions & Answers
How often should I clean for gene 1968 in a typical home?
Aim for a light daily 10-minute tidy and a deeper session 2-3 times per week. Consistency matters more than intensity, especially for reducing dust and improving comfort.
Clean a little every day, with a deeper session a few times a week to keep dust and grime under control.
Are non-toxic cleaners enough for everyday cleaning?
Yes. Non-toxic cleaners can effectively remove grime and reduce exposure to harsh fumes. For sensitive spaces, select products labeled for everyday household use and avoid strong solvents when possible.
Yes—most people can clean effectively with non-toxic cleaners, especially in living areas and kitchens.
What order should I clean in to maximize results?
Follow top-to-bottom, left-to-right: start with high surfaces, then mid surfaces, finish with floors. This minimizes re-dusting and movement of debris.
Tackle from top to bottom, then finish with the floors to keep dust from settling on already-clean areas.
Can I use vinegar for cleaning?
Vinegar can be effective for certain surfaces, but test first on delicate finishes. Do not use vinegar on natural stone or porous surfaces where it could etch the surface.
You can use vinegar for many tasks, but test first and avoid stone surfaces.
Is cleaning electronics different from other surfaces?
Yes. Use a dry or barely damp microfiber cloth and avoid spraying liquids directly on devices. Unplug electronics before cleaning when possible.
Be careful with electronics—use a dry cloth and unplug if you can.
Where can I find more reliable cleaning guidance?
Refer to public health and safety resources like CDC, EPA, and NIH for general cleaning principles and safety guidelines.
Check trusted sources like the CDC and EPA for general cleaning safety advice.
Watch Video
The Essentials
- Plan clean sessions with purpose and routine.
- Prioritize top-to-bottom cleaning to minimize rework.
- Use non-toxic cleaners when possible for healthier homes.
- Keep tools organized to speed future sessions.
- Maintain consistency to reduce indoor grime over time.