How to Clean a Sponge: Safe, Simple Hygiene Tips for Home
Learn practical, step-by-step methods to clean and sanitize kitchen and bathroom sponges, extending life and reducing bacteria growth. Cleaning Tips shows homeowners how to care for a clean sponge with safe, easy routines.

Regularly sanitize and fully dry your sponge after use to maximize lifespan and cleaning efficacy. Choose a repeatable method—microwave, dishwasher, or vinegar soak—and run it weekly, followed by thorough air-drying.
Why a clean sponge matters
A clean sponge is more than a convenience—it's a frontline tool for home hygiene. Sponges collect food particles, moisture, and microorganisms that can multiply quickly in damp environments. The Cleaning Tips team highlights how routine care helps minimize cross-contamination in kitchens and bathrooms, where sponges are frequently used on countertops, dishes, and sinks. When a sponge is dirty or damp for extended periods, it becomes a haven for bacteria, yeast, and mold, potentially transferring grime to surfaces you touch daily. By adopting a simple, repeatable care routine, homeowners and renters can improve cleaning outcomes and reduce odors that signal microbial growth. According to Cleaning Tips, a well-maintained sponge not only cleans more effectively but also lasts longer between replacements. This section emphasizes practical habits you can implement today, such as separating sponges by task and ensuring you have a dedicated, properly dried sponge for each job. The goal is to create a safe, efficient workflow that prioritizes hygiene without adding complexity to your cleaning routine.
Types of sponges and when to use them
Sponge choice matters for sanitation and performance. Cellulose sponges are highly absorbent and inexpensive, but they dry slowly and can harbor microbes if left damp. Synthetic foams dry more quickly and tolerate aggressive cleaning agents better, making them a versatile choice for everyday tasks. Scrub sponges with rough scouring pads are excellent for stuck-on grime but need careful handling to avoid scratching delicate surfaces. Natural sea sponges, though less common, can offer durability and a different texture for gentle cleaning. When choosing a clean sponge, consider moisture recovery, airflow around the surface, and how you intend to clean or sanitize it. For households with a lot of grease and food residue, a dual-texture sponge can be particularly effective, provided you rotate between surfaces to avoid cross-contamination. Cleaning Tips recommends having at least two sponges in rotation: one for general wiping and another reserved for sanitizing routines. Remember to replace any sponge that shows wear, persistent odor, or visible mold growth. By matching sponge type to your cleaning tasks, you can maintain higher hygiene standards with less effort over time.
How to clean a sponge effectively
Effective sponge care blends mechanical cleaning with chemical or heat-based disinfection. Start with a quick rinse under warm running water to remove loose debris, then wash with mild dish soap to lift oils and particulates. For many surfaces, a rinse-and-scrub is enough to restore absorbency, but true sanitization requires a disinfection step. You can disinfect with a heat method (microwave or dishwasher) or a chemical soak (vinegar or hydrogen peroxide). The choice depends on your equipment and comfort level. If you have a microwave, dampen the sponge (to prevent drying out and scorching) and heat briefly until it steams. A dishwasher cycle with a hot drying phase also works well for many sponges. A vinegar soak—mix one part vinegar to two parts water in a cup or bowl for several minutes—offers an accessible, gentler option. The key is to ensure the sponge dries completely after treatment to prevent recontamination. Cleaning Tips emphasizes that consistent, repeatable steps are more valuable than a perfect one-time clean.
Disinfection methods explained
Here are practical disinfection methods explained for everyday homes. The microwave method is quick and avoids chemical residues, but only use it if the sponge is microwave-safe and dampened to prevent overheating. The dishwasher method leverages high heat and efficient rinsing, making it convenient if you routinely run top-rack cycles. A vinegar soak provides a chemical-free option using a simple solution of white vinegar and water; it’s gentle on surfaces and affects odor reduction without harsh fumes. If you prefer, hydrogen peroxide can be used as an alternative disinfectant with a short soak. Each method has its own pros and caveats: heat methods require careful handling to avoid burns or damage to the sponge, while chemical soaks depend on ensuring the sponge is thoroughly rinsed before reuse. Consistency matters more than the method chosen—sanitizing on a regular schedule is the most reliable way to maintain a clean sponge.
Drying and storing to prevent odor and bacteria
After any cleaning or disinfection step, drying is the unsung hero of sponge hygiene. Wring out excess moisture, then place the sponge on a drying rack, in a well-ventilated area, or in sunlight if possible. Avoid storing damp sponges in closed containers or drawers, which can trap moisture and foster mold and mildew. Airflow is critical: choose storage that allows air to circulate around all sides of the sponge. If you keep multiple sponges, designate a separate drying space for each to prevent cross-contamination while they air out. Cleaning Tips suggests rotating sponges and using a designated spot for sanitizer before storage in a dry, accessible location. A thoroughly dried clean sponge will retain its absorbency longer and resist stubborn odors.
How to extend sponge life with routine care
Extending the life of a clean sponge comes down to rotation, proper drying, and prompt replacement when signs of wear appear. Maintain a simple rotation schedule: use one sponge for routine cleaning, and dedicate another for disinfection steps. Always allow sponges to dry completely between uses, since damp environments accelerate microbial growth. If a sponge begins to smell, change its use or sanitize it immediately; persistent odors are a sign that bacteria or mold have taken up residence. Periodically rinse sponges thoroughly with hot water and a tiny amount of soap to remove oils, then dry. If you notice visible cracks, thinning fibers, or color changes, treat the sponge as compromised and replace it. Cleaning Tips notes that while sponges are affordable, investing in regular rotation and mindful disposal reduces the overall amount of waste while maintaining high cleaning performance.
Common myths about sponge cleaning debunked
There are several myths around cleaning sponges that can lead to misuse. Myth: microwaving a sponge sterilizes it completely. Reality: microwaving can kill surface bacteria but may not reach deeper fibers; use it as part of a broader routine. Myth: a longer soak always makes a sponge safer. Reality: overly long soaks can degrade fibers and retain moisture that promotes mold. Myth: any detergent is safe for all sponges. Reality: some sponges are designed for specific cleaners, and harsh chemicals can damage fibers or leave residues. The truth is simple: regular rinsing, appropriate disinfection, thorough drying, and timely replacement create a practical, effective cleaning cycle that reduces germ presence without complicating daily routines. The Cleaning Tips team emphasizes implementing consistent habits rather than chasing perfect, one-off sanitization.
When to replace a sponge and what to look for
A sponge isn’t meant to last forever. Replace it when it shows signs such as persistent odors, visible mold, tears, or frayed fibers, which indicate reduced effectiveness and potential harboring of microbes. If the sponge remains stiff after cleaning, or if it retains a grimy feel after a standard rinse, it’s a sign it has degraded. For most households, rotating sponges every couple of weeks is practical, but if your cleaning tasks involve raw foods or heavy grease, you may prefer more frequent changes. Keeping spare sponges on hand helps you maintain hygiene without interrupting your routines. The key takeaway is to treat a sponge as a consumable cleaning tool: monitor its condition, sanitize regularly, and replace when performance declines or odors return.
Creating a simple weekly cleaning routine for your kitchen and bathroom
A straightforward weekly routine keeps your sponge in peak condition without being burdensome. Start with a light rinse after each use, then designate a weekly sanitizing session using your preferred method (microwave, dishwasher, or vinegar soak). On the same day, perform a quick wipe-down of key surfaces to reinforce hygiene habits. If you have multiple sponges, rotate their use by zone—kitchen sponge for dishes, bathroom sponge for sinks—so each sponge experiences a similar wear pattern. Finally, store sponges in a dry, well-ventilated spot to speed up drying. Keeping a simple chart or reminder helps your household stay on track, ensuring your cleaning tools perform well and minimize the spread of germs. Cleaning Tips highlights that consistency beats intensity when maintaining sponge hygiene over time.
Tools & Materials
- Standard cleaning sponge(One sponge per cleaning session; rotate between tasks)
- Mild dish soap(For routine cleaning and oil removal)
- White vinegar (5% acidity)(For odor control and gentle disinfection)
- Baking soda(Optional scrub and deodorizing paste)
- Microwave(For heat disinfection (damp sponge only))
- Dishwasher with top rack(High-heat cycle helps sanitize and dry)
- Small bowl(For soaking solutions or vinegar mixes)
- Drying rack or clean towel(Promotes complete air-drying between uses)
- Safety gloves(Optional for handling hot utensils or harsh cleaners)
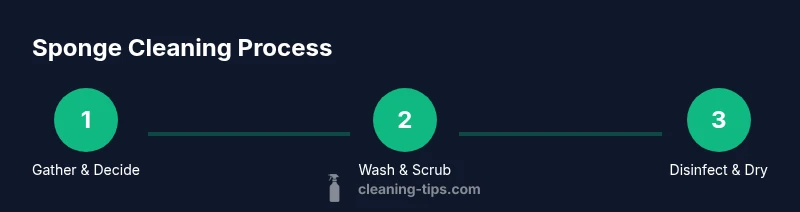
Steps
Estimated time: 15-25 minutes
- 1
Gather supplies and choose method
Collect your sponge, dish soap, and a drying area. Decide whether to disinfect with heat (microwave or dishwasher) or a chemical soak (vinegar or hydrogen peroxide). This upfront choice helps you follow a clear routine without improvising mid-task.
Tip: Have a separate sponge for kitchen surfaces and for bathroom surfaces to avoid cross-contamination. - 2
Rinse and wring to remove debris
Rinse the sponge under warm water to remove loose particles, then wring it well to remove most moisture. A dry sponge is less likely to promote bacterial growth during the next cleaning step.
Tip: Squeeze from the center outward to minimize fiber damage. - 3
Wash with soap and warm water
Lather the sponge with mild dish soap and warm water, then scrub gently to lift oils and residue. Rinse again until the water runs clear. This step restores absorbency and readies the sponge for disinfection.
Tip: Avoid using abrasive scrubs that can tear fibers. - 4
Disinfect using your chosen method
Use heat (microwave or dishwasher) or a chemical soak (vinegar or hydrogen peroxide) to reduce microbial load. If using heat, dampen the sponge and heat briefly until steaming; if using a soak, submerge in the solution for several minutes and rinse well afterward.
Tip: Never mix bleach with vinegar in a soaking solution; use one method at a time. - 5
Dry thoroughly and store properly
After disinfection, dry the sponge completely on a rack or clean towel. Avoid enclosing damp sponges in closed containers which trap moisture and foster mold.
Tip: Place sponges where air circulates; sunlight can help dry and deodorize. - 6
Inspect and schedule replacements
Check for lingering odors, discoloration, or wear. If present, replace the sponge to maintain hygiene. Keeping a small rotation reduces downtime and keeps cleaning tools effective.
Tip: If odor persists after sanitizing, treat as time to replace.
Questions & Answers
Can I microwave a sponge to disinfect it?
Yes, microwaving a damp sponge can help reduce surface bacteria. Do not use if the sponge has metal parts and ensure it is clearly damp to avoid overheating. This should be one of several routine steps, not the only method.
Microwave a damp sponge to reduce surface bacteria, as long as there are no metal parts. Use it as part of a regular routine.
How often should I sanitize my sponge?
Aim for a weekly sanitation cycle, plus a quick rinse after each use. If the sponge shows signs of odor or wear, sanitize more frequently or replace it sooner.
Sanitize weekly, rinse after each use, and replace if odors or wear appear.
Is it safe to use bleach on sponges?
Bleach can be used cautiously on some sponges, but avoid prolonged soaking and always rinse thoroughly before reuse. Check the sponge label for chemical compatibility and follow manufacturer guidelines.
Bleach can be used in some cases, but always check the sponge and rinse well before reuse.
What if my sponge smells even after cleaning?
Persistent odor usually means bacteria or mold has taken hold. Replace the sponge and review your drying and storage routine to prevent recurrence.
If odor lasts after cleaning, replace the sponge and adjust drying habits.
Are sponges reusable after sanitizing?
Sanitizing helps, but sponges have a finite lifespan. If they show wear, splitting fibers, or persistent odor, replace rather than continuing to reuse.
Sanitizing helps, but replace sponges when they wear out or smell.
Should I use different sponges for different rooms?
Yes. Assign one sponge to the kitchen and another to bathrooms to reduce cross-contamination. This simple separation can improve overall hygiene.
Yes—use separate sponges for kitchen and bathroom to reduce cross-contamination.
Watch Video
The Essentials
- Sanitize weekly to prevent bacteria buildup
- Dry thoroughly after each use
- Rotate sponges to extend life
- Choose a safe disinfection method you can repeat
- Replace when odor or wear persists