How to Clean Up a Picture: A Practical Home Guide
Learn how to clean up a picture, whether it’s a dusty frame or a faded print. This guide covers safe tools, step-by-step physical and digital cleanup, display tips, and expert best practices from Cleaning Tips.

This guide shows you how to clean up a picture, whether it's a dusty frame or a smudged print. You'll learn safe methods, the right tools, and a clear step-by-step process to restore clarity without damaging the artwork. Start with the frame, move to the glass, and finish with final touches for a pristine display.
Why cleaning up a picture matters
A clean, well-presented picture can brighten a room, protect a print from further damage, and preserve memories for years. The Cleaning Tips team emphasizes that gentle, regular care extends the life of framed artwork and photos alike. Dust and fingerprints settle on glass and frames, dulling color and obscure detail; addressing these issues with safe methods keeps your display looking vibrant. By establishing a simple routine, homeowners and renters can maintain a gallery-worthy presentation without expensive restorations or professional services. This guide focuses on practical, low-risk techniques you can perform at home while avoiding common mistakes that could harm delicate prints or wooden frames. Remember: the goal is to restore clarity while preserving the original materials for future enjoyment.
According to Cleaning Tips, consistent upkeep reduces buildup on glass and frame surfaces and minimizes the need for aggressive cleaning methods. The team recommends a calm, methodical approach rather than rushing through the process. With the right tools and a few minutes of attention, you can make a noticeable difference in how your picture looks and lasts.
Why cleaning up a picture matters and what you’ll gain from the process. The emphasis is on safety, preservation, and visible improvement for both framed photos and unframed prints.
Tip: Work in a well-lit area and lay a soft mat or towel underneath to protect surfaces. This approach aligns with Cleaning Tips’ care principles.
Tools & Materials
- Microfiber cloth(Lint-free; use dry for dusting, dampen slightly if needed)
- Distilled water(For glass and delicate surfaces)
- Mild dish soap(A few drops in water; avoid soaking)
- Soft-bristle brush(Dust edges and crevices gently)
- Cotton swabs(For corners and tight spots)
- Isopropyl alcohol 70%(Test in a hidden area first; use sparingly)
- Gloves(Optional to prevent oils from transferring)
- Old newspaper or lint-free tape(Helpful for protecting surfaces during handling)
Steps
Estimated time: 25-40 minutes
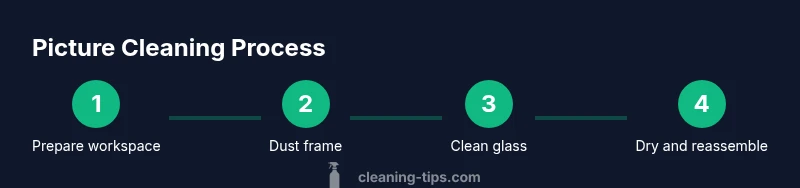
- 1
Prepare the workspace
Clear a clean, well-lit surface. Gather tools within easy reach and lay a soft mat underneath to prevent accidental damage. This reduces the risk of spills and scratches during the cleaning process.
Tip: Have a small tray ready to hold fragile parts like hanging hardware. - 2
Assess the frame and glass
Check for loose backing, flaking varnish, or damaged glass. If the print is sealed behind glass, you can clean the glass more freely; if the print is exposed, avoid liquids near the artwork. This assessment guides your approach and helps prevent further damage.
Tip: If the frame is warped or nails are loose, address those before cleaning. - 3
Dust the frame and edges
Use a soft brush or microfiber cloth to remove surface dust from the frame and molding. Move in gentle, consistent strokes to avoid scratching. Dust often hides in corners where a brush will reach better than a cloth.
Tip: Dust first to prevent pushing particles into the glass when you later wipe. - 4
Clean the glass carefully
Lightly dampen a microfiber cloth with a mild soap solution (distilled water + a drop of dish soap). Wipe the glass with straight, even strokes, then dry with a clean cloth. Avoid spraying liquids directly onto the glass to prevent seepage behind the print.
Tip: For stubborn fingerprints, use a cotton swab moistened slightly with the solution and work from the center outward. - 5
Clean the frame and mat
If the frame is wood, wipe with a barely damp cloth and dry immediately to prevent moisture damage. For fabric mats or molded plastics, use a dry microfiber or a lightly damp cloth as appropriate. Do not saturate, especially on older frames.
Tip: Test any cleaner on a hidden corner first to ensure no color transfer or staining. - 6
Dry, reassemble, and inspect
Use a dry microfiber cloth to remove any remaining moisture. Reassemble the backing and secure the hardware. Inspect the display from a distance to ensure no streaks or smudges are visible.
Tip: Take a before/after photo to verify progress and guide future touch-ups. - 7
Optional digital backup
If the physical piece is at risk of further wear, photograph it accurately for digital archiving. A high-quality image lets you preserve the memory even if the original piece is sensitive to cleaning.
Tip: Use natural light and a neutral background for best results.
Questions & Answers
Can I clean a picture without removing it from the frame?
Yes, you can clean the glass while the picture remains in the frame if you’re careful. Focus on the glass surfaces and use a minimal amount of moisture to avoid seepage; if the print touches the glass, consider removing it for a thorough cleaning.
Yes, you can clean the glass without removing the picture, but be careful and use minimal moisture so you don’t damage the print.
What cleaning solutions are safe to use?
A mild soap solution with distilled water is generally safe. Avoid ammonia-based cleaners on wood frames and prints unless you’ve tested a hidden area first. If in doubt, stick to water and a microfiber cloth.
Use a mild soap solution with distilled water, and avoid ammonia-based cleaners on wood frames. Test first if unsure.
Do I need special tools for stubborn smudges?
For stubborn marks, use cotton swabs with a tiny amount of solution, working from the center out. Switch to a dry microfiber cloth for final polish to prevent streaks.
For stubborn smudges, try a tiny amount on a cotton swab and work from the center outward, then dry with a microfiber cloth.
Can I clean a canvas frame or print?
Canvas requires extra care; avoid liquids that could weaken the fibers. Use a dry microfiber brush to remove surface dust and consider consulting a professional for restoration if damage is present.
Canvas needs gentler handling; keep it dry and consult a pro if there’s damage.
Is it safe to speed-dry a frame with a hair dryer?
Avoid heat sources that could warp wood or parchment inside; let air dry naturally in a well-ventilated area. Patience prevents warping or color changes.
Don’t use heat to dry; air-dry in a ventilated area to avoid warping or color shifts.
What should I do if there is mold on the frame?
If mold is visible, stop cleaning and seek professional guidance. Protect yourself and the artwork, as mold can damage materials and pose health risks.
If you see mold, stop cleaning and consult a professional; mold can be harmful and damaging.
Watch Video
The Essentials
- Prepare a clean, well-lit workspace before starting
- Inspect the frame and glass to choose safe methods
- Dust first, clean glass with minimal moisture, avoid saturating wood
- Dry thoroughly and reassemble carefully for optimal display