How Hard to Clean Throttle Body: A Practical DIY Guide
Discover how hard it is to clean a throttle body, what affects difficulty, essential tools, step-by-step DIY steps, safety tips, and when to seek professional help. A comprehensive, beginner-friendly guide for healthier engine breathing.

Cleaning a throttle body is a moderate DIY task that most homeowners can handle with basic mechanical aptitude. You’ll need common tools, proper cleaners, and a patient, methodical approach. Expect about 45–90 minutes for a simple cleaning on many vehicles, plus time for checks and reassembly. If you drive a turbocharged or direct-injection engine, plan for extra care or professional help.
What is the throttle body and why cleaning matters
The throttle body is a valve that regulates the amount of air entering the engine. In many modern cars it sits between the air intake hose and the intake manifold, controlled by the accelerator pedal or by the engine computer. Over time, carbon buildup, dust, and oil residues collect on the throttle blade and in the bore, which can cause rough idle, hesitation, and reduced fuel economy. Cleaning this component helps the engine breathe easier, restores idle stability, and can improve throttle response, especially after extended city driving. According to Cleaning Tips, a careful, methodical approach with the right cleaners and tools minimizes risk to sensors and gaskets while delivering real benefits. Always identify whether your car uses a cable-driven throttle or a drive-by-wire (DBW) system, as the approach and precautions differ slightly. A clean throttle body isn’t a magical fix, but it can restore smooth operation when buildup has become noticeable.
How hard is cleaning throttle body? Key factors
Several variables determine difficulty: engine design (DBW vs. cable), access to the throttle body, and the presence of an electronically controlled throttle position sensor. If the throttle body is easy to reach behind the air intake, cleaning is typically straightforward. In tight engine bays, or in vehicles with integrated sensors, you’ll work more carefully to avoid damaging wiring and connectors. The cleaner you choose matters (throttle body cleaner or a safe carb cleaner), how thoroughly you scrub without bending components, and whether you replace gaskets if needed. For older vehicles with heavy varnish, expect more time and more careful scrubbing. A straightforward DIY approach works for most users; however, on complex or high-mileage engines, a professional service can ensure seals and sensors stay aligned.
DIY vs professional: when to DIY
DIY cleaning is appealing for budget-minded car owners, provided you have a clean workspace, protective gear, and patience. If your vehicle uses a turbocharged engine or direct injection, the throttle body area is more sensitive, and improper cleaning can lead to sensor faults or vacuum leaks. In those cases, or if you notice wiring harnesses near the throttle body that look brittle, it may be safer to consult a professional. For many vehicles, a well-executed DIY cleaning reduces rough idle and can improve throttle response. Always check your owner’s manual and service notes before starting, and consider a professional inspection if you’re unsure about the configuration.
Tools and safety preparations
Before you begin, assemble the essential tools and protective gear. Gather safety glasses, gloves, a solvent-safe workspace, rags, and the right cleaner for your throttle body type. You’ll also need basic hand tools to remove air intake ducts or sensors, plus a soft-bristle brush for gentle scrubbing. Label disconnected parts to ensure proper reassembly, and be mindful of electronic connectors. Working in a well-ventilated area helps avoid inhaling fumes from cleaners. If you’re unsure about a sensor or gasket, err on the side of caution and pause the project to consult a repair guide.
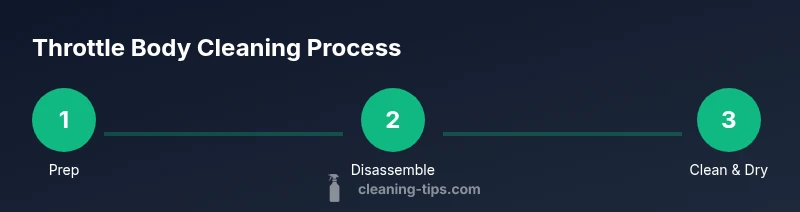
Step-by-step overview (high-level)
Here’s a quick outline of the process you’ll perform when tackling a throttle body clean: (1) prepare the workspace and disconnect the battery, (2) gain access by removing intake components, (3) inspect and protect sensors, (4) spray cleaner and scrub the blade, (5) wipe and dry thoroughly, (6) reassemble, (7) reconnect electricals and battery, (8) test idle and drive to confirm improvements. This overview helps you plan and avoid surprises during the actual steps.
Cleaning procedure: detailed sequence
A thorough throttle body cleaning requires patience and a careful touch:
- Disconnect the battery, then remove the air intake duct to access the throttle body. This grants clean access and reduces the risk of contaminating the intake with debris.
- Inspect the throttle body for varnish, carbon buildup, and any signs of damage or wear. Note sensor positions and take photos if needed.
- Use throttle body cleaner and a soft-bristle brush to gently scrub the blade and bore. Do not aggressively scrape; you can damage the coating or the sensors. If carbon is stubborn, apply a second pass after a few minutes of dwell time.
- Wipe away residue with clean rags until the bore and blade appear shiny but not polished. Avoid leaving lint or fibers in the throttle body.
- Reinstall all components, reconnect sensors, and ensure vacuum lines and hoses are properly seated. Reconnect the battery last.
- Start the engine and allow it to idle; the ECU may re-learn idle settings. If you notice stalls or rough idle, re-check connections and ensure there are no vacuum leaks.
Common mistakes and troubleshooting
Common mistakes include using too much cleaner, which can wash into sensors or cause intake residue; scrubbing too aggressively, which can scratch the blade or damage seals; and failing to disconnect the battery, which risks short circuits. If the engine runs poorly after cleaning, verify sensor connections and look for vacuum leaks. A forgotten bracket or gasket can create an intake leak that mimics dirty throttle body symptoms. If you unsure about a step, slowing down and double-checking connections is generally safer than rushing.
Safety considerations and warnings
Always work in a well-ventilated area and wear eye protection. Throttle body cleaners are solvents; avoid skin contact and inhalation. Do not spray cleaners directly into sensors, connectors, or the throttle position sensor. Keep the battery disconnected until reassembly is complete, and ensure the intake system is reconnected correctly to avoid vacuum leaks. If your engine uses a DBW system, avoid forcing the throttle plate or misaligning the sensor. Finally, dispose of used rags and solvent-soaked waste according to local regulations.
Maintenance tips to prevent buildup
Regular maintenance can minimize throttle body buildup. Run top-tier fuel and use ethanol- or moisture-reduction additives as advised by your vehicle’s maker. During oil changes, inspect for oil leaks that can contribute to varnish buildup near the intake. Consider a light weekly drive pattern that helps keep the intake air clean through the air filter. If your driving is mostly short trips, you may want to perform a light cleaning if you notice rough idle at the end of a cold start.
Time and cost estimates, and what to expect
A typical throttle body cleaning project takes anywhere from 45 minutes to 90 minutes for a straightforward job on many vehicles. Expect longer if you encounter stubborn varnish, a difficult-to-reach throttle body, or if you’re new to the process. Costs for DIY cleaning are primarily the price of cleaner, rags, and basic tools—usually modest, depending on the solvent quality and whether you need to replace a gasket. If you opt for professional service, you’ll be charged for labor and any replacement parts. A quick, honest evaluation at a shop can help you decide whether DIY is worth it given your vehicle and skills.
Tools & Materials
- Safety glasses(Impact-resistant; always wear when spraying solvents)
- nitrile gloves(Protect skin from solvents)
- Throttle body cleaner(Choose an appropriate, safe solvent)
- Soft-bristle brush(Non-abrasive; prevents blade scratching)
- Rags or lint-free cloths(For wiping residue and drying)
- Screwdrivers and socket set(To remove air intake components)
- Torque wrench (optional)(Useful when reinstalling parts with torque specs)
- Gasket or gasket sealant (optional)(Replace if you notice leakage or wear)
- Shop rag bucket or waste disposal bag(Dispose of used solvents properly)
- Camera or notebook (optional)(Photograph connectors and hoses for accuracy)
Steps
Estimated time: 45-90 minutes
- 1
Disconnect battery
Begin by disconnecting the negative battery terminal to prevent any shorts while you work near sensors and electronics. This also resets the ECU learning after reassembly.
Tip: Wait 60 seconds after disconnecting to ensure circuits are fully unpowered. - 2
Access the throttle body
Remove the air intake duct and any shielding to expose the throttle body. Keep track of every hose and connector you detach for proper reassembly.
Tip: Take a quick photo of sensor positions before removing connectors. - 3
Inspect sensors and seals
Check the throttle position sensor and any voltage or signal wires for damage. If you find cracked hoses or brittle connectors, replace them before proceeding.
Tip: Do not force connectors; unplug gently to avoid pinching or breaking wires. - 4
Apply cleaner and scrub
Spray throttle cleaner onto the blade and bore; allow a brief dwell, then use a soft brush to remove varnish. Wipe away loosened residue with a clean cloth.
Tip: Avoid soaking sensors; spray only on the metal surfaces you intend to clean. - 5
Dry and inspect again
Wipe the area dry with lint-free towels and re-check for any remaining buildup. Ensure there’s no solvent residue before reassembly.
Tip: If residue remains, repeat the spray-and-wipe step rather than forcing it off with tools. - 6
Reassemble components
Reconnect sensors, hoses, and the air intake duct exactly as you found them. Ensure clamps are tight and hoses seated evenly to prevent leaks.
Tip: Double-check the intake hose clamp position and re-check torque specs if you used a torque wrench. - 7
Reconnect battery and ECU
Reconnect the negative battery connection. Start the engine and let it idle for a few minutes so the ECU relearns idle and base fuel trims.
Tip: If you see a rough idle, give the ECU a bit more time to settle in before driving. - 8
Test drive and verify
Take a short test drive to verify smooth idle, normal throttle response, and no vacuum leaks. If symptoms persist, re-check all connections and consider a professional assessment.
Tip: Note any long-term errors or warning lights; address them promptly.
Questions & Answers
Is throttle body cleaning a DIY-friendly task for beginners?
For many cars, yes, but beginners should follow safety steps and avoid sensor disruption. If you have a DBW system or direct injection, proceed cautiously or consult a guide. Start with a clean workspace and a clear plan.
Yes, many beginners can DIY this task with proper safety steps. If you have a DBW system, proceed cautiously and check the wiring first.
Will cleaning the throttle body fix rough idle or stalling?
Cleaning can improve idle stability and throttle response when buildup is the cause. If symptoms persist after cleaning, there may be other problems such as vacuum leaks, sensor faults, or fuel delivery issues.
Cleaning can help if buildup is the cause, but persistent symptoms might indicate other issues.
Do I need to disconnect the battery?
Yes. Disconnecting the negative battery terminal prevents shorts and resets the ECU learning after reassembly. Reconnect it after everything is reassembled and checked.
Yes, disconnect the battery to stay safe and reset the ECU after finishing.
Can I reuse the old gasket after cleaning?
If the gasket shows wear, cracks, or damage, replace it. A degraded gasket can cause vacuum leaks that mimic dirty throttle body symptoms, undermining the repair.
Only reuse if you inspect the gasket and it’s in perfect condition; otherwise replace it.
Are special tools required for throttle body cleaning?
Most tasks require basic hand tools, a soft brush, and a suitable cleaner. Some vehicles may need a torque wrench or sensor-safe tools; consult your service notes if in doubt.
Mostly standard tools are enough, but check your vehicle’s specs if you’re unsure.
How often should I clean the throttle body?
There’s no universal interval; clean when symptoms appear or as part of major maintenance on high-mileage vehicles. For some engines, annual checks are reasonable if you drive in dirty or short-trip conditions.
Clean as needed based on symptoms and driving conditions; there’s no fixed schedule.
Watch Video
The Essentials
- Identify if you have a DBW or cable throttle before starting
- Prepare with proper tools and protective gear
- Scrub gently to avoid sensor damage
- Reassemble carefully and allow ECU to relearn idle
- Seek professional help for complex engines or persistent issues