How to Fix Cleaning Mop: A Step-by-Step Guide
Learn how to diagnose and repair common mop problems—from loose handles to frayed fibers. A practical, step-by-step guide with safety tips and maintenance ideas to extend mop life and keep your home cleaning efficient.

By diagnosing common mop issues and performing simple repairs, you can restore cleaning efficiency and extend the life of your mop. According to Cleaning Tips, many problems come from loose connections, worn heads, or clogged fibers that are easy to fix with basic tools. This guide walks you through safe, step-by-step fixes you can try today.
Why Fixing Your Mop Matters
A well-maintained mop is essential for effective cleaning and healthier living spaces. When a mop performs poorly, you may use more product, spend more time scrubbing, or spread dirt rather than remove it. The Cleaning Tips team emphasizes that small repairs can extend tool life and prevent more waste than discarding and replacing. By diagnosing issues early—like a loose connection, frayed fibers, or a stiff hinge—you can restore performance at minimal cost. In addition to saving money, a fixed mop helps reduce plastic waste and conserves resources by delaying purchases. Practical maintenance routines also prevent hidden mold growth in damp environments, which is crucial for households with allergy sensitivities or high hygiene standards. If you feel uncertain about a fix, start with the simplest option and verify that the mop operates correctly after each adjustment. This approach keeps your cleaning routine efficient and safe, preserving your home environment. According to Cleaning Tips, a simple mop repair can save money and reduce waste while restoring performance.
Common Mop Problems and Their Causes
Mops fail for several common reasons, most of which are easy to address with basic tools. A loose handle or connection at the joint is often caused by worn threads, overtightened clamps, or a loose screw. Worn or torn mop heads are the second most frequent issue; fibers can fray, shedding lint and reducing absorption. Fiber clogs from hair, soap scum, or mineral buildup impede cleaning action and cause stiff rotation. Mold or mildew can develop in damp mop heads or handles if dry-out time is insufficient, creating odors and potential health concerns. Sprayers on spray mops may clog, reducing spray efficiency. If your mop uses a lever mechanism, the latch can break or slip, leading to a droopy head. Understanding these patterns helps you decide whether you can fix the part or if replacement is wiser. Always inspect both the handle and the head before deciding on a course of action, because these are the components most likely to wear out with regular use.
Choosing the Right Fix: Repair vs Replace
Deciding whether to repair or replace depends on the cost, availability of parts, and the severity of wear. If the mop head is cracked or the handle threads are stripped beyond reasonable repair, replacement is usually the best option. When fibers are simply dirty or bent, a thorough cleaning or trimming can restore function. For spray mops, clogged nozzles are often fixable with a cleaning solution and a small brush. If parts are hard to source for your exact model, consider a compatible upgrade rather than forcing an ill-fitting component. In general, prioritize fixes that restore full range of motion, secure connections, and hygienic performance. The Cleaning Tips team recommends weighing the cost and effort of parts against the benefit of a reliable mop before extending the life of a badly worn tool.
Common Part Names and Quick Diagnostic Tricks
Knowing common part names helps you source replacements quickly. The main components typically include the handle, joint, mop head (string, sponge, or flat), connectors, and, for spray mops, the nozzle. A quick diagnostic check involves wiggling the joint to feel for looseness, inspecting the threads for wear, and inspecting the mop head for fraying or stiffness. If you notice hair or soap scum buildup, clean the fibers with warm water and a mild detergent, then rinse thoroughly. For metal joints, listen for creaks or grinding sounds that indicate wear. Document any loose screws or damaged washers so you can source exact replacements and reassemble with confidence. This approach saves time and reduces the risk of forcing incompatible parts.
Cleaning and Maintenance to Extend Mop Life
Implementing a simple maintenance routine can significantly extend mop life. After each use, rinse the head to remove soap residue and wring out excess water. Allow the head and fibers to dry completely by standing the mop upright in a well-ventilated area. Store the mop in an upright position to prevent fiber bending and head deformation. Periodically deep-clean the head with a mild detergent solution and rinse well; for mold-prone heads, a vinegar solution can help disinfect without harsh chemicals. Inspect the connectors and screws monthly, tightening loose parts promptly. By incorporating these habits, you reduce the chance of moisture-related deterioration and keep the mop ready for the next cleaning cycle.
Quick Fixes You Can Try Today
- Tighten loose screws or clamps on the handle to restore stability.
- Replace a worn or frayed mop head with a compatible replacement kit.
- Clean the fibers by rinsing with warm water and mild detergent; trim frayed strands for better absorption.
- Soak the head briefly in a vinegar solution to disinfect and loosen mineral buildup.
- Dry the head thoroughly before storage to prevent mold growth and odor.
Safety Considerations and Final Checks
Always unplug or remove any power sources if you are using electrical cleaning tools nearby, and wear gloves to protect your hands from cleaners or sharp parts. Work in a well-ventilated area when using cleaners, and avoid mixing cleaners that could create hazardous fumes. After performing repairs, test the mop on a small area to ensure the fix holds and there are no loose parts. If you encounter a stubborn component that resists replacement, consult the manufacturer’s guidance or seek a compatible third-party part to avoid damage. Finally, document the fix you performed so future maintenance is faster and more accurate.
Tools & Materials
- Screwdriver set (Phillips and flat-head)(Phillips #1-2 and flat-head for common handle screws)
- Replacement mop head or mop head kit(Ensure compatibility with your mop model)
- Scissors or utility knife(Trim frayed fibers cleanly)
- Microfiber cleaning cloths(For wiping joints and drying head)
- Mild detergent or white vinegar(For cleaning and disinfection)
- Grout brush or old toothbrush(Helpful for deep cleaning joints and fibers)
- Replacement washers or O-rings(Stock up for common wear points)
- Lubricant (optional, silicone-based)(Apply sparingly to metal joints if stiffness occurs)
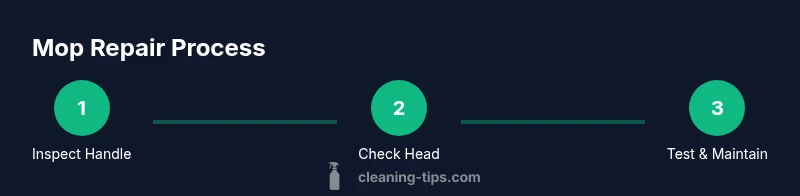
Steps
Estimated time: 30-45 minutes
- 1
Inspect the handle connection
Visually inspect the joint where the handle meets the mop head. Wiggle gently to feel for looseness and test by tugging on the handle. If there is any movement or wobble, tighten or replace the connector.
Tip: Take a photo of the connector before disassembly to aid reassembly later. - 2
Check the mop head and fibers
Examine the mop head for cracks, wear, or torn fibers. If the head is cracked or fibers are severely frayed, replace the head. Remove hair or debris from the fibers to restore absorption.
Tip: Use scissors to trim frayed fibers evenly for balanced cleaning. - 3
Clean and dry components
Rinse the head and fibers with warm water; apply a mild detergent if needed. Rinse thoroughly to remove any soap residue. Shake off excess water and allow parts to air-dry completely.
Tip: Drying fully prevents mold and odor in damp environments. - 4
Replace worn parts
Install the new mop head or any worn washers/O-rings. Ensure components fit firmly and align screws or clamps properly. Do not overtighten, which can strip threads.
Tip: Keep loose parts in a small tray to avoid losing them during reassembly. - 5
Reassemble and test
Reassemble all parts and test the mop on a small cleaning area. Check for wobble, stiffness, and proper fiber contact. If the mop drifts or head tips, adjust the alignment.
Tip: Run a quick cycle on a dry surface to confirm stability before regular use. - 6
Establish a maintenance routine
Schedule regular checks every few weeks and after heavy use. Clean and dry the mop after each session and store upright. Keep spare parts on hand for quick fixes.
Tip: Pair repairs with a short cleaning schedule to maximize tool life.
Questions & Answers
What are the most common mop problems that require fixing?
The most common issues include a loose handle, worn mop head, and clogged fibers. Inspect the handle joint, replace the head when needed, and clear fiber buildup to restore performance.
The most common problems are a loose handle, worn head, or clogged fibers. Check the joint, replace the head if needed, and clear buildup to fix it.
Should I repair or replace my mop?
If the head is cracked or the handle threads are stripped beyond repair, replacement is usually best. For minor wear or buildup, repair and cleaning are often sufficient to restore function.
If the head is cracked or threads are worn out, replace it. For minor wear, repair and clean it to save money.
Can household products damage mop fibers?
Some strong cleaners can degrade synthetic fibers over time. Use mild detergents and rinse thoroughly. For mold-prone heads, a mild vinegar rinse can help without harsh chemicals.
Strong cleaners can wear fibers faster. Use mild detergents and rinse well; a gentle vinegar rinse can help with mold.
Is it safe to use vinegar to disinfect a mop head?
Yes, a diluted vinegar solution is a safe disinfectant for many mop heads. Rinse thoroughly after soaking to avoid any residue that could transfer to surfaces.
Yes, dilute vinegar can disinfect, but rinse well afterward to remove any residue.
How long does a mop repair typically last?
Lifespan after a repair depends on usage and care. With proper maintenance, a repaired mop can function effectively for many cleaning sessions before another fix is needed.
It varies with use and care, but proper maintenance can keep a repaired mop usable for many cleanings.
What if parts aren’t available for my mop model?
If exact parts aren’t available, seek compatible alternatives from the same family of products or consider replacing with a model that uses common connectors. Avoid forcing incompatible parts.
If parts aren’t available, look for compatible options from the same family or consider a model with standard connectors.
Watch Video
The Essentials
- Diagnose before disassembly to save time.
- Replace worn parts rather than forcing repair.
- Keep fibers clean and dry after each use.
- Store mop upright to prevent deformation.
- Document fixes for easier future maintenance.