How to Make Clean Burning Candles: A Practical Guide
Step-by-step instructions to craft clean burning candles with natural wax, cotton wicks, and safe fragrances. Learn ingredient choices, safe melting, pouring, curing, and storage for healthier, pleasant-smelling candles at home.

By the end of this guide, you will know exactly how to make clean burning candles using natural wax, cotton wicks, and safe fragrance choices. You’ll learn how to select ingredients, melt wax safely, pour into molds, and cure candles so they burn evenly with minimal soot. This step-by-step method avoids paraffin and harsh additives, helping you create healthier candles for your home.
Why clean burning candles matter
Clean burning candles offer a healthier alternative to paraffin-based candles by reducing soot and other airborne particulates that can affect indoor air quality. When candles burn cleanly, they minimize the release of smoke and potentially irritating compounds, which is especially important for households with children, pets, or people with allergies or asthma. According to Cleaning Tips, clean burning candles can help maintain a fresher indoor environment, particularly when candles are used regularly in small living areas. The wax type, wick construction, and fragrance choice all influence combustion byproducts. In practice, choosing a natural wax blend and a lead-free, properly sized wick sets the foundation for a safer, more enjoyable candle. This section explains what to look for and how to align your recipe with cleaner burning performance.
Key ingredients for clean-burning candles
To make clean burning candles, start with three core components: wax, wick, and fragrance (optional). Natural waxes such as soy, beeswax, or coconut wax burn cleaner than traditional paraffin and tend to produce less soot when used with appropriate wicks. Wicks should be cotton or wood with a true, flat braid or braided core—tinned or zinc-coated wicks can add unnecessary burn impurities. Fragrance should be phthalate-free and kept within manufacturer-specified limits to avoid excessive smoking or glossing of the wax. If you prefer a fragrance-free option, you can rely on the scent of the wax itself. For color, you can use natural colorants or skip color entirely for a cleaner appearance. This section highlights why your ingredient choices matter and how they work together to create a tidy, efficient burn.
Wax options and wicks
Choosing the right wax and wick combo is a major factor in burn quality. Soy wax blends are popular for clean burning because they have a lower melt point and good scent throw when used properly. Beeswax adds firmness and a slower burn but can be a bit more opaque or yellow; it often requires a blend with another wax to improve pourability. Coconut wax offers a creamy texture and smooth burn but can be more expensive and less forgiving for beginners. For wicks, choose cotton or wooden wicks that are appropriately sized for your container and wax. Wicks should be flat and centered, with a stable base so they don’t drift during pouring. This section breaks down practical pairings and why they affect melt pool, flame height, and soot production.
Tools, workspace, and safety considerations
Safety starts with your workspace. Use a heatproof surface, a dedicated scale, and a thermometer to monitor melting temperatures. A double boiler or a dedicated wax melter reduces direct heat and minimizes scorching. Have a fire extinguisher or a bucket of sand nearby, and never leave melting wax unattended. Keep flammable materials away and use precision tools to measure wax, fragrance, and colorants. This section also covers setup tips like using wick centering devices and pre-wicking containers to prevent displacement as the wax cools. Proper organization speeds up the process and reduces mistakes that can impact burn quality or safety.
Fragrance and dye considerations
If you’re adding fragrance, keep loads within recommended percentages to preserve a clean burn and avoid excessive vapor. Fragrance oils rated safe for candles are preferred over regular room fragrances, and always check the maximum recommended load by weight for your chosen wax. Essential oils can be used in some waxes but tend to be volatile and may require adjustments to fragrance load and pouring temperature. For color, use pigment or dye chips designed for candle wax. Avoid adding water or incompatible additives, which can cause cracking, frosting, or poor fragrance throw. This section explains practical guidelines to balance scent strength, color, and burn quality while staying within safe usage limits.
Pouring, curing, and storage guidelines
Pour the melted wax into prepared containers at a temperature compatible with your wax type and wick, typically after a controlled melt-and-purge cycle. Center the wick, secure it with a wick holder, and pour slowly to minimize air pockets. Allow candles to cure undisturbed for several days to maximize scent throw and even burn; this step is crucial for avoiding surface cracks or sinkholes. Store finished candles in a cool, dry place away from direct sunlight to preserve fragrance and color. This section outlines practical timing, temperature targets, and storage conditions to ensure a reliable, pleasant result with every batch.
Troubleshooting common issues
Even with careful planning, you may encounter issues like poor melt pools, frosting, or sinking at the top. Common causes include too-high or too-low pouring temperature, wick misalignment, improper fragrance load, or insufficient curing time. Fixes range from repositioning the wick and adjusting pour temperature to resealing the surface with a thin layer of wax for a smoother top. By understanding typical symptoms and their causes, you can adjust your technique and ingredients to improve future batches. This section provides actionable diagnostics to help you troubleshoot quickly.
Authority sources and safety data
For further reading on candle safety and best practices, consult trusted sources such as NFPA, CPSC, and OSHA. These organizations provide general guidance on home flame safety and material handling that can inform your candle projects. While individual candle formulas vary, following professional safety guidelines helps reduce risk and improve burn quality. The sources listed here are widely recognized for their public safety information and standards related to consumer products and workplace safety.
Practical tips and best practices (from Cleaning Tips)
To maximize safety and performance, always test new blends on small test batches before scaling up. Keep detailed notes on wax type, fragrance load, wick size, and curing time so you can reproduce successful results. Regularly inspect your equipment and practice proper cleaning routines to prevent cross-contamination of scents. Remember that patience during the curing phase pays off with a cleaner burn and a longer-lasting candle.
Tools & Materials
- Soy wax, beeswax, or coconut wax blend(Choose based on burn characteristics and availability)
- Cotton wicks (pre-waxed and centered)(Size to container diameter)
- Wooden wicks (optional)(Used for specific aesthetics or burn behavior)
- Fragrance oil (phthalate-free) or essential oil(Follow wax-specific maximum load)
- Colorants suitable for candle wax(Natural dyes or approved candle pigments)
- Digital kitchen scale(Accurate wax and fragrance measurements)
- Double boiler or heat-safe container with a secondary pot(Controlled melting surface)
- Thermometer (candy or infrared)(Monitor melting and pour temperatures)
- Pouring pitcher or heat-safe measuring cup(Pour wax smoothly)
- Molds or heat-safe jars(Prepare containers with wick anchors)
- Wick centering device or pegs(Keeps wick centered during pour)
- Protective gloves and apron(Safety gear for hot wax handling)
- Paper towels and a heat-safe mat(Cleanup and protection)
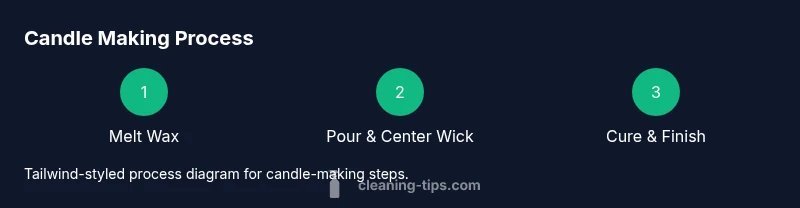
Steps
Estimated time: 2-3 hours (active work) plus 24-72 hours cure time depending on wax
- 1
Prepare workspace and materials
Clear a safe, ventilated area and lay out all required tools and ingredients. Use a heat-resistant mat and keep a fire extinguisher within reach. This step ensures you can work cleanly and calmly without last-minute scrambles.
Tip: Organize items by pour, cure, and finish to minimize cross-contamination and mistakes. - 2
Set up the melting setup
Fill the bottom pan of your double boiler with water and place your upper pan for wax. Heat gradually to avoid scorching, monitoring with a thermometer. This protects your wax integrity and prevents off smells.
Tip: Use a dedicated thermometer for wax to avoid kitchen tool contamination. - 3
Measure and melt wax
Weigh the wax according to container volume and melt slowly until fully liquid, stirring occasionally. Remove from heat once fully melted to prevent overheating. Keep the temperature within the target range recommended for your wax blend.
Tip: Avoid adding fragrance until the wax reaches the recommended melt temperature. - 4
Center and secure the wick
Attach the wick to the container using a wick sticker or dot of melted wax. Ensure it is perfectly centered to prevent uneven burn and tunneling.
Tip: A wick holder or ruler helps maintain perfect alignment during pouring. - 5
Add fragrance and color (optional)
If using fragrance, add it when the wax reaches the scent-compatible temperature. Stir gently to avoid air bubbles. Add colorants if desired and mix evenly.
Tip: Pour temperatures and fragrance loads vary by wax, so consult the manufacturer's guidelines. - 6
Pour into containers
Slowly pour the wax into prepared containers, leaving a small headspace. Avoid splashing the sides and create a smooth surface. Allow the surface to settle before final adjustments if needed.
Tip: Pour in a single smooth motion to reduce air pockets. - 7
First cure and top-off (if needed)
Let the candle cool and form a skin. If a sinkhole forms, rewarm small amount of wax and top off to create a flat surface. This improves appearance and burn quality.
Tip: Keep the top surface clean to prevent dust and imperfections. - 8
Trim wick and cure time
Trim wick to about ¼ inch above the wax surface after the initial cure. Allow the candle to cure for several days to maximize scent throw and even burn.
Tip: Long cure times generally improve scent throw and burn stability. - 9
Test burn and label
Perform a burn test in a safe area to verify even melt pool and flame height. Label the finished candle with scent, wax type, and date for future batches.
Tip: Document any adjustments for next runs to improve consistency.
Questions & Answers
What defines a clean-burning candle?
A clean-burning candle uses natural wax, a proper wick, and fragrance formulations that minimize soot and smoke. Proper curing and correct pour temperatures also influence burn quality.
A clean-burning candle uses natural wax, the right wick, and safe fragrance to minimize soot and smoke.
Can I use paraffin wax if I want a clean burn?
Paraffin wax can emit more soot than natural waxes when burned. For the cleanest burn, choose soy, beeswax, or coconut wax blends and ensure a suitable wick.
Paraffin can produce more soot; for a cleaner burn, use natural wax blends and the right wick.
Are essential oils safe for candles?
Essential oils can be used in some candles, but they may require different soaking and curing times and can affect burn performance. Always follow the wax’s guidelines and avoid overloading fragrance.
Essential oils can be used, but follow wax guidelines and avoid overloading the fragrance.
How long should candles cure before burning?
Cure time varies by wax and fragrance, but many clean-burning candles perform best after several days of curing. Avoid premature burning to improve scent throw and burn consistency.
Cure for several days when possible for better scent and burn.
What wick size should I use for my container?
Wick size depends on container diameter, wax type, and fragrance load. Start with a recommended size from the wax manufacturer and adjust in small increments if the melt pool is too shallow or too deep.
Pick a wick size based on container and wax, then adjust as needed.
Is fragrance always needed for a clean burn?
Fragrance is optional for a clean burn. If you skip fragrance, you’ll still get a pleasant scent from the wax and any natural properties, while reducing potential burn variability.
Fragrance is optional; you can still have a clean burn without it.
Watch Video
The Essentials
- Choose natural waxes for cleaner burns
- Center the wick for an even melt pool
- Allow ample curing time for best scent throw
- Document ratios and temps for repeatable results