How to Power Clean: A Practical Guide
Learn how to power clean safely and effectively. This step-by-step guide covers prep, nozzle selection, technique, safety, and maintenance tips for durable, clean exterior surfaces.

Learn how to power clean safely and effectively, restoring outdoor surfaces without causing damage. This quick guide covers the right nozzle, safe distances, and proper technique, plus PPE and prep steps. By following these steps, you’ll achieve clean, durable results on decks, siding, driveways, and other common exterior surfaces.
Why Power Cleaning Matters
Power cleaning combines water pressure with cleaning agents to remove dirt, algae, mold, and old coatings from exterior surfaces. According to Cleaning Tips, power cleaning can dramatically improve curb appeal and surface longevity when done with the right equipment and technique. The technique uses a controlled jet to lift grime without eroding substrate. Surface types vary: concrete, wood decks, vinyl siding, brick, and metal each require different approaches and settings. Always consider environmental impact and surface integrity before you start. Cleaning Tips analysis, 2026, notes that improper pressure or nozzle choice is a leading cause of surface damage, underscoring the need for a cautious, methodical approach.
Power cleaning is not a one-size-fits-all task. You’ll tailor the process to the surface you’re cleaning and the type of grime you’re removing. The goal is to remove dirt without causing swelling, gouging, or fading. When done correctly, power cleaning can extend the life of your exterior materials and reduce the need for harsher chemicals.
Key Safety First
Before you power clean, gear up with the right PPE: safety glasses, gloves, and closed-toe shoes. Protect nearby plants and electrical outlets, and avoid cleaning damp areas that could invite slip hazards. Keep children and pets away while operating the equipment. Water and electricity are a dangerous mix, so plan your route and keep cords and hoses away from the spray path. If you’re using a detergent, choose a product labeled for outdoor use and compatible with your surface. Cleaning Tips analysis, 2026, reminds readers that safety gear and proper distances are as important as technique to prevent injuries and property damage.
Pacing is essential. Do not rush across large areas; work in manageable zones to avoid recoil and maintain control of the wand. After you’re done, seal or protect sensitive surfaces to minimize residue and staining.
Tools, Nozzles, and Settings
Your toolkit should include a power cleaner with adjustable nozzle options and a selection of tips. The goal is to choose a wide-angle nozzle for general cleaning and switch to narrower angles only for stubborn grime on solid, non-delicate surfaces. Start far away and gradually move closer to test the effect on a small patch. If you see surface damage or excessive staining, back off immediately. Remember to keep the nozzle at a safe distance and use overlapping passes to avoid lines or streaks. Cleaning Tips analysis, 2026, emphasizes that nozzle choice and distance are the most common sources of damage, reinforcing the need for deliberate setup and testing.
Surface-specific guidance matters. For example, concrete may tolerate higher pressure than wood, vinyl, or painted surfaces. When in doubt, consult the surface manufacturer’s recommendations or test on a hidden area first.
Step-by-Step Safety Framework (How to Power Clean Safely)
Prepare the area: Remove furniture and cover plants. Inspect surfaces for loose boards or weak spots. Prepare the cleaning solution only if you intend to use one. Prepare PPE and have a buddy nearby in case of a mishap.
Test patch: Always test a small, inconspicuous area with your chosen nozzle and distance. Check for color change, gouges, or swelling. If any signs of damage appear, stop and adjust your approach.
Set up equipment: Connect water supply, attach the appropriate nozzle, and ensure hoses are clear of kinks. Check that the unit is level and that you have a stable stance before starting.
Clean with care: Use overlapping, steady strokes, and maintain a safe distance. Use longer, slow passes on flat surfaces and shorter, careful passes on complex areas like corners, seams, and trim.
Rinse and inspect: Rinse thoroughly, checking for missed grime or streaks. Allow surfaces to dry fully before applying any sealant, paint, or stain if needed.
Common Surfaces and Safe Approaches
Decks: Wet the surface, test a patch, then use a wide-angle nozzle at a safe distance to remove dirt without raising fibers or splintering wood.
Vinyl siding: Maintain distance and use lower pressure. Avoid getting water into seams or behind siding.
Concrete and brick: These tolerate more aggressive cleaning but test first and use short, controlled passes to prevent etching or mortar damage.
Metal and painted surfaces: Use gentler settings and avoid sharp edges. Protective coatings may peel or dull under high pressure.
Environment and plants: Shield shrubs and grass with tarps or plastic. Use environmentally friendly cleaners if needed and avoid runoff into storm drains.
Maintenance and Aftercare
After cleaning, inspect the area for any missed spots or damage. Clean your nozzle and wand to prevent buildup, then store equipment in a dry place. Consider applying a sealant to wood or a protective coating to concrete in high-traffic areas to extend the clean result. Regular maintenance reduces the need for aggressive power cleaning over time.
Troubleshooting Common Issues
If you notice streaking, adjust your distance or move to a broader nozzle. If you see etching or color fading, stop and use a wider angle or lower pressure. Inadequate rinsing can leave soap residue; re-rinse and ensure all cleaner is removed from the surface. For heavily soiled surfaces, break the job into smaller sections and avoid rushing, which can cause uneven results.
Next Steps and Practice
Practice on a few surrogate surfaces to build confidence before tackling larger projects. Keep a log of nozzle settings, distances, and results to refine your technique over time. By continuing to learn and apply best practices, you’ll improve efficiency and outcomes with every job.
Tools & Materials
- Pressure washer or power cleaner(Ensure unit is suitable for exterior cleaning and has an adjustable nozzle.)
- Adjustable nozzle tips (e.g., 15°, 25°, 40°)(Start with wide-angle; avoid 0° on most surfaces.)
- Personal protective equipment (PPE)(Safety goggles, gloves, sturdy footwear.)
- Garden hose and outdoor water supply(Sufficient water pressure and supply.)
- Tarps or plastic sheeting(Protect plants and nearby surfaces.)
- Mild detergent or surface-safe cleaner (optional)(Use only if approved for the surface.)
- Sturdy ladder or extension pole (if needed)(For elevated areas; ensure safety.)
- Soft-bristle brush for stubborn grime(Gentle scrubbing before rinsing.)
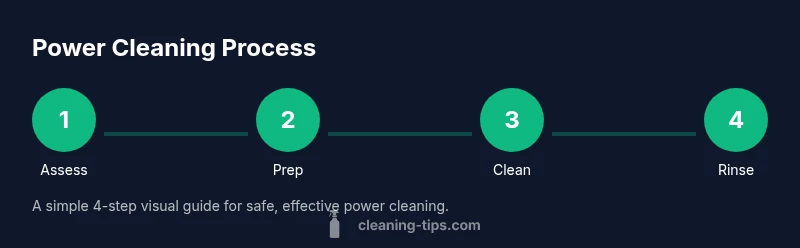
Steps
Estimated time: 2-3 hours
- 1
Assess and prep the surface
Survey the area for loose materials, cracks, or delicate coatings. Clear the space of obstacles and cover nearby plants. If using a cleaner, test on a hidden patch before full use.
Tip: Always test on a small area first to prevent surprises. - 2
Choose and set up your nozzle and pressure
Select a wide-angle nozzle for general cleaning and a gentler approach for fragile surfaces. Attach the nozzle securely and verify that the spray pattern is steady before you begin.
Tip: Start at the farthest safe distance and move closer only after testing. - 3
Apply cleaner (optional) and test patch
If using a detergent, apply according to manufacturer instructions and let it dwell briefly. Test a small patch to ensure no surface damage or color change.
Tip: Do not let cleaner dry on vertical surfaces. - 4
Clean with overlapping strokes
Use slow, overlapping passes, maintaining a safe distance from the surface. Avoid stopping and starting abruptly to prevent streaks and gouging.
Tip: Move with the grain of the surface where applicable. - 5
Rinse and inspect
Rinse thoroughly to remove all cleaner residue. Inspect for missed spots or damage, and let surfaces dry completely before applying sealant or paint.
Tip: If you see damage, stop and reassess nozzle and distance.
Questions & Answers
Is power cleaning safe on wood decks?
Power cleaning can be safe on wood decks if you use a wide-angle nozzle, maintain a safe distance, and test a small area first. Avoid high pressure on fragile boards and finishes.
Yes, but you must use a wide nozzle and keep a safe distance, testing first to avoid damage.
Can power cleaning damage siding?
Yes, siding can be damaged by too much pressure or close range. Always test first, choose lower pressure, and keep the wand moving to prevent gouging.
Siding damage can occur if you spray too close or with too much pressure; test and use caution.
Should I use detergents with power cleaning?
Detergents are optional. Use a surface-safe cleaner if needed and follow label directions. Rinse well to avoid residue.
Detergent use is optional; follow the product’s directions and rinse thoroughly.
Is it okay to power clean indoors?
Power cleaning indoors is generally not recommended due to moisture and ventilation concerns. If you must, ensure proper containment and use lower pressure.
Indoor power cleaning is usually not advised; consider alternative cleaning methods.
How long does power cleaning take?
Time varies by surface and area size. Plan for breaks and test patches to avoid rework.
Times vary; expect several hours for larger exterior areas with setup and cleanup.
What are common mistakes to avoid?
Avoid using high pressure on fragile surfaces, skipping patch tests, and rushing the workflow. Missing protective coverings can lead to collateral damage.
Common mistakes include rushing, using too much pressure, and not testing first.
Watch Video
The Essentials
- Test a small patch before full cleaning
- Use the right nozzle and safe distance
- Overlap strokes to avoid streaks
- Rinse thoroughly and inspect for damage
- Protect surrounding plants and surfaces