Try Not Laugh Clean: A Practical Cleaning Challenge for Healthier Home
Learn how to run a fun, safe 'try not laugh clean' cleaning challenge at home. This guide covers setup, tools, step-by-step actions, safety tips, and metrics to build healthier cleaning habits.

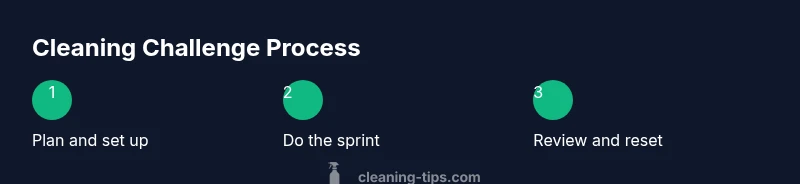
In this guide, you’ll learn how to run a friendly, safe “try not laugh clean” challenge at home. The goal is steady, thorough cleaning that boosts health while keeping the mood light and engaging. You’ll get a clear two-hour plan, essential tools, a step-by-step framework, and safety tips to involve everyone safely. According to Cleaning Tips, a structured, humorous approach improves consistency and habit formation without compromising results.
Why the phrase 'try not laugh clean' matters in cleaning routines
The idea behind the phrase may sound playful, but it captures a serious principle: make cleaning tasks inviting enough that you actually start and stick with them. When humor and structure coexist with a health-focused goal, you’re more likely to complete chores thoroughly without burning out. Cleaning Tips has observed that framing routine chores as a lighthearted challenge helps household members stay accountable while maintaining high cleaning standards. The key is to balance fun with method: use timers, set boundaries, and keep safety at the forefront. The result is not slapstick chaos but a sustainable ritual that supports healthier living and happier homes. As you embark on a try not laugh clean session, remember that consistency beats intensity over the long term and that small, deliberate actions compound into meaningful cleanliness.
The approach works across kitchens, bathrooms, living areas, and bedrooms. It’s adaptable for renters and homeowners alike, requiring only a clear plan, basic tools, and a few ground rules. In this article, you’ll see how humor can be a catalyst for better cleaning habits without sacrificing results.
Tools & Materials
- Microfiber cloths (set of 6)(Use color-coding for different zones (kitchen, bathroom, glass) to avoid cross-contamination)
- Spray bottles(Label for all-purpose cleaner and glass cleaner; keep dedicated bottle for each solution)
- All-purpose cleaner(Choose a formula suitable for multiple surfaces; avoid abrasive cleaners on delicate finishes)
- Baking soda(Deodorizing sprays and gentle scrubbing in sinks or drains)
- White vinegar(Safe, natural cleaner for windows and some surfaces when diluted)
- Rubber gloves(Protect skin from cleaners and moisture)
- Timer(Use a kitchen timer; 15–20 minute blocks help maintain pace)
- Trash bags(For decluttering as you go; use a separate bag per room if needed)
- Bucket and mop(Use a washable mop head; wring well to avoid excess moisture)
- Safety goggles (optional)(Useful for high-dust tasks or ceiling corners)
Steps
Estimated time: 30-45 minutes
- 1
Clear the area and set the timer
Before you begin, remove clutter and place items in their proper spots. Set a timer for 20 minutes for a focused sprint in this area. The time constraint helps you stay on task and reduces the tendency to multitask and stall.
Tip: Starting with a quick declutter makes the subsequent cleaning easier and faster. - 2
Dust and wipe from high to low
Dust ceiling corners, fan blades, shelves, and light fixtures first, then wipe surfaces with a microfiber cloth. Move down to furniture, countertops, and finally baseboards. This order prevents re-cleaning from falling dust.
Tip: Keep a dedicated cloth for dusty areas to avoid spreading dust to clean surfaces. - 3
Clean glass and mirrors
Use a glass cleaner or diluted vinegar solution on mirrors and glass surfaces. Wipe in a circular motion to avoid streaks, then dry with a lint-free cloth.
Tip: Avoid cleaning mirrors in direct sunlight to prevent streaking caused by rapid drying. - 4
Wipe high-touch areas
Focus on door handles, light switches, and electronics with a microfiber cloth dampened with mild cleaner. This reduces germ buildup in frequently touched zones.
Tip: Don’t oversaturate electronics; use a lightly damp cloth and follow manufacturer guidance. - 5
Tackle floors and corners
Sweep or vacuum to remove loose debris, then mop or steam-clean as appropriate for the floor type. Pay attention to edges and corners where dirt accumulates.
Tip: Rinse mop frequently to avoid redistributing dirt across the floor. - 6
Declutter as you go
Return misplaced items to their homes and discard trash. A clutter-free space makes cleaning faster and more effective.
Tip: Carry a small basket to collect items you plan to relocate, then sort them at the end. - 7
Sanitize and ventilate
Wipe down surfaces with a disinfectant where appropriate and open windows or run a fan to improve air quality. Adequate ventilation reduces chemical odors and exposure.
Tip: Read product labels for contact time to ensure effective sanitizing. - 8
Final check and reset for next session
Do a quick visual pass to ensure nothing was missed, note any stubborn spots, and prepare a simple plan for the next round. This builds momentum and consistency for future sessions.
Tip: Create a one-page checklist to reuse in future sessions.
Questions & Answers
What is the main goal of the 'try not laugh clean' method?
The goal is to make cleaning consistent, efficient, and enjoyable without sacrificing thoroughness. By combining humor with a structured plan, you increase adherence and reduce procrastination while maintaining health-focused results.
The main goal is to clean consistently and safely while keeping things light and engaging.
How long should a single cleaning sprint last?
Aim for 15–20 minute sprints for smaller tasks, and 30–45 minutes for larger areas. Shorter blocks help maintain energy, while longer blocks address bigger jobs without burnout.
Try 15 to 20 minutes for quick tasks, or up to 45 minutes for bigger rooms.
Is this approach safe for all surfaces?
Yes, as long as you choose cleaners appropriate for the surface and follow manufacturer guidelines. Always test in an inconspicuous area first.
Yes, with surface-appropriate cleaners and a quick test patch.
Can children and pets participate?
Yes, but set clear boundaries: use child-safe tools, avoid harsh chemicals, and supervise. Turn it into a learning activity about responsibility and safety.
Kids can join if you keep it safe and supervised.
What if I can’t finish within the planned time?
Adapt by breaking the task into smaller sprints, prioritizing high-impact areas first. You can resume in the next session with the same checklist.
If you can’t finish, resume in your next session with the same plan.
Do I need special equipment beyond basics?
Most tasks only require standard cleaners, microfiber cloths, gloves, and a timer. Optional gear includes safety goggles and a squeegee for glass.
Basic supplies are enough; extra gear helps with specific tasks.
Watch Video
The Essentials
- Plan a clear, time-boxed cleaning session
- Use timer-based sprints to stay on track
- Engage others to boost motivation
- Prioritize safety and surface compatibility