What to Clean Walls With: A Practical Guide for Home Walls
Discover safe, effective ways to clean walls across finishes. This guide covers surfaces, cleaners, step-by-step methods, and maintenance to keep walls looking fresh.

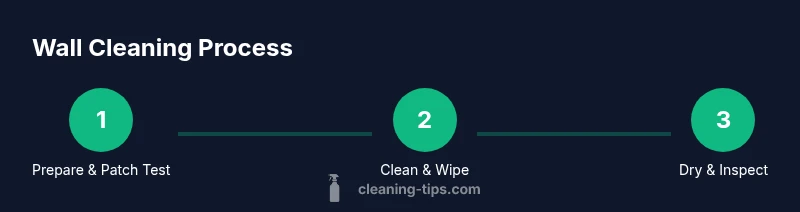
You can clean walls effectively by using a mild detergent solution, a soft microfiber cloth or sponge, and gentle scrubbing. Always test a hidden patch first and tailor your approach to the wall finish (painted, wallpaper, or wood). Start with the mildest cleaner, then escalate only if needed to avoid damage.
What to Clean Walls With: A Practical Overview
Walls come in a variety of finishes, from satin-painted surfaces to wallpaper, wood paneling, tile, and brick. Choosing the right cleaner depends on the wall finish, the kind of dirt, and the room. When you ask what to clean walls with, you should start with the mildest option that is safe for your wall. According to Cleaning Tips, starting with gentle cleaners and testing a hidden area helps prevent damage and keeps finishes looking fresh. In most homes, a simple approach—soap and water, followed by a rinse and dry—works for everyday dust, smudges, and light grime. For vinyl wallpaper or glossy paint, avoid harsh scrubbing that can remove color or lift seams. For stone or unsealed surfaces, consult a pro before attempting any cleaner, as some substances can etch or stain.
Keep your expectations realistic: most walls respond well to patience, small batches of cleaner, and a light touch. The goal is to lift visible dirt without saturating the surface or forcing moisture into seams and corners.
Testing and Prep: Patch Test, Ventilation, and Prep
Before applying any cleaner to visible walls, do a patch test. Choose a small, inconspicuous area—inside a closet door or near a baseboard— and apply your chosen cleaner with a soft cloth. If there’s no discoloration or texture change after 5-7 minutes, you’re good to proceed. Open windows or set up a fan to maintain ventilation, and protect floors with a drop cloth or old towels. Remove decorative items, switch off power outlets in the nearby area if necessary, and have clean, dry towels ready. The goal is to catch damage early and minimize the amount of moisture that travels into cracks or surfaces sensitive to water. If you’re cleaning wallpaper, test along the edge where panels meet to ensure cleanability won’t strip away color or adhesive. Patch testing also helps you compare how different cleaners interact with the surface over time.
Pro tip: keep a small, labeled bottle of your test cleaner so you can recheck spots that look questionable after drying.
Basic Cleaning Agents by Surface Type
Painted walls: A small amount of mild dish soap in warm water is usually enough for everyday dirt. Use a soft microfiber cloth and gentle circular motions, then rinse with a clean damp cloth and pat dry.
Wallpaper: Use the mildest solution that won’t soak the backing. Lightly wipe in the direction of the pattern with a soft cloth; never rub vigorously, as ink or adhesive can lift.
Wood paneling or beadboard: A damp microfiber cloth with a touch of mild soap can lift fingerprints without saturating the wood. Wipe dry to prevent moisture from seeping into seams.
Tile or glossy surfaces: A diluted ammonia-free cleaner or a vinegar-diluted solution (if the wallpaper isn’t vinyl) can remove soap scum and salt buildup. Rinse well and dry.
Brick or masonry: For painted brick, use the soap solution; for bare brick, avoid acidic cleaners and use a soft brush with water only to prevent etching.
Tip: Always work one wall at a time and keep your cloth or sponge clean and damp, not soaking wet.
Natural Cleaners and Their Limits
Nature-based cleaners like vinegar, baking soda, and castile soap can handle many everyday soils. Vinegar works well on glassy surfaces and some painted finishes but can dull certain stone or terrazzo. Baking soda is mildly abrasive and excellent for scuff marks or grease on smooth walls, but avoid using it on matte finishes where it can scratch. Castile soap diluted with water provides a gentle cleansing base for most walls. Always test and avoid combining cleaners that create harmful fumes (for example, vinegar with bleach). If in doubt, stick to plain warm water and a dash of mild soap. For delicate wallpaper or high-gloss paints, less is more.
Caution: never mix unidentified cleaners; chemical reactions can produce noxious fumes or damage finishes. When cleaning, prioritize ventilation and controlled moisture.
Step-by-Step Cleaning Process for Everyday Dirt
- Prep and dust: Remove loose dirt with a microfiber duster to prevent muddy smears.
- Mix cleaner: In a spray bottle, combine a small amount of mild dish soap with warm water. Label the bottle and keep it away from kids.
- Wipe section by section: Lightly spray the cloth or sponge; wipe in smooth, overlapping strokes, working from top to bottom to catch drips.
- Rinse and dry: Wipe with a clean damp cloth to remove soap residue; finish with a dry microfiber or towel to prevent water marks.
- Address corners: Pay attention to high-traffic areas (near light switches and door frames) where fingerprints accumulate.
- Reassess: Step back and check for missed spots; repeat as needed.
Tip: If the wall has a delicate finish, test again after drying to ensure no color lift occurred. See diagrams in the infographic for a visual guide.
Note: For wallpaper, avoid soaking; use a damp cloth rather than a spray to prevent adhesive failure.
Stubborn Stains and How to Tackle Them
For tough marks, adjust the approach gradually. Ink and marker stains respond best to a microfiber cloth moistened with a mild soap solution; avoid aggressive rubbing to prevent spreading. Grease responds to a drop of dish soap on a damp cloth—gently lift residues rather than smear them. Crayon marks on painted surfaces or wallpaper may lift with a light touch of baking soda on a damp sponge; wipe away residue immediately to prevent re-deposition.
If stains persist after careful spot cleaning, switch to a surface-specific cleaner recommended by the wall’s manufacturer and test first. For mold or mildew, avoid bleach on colored walls and consider a mold-specific cleaner or professional assessment.
Special Surfaces: Wallpaper, Wood, and Tile
Wallpaper requires caution: do not oversaturate; use a barely damp cloth and light strokes along the seam direction. Wooden surfaces should be cleaned with a barely damp cloth and dried promptly to prevent warping or swelling. Tile and grout benefit from a soft brush and a gentle cleaner; rinse and dry to prevent moisture from seeping into grout.
In all cases, protect surrounding areas and finish by buffing with a dry microfiber to restore the finish’s natural sheen.
Drying, Maintenance and Preventing Marks
Drying is essential to prevent water marks and damage. Open windows or run a fan to speed the process and ensure the wall is completely dry before putting objects back in place. Build a light maintenance routine: dust weekly, spot-clean monthly, and deep-clean every 6-12 months depending on traffic. Touch up any chipped paint or loosened wallpaper seams. Keep a small touch-up kit ready for quick repairs, and avoid aggressive scrubbing that can dull finishes or lift coatings over time.
If you have high-traffic walls or delicate finishes, consider periodic professional cleaning checks to preserve longevity.
Authoritative Sources and Additional Reading
For more authoritative guidance on safe cleaning practices and wall materials, consult the following sources:
- United States Environmental Protection Agency: https://www.epa.gov/saferchoice
- Occupational Safety and Health Administration: https://www.osha.gov
- Penn State Extension: https://extension.psu.edu
These resources provide general safety guidelines and surface-specific considerations that can help you refine your wall-cleaning routine.
Tools & Materials
- Microfiber cloths(Lint-free, soft; use multiple colors to prevent cross-contamination)
- Soft sponges(Non-abrasive; avoid rough scrubs)
- Bucket or spray bottle(For mixing cleaners and applying solution)
- Mild dish soap(Gentle on finishes (e.g., dawn or generic brand))
- Warm water(Diluent for cleaners)
- Drop cloths or old towels(Protect floors and furniture)
- Gloves(Protect hands if you have sensitive skin)
- Patch test area(Test on hidden area before broad cleaning)
- Ventilation(Open windows or use a fan to keep air moving)
Steps
Estimated time: 60-90 minutes
- 1
Clear the room and prepare supplies
Move lightweight furniture away from the walls and lay down drop cloths. Gather your cleaners, cloths, sponge, and a spray bottle within easy reach. This minimizes drips and backtracking.
Tip: Set up a staging area so you can stay organized. - 2
Test a hidden patch
Apply your cleaner to a small, inconspicuous area and wait several minutes to observe any staining or color lift. If anything changes, select a milder solution or different cleaner.
Tip: Always test before widespread use on visible walls. - 3
Dust the walls
Use a microfiber duster to remove loose dust and cobwebs. This prevents smeared dirt when you introduce moisture.
Tip: Dust from top to bottom to catch drips. - 4
Mix your cleaner
In a bottle or bucket, mix a small amount of mild dish soap with warm water. Label the container and keep it out of reach of children.
Tip: Keep the solution light; you can increase strength if needed after patch test. - 5
Wipe in sections
Dampen a microfiber cloth, wring it well, and wipe walls in gentle, overlapping strokes from top to bottom. Use curved motions for corners.
Tip: Don’t saturate the surface; moisture can creep into seams. - 6
Rinse and remove soap residue
Wipe with a clean, damp cloth to lift soap. Avoid leaving suds behind, which can attract more dirt.
Tip: Rinse the cloth frequently to avoid reapplying dirty solution. - 7
Dry the surface
Use a dry microfiber or towel to blot and dry the wall. Air-drying is slower but helps prevent streaks on glossy finishes.
Tip: For glossy paint, a final buff can improve finish. - 8
Check and repeat if needed
Step back and inspect the wall; repeat cleaning on stubborn spots if necessary, always with a fresh cloth for each pass.
Tip: Don’t over-wet; moisture can cause warping on some finishes. - 9
Maintain and protect
Touch up paint or wallpaper seams as needed and establish a regular cleaning routine to prevent buildup.
Tip: Keep a small touch-up kit handy for quick repairs.
Questions & Answers
Is vinegar safe to use on painted walls?
Vinegar can be safe for some painted walls when diluted, but it may dull or damage certain finishes. Always patch test first and avoid vinegar on stone or unsealed surfaces.
Vinegar can be okay on some painted walls if it's diluted, but test first and avoid it on sensitive finishes.
Can I use baking soda on walls?
Baking soda is mildly abrasive and can help with light scuffs on smooth walls, but avoid matte finishes where it may scratch. Use sparingly and test first.
Baking soda can help small scuffs but test first on a hidden spot.
Should I use a sponge or a cloth?
Both work; use a soft cloth for delicate finishes and a non-scratch sponge for firmer dirt. Always wring out well to prevent over-wetting.
A soft cloth is best for delicate finishes; use a sponge for tougher dirt, and wring well.
How often should walls be cleaned?
Frequency depends on traffic and room type. Light cleaning every few months and a deeper clean annually or as needed keeps surfaces fresh.
Clean more often in high-traffic areas; deep-clean as needed.
What should I avoid on wallpaper?
Avoid soaking wallpaper; use a damp cloth and gentle strokes in the pattern direction. Do not scrub vigorously or apply strong solvents.
Don’t soak wallpaper; use a damp cloth and gentle strokes.
Can I clean walls with just water?
Water alone can remove light dust, but most dirt benefits from a mild cleaner. Test if water lifts color or adhesive before proceeding.
Water may remove dust, but a mild cleaner often works better; test first.
Watch Video
The Essentials
- Start with mild cleaners and patch tests.
- Different wall finishes require tailored approaches.
- Dry thoroughly to prevent moisture damage.
- Patch, test, and adjust before large-scale cleaning.