Where to Clean Paint Brushes: A Practical Guide
Learn where to clean paint brushes safely and effectively. This guide covers water-based and oil-based cleaning, essential tools, drying, and storage to extend brush life and maintain performance.

By the end of a painting session, you’ll know where to clean paint brushes and how to do it correctly. For water-based paints, rinse with warm water, work in mild soap, then reshape the bristles. For oil-based paints, use an appropriate solvent before washing with soap and water. This quick guide covers locations to rinse, tools, and safety. Cleaning Tips emphasizes brush longevity when you follow these steps.
Why proper brush cleaning matters
Cleaning brushes correctly preserves the shape and softness of bristles, prevents stray paint from drying into the fibers, and reduces work on future projects. When you invest a few extra minutes in a dedicated cleaning routine, you minimize the chance of bristle fraying, color transfer, and uneven paint application. According to Cleaning Tips, consistent brush care leads to longer brush life and better results over time. A well-maintained brush performs more consistently, which saves both time and money. In this section we outline the core reasons to prioritize cleaning and how small habits compound into big benefits for your home projects.
Brush types and paint compatibility
Paint brushes come in several bristle types (natural vs synthetic) and shapes, each reacting differently to cleaners and solvents. Water-based paints rinse away easily with warm water, while oil-based paints cling to bristles and require a solvent first. Understanding these differences helps you pick the right cleaning method without weakening the brush. We’ll cover the main brush categories, how to identify their needs, and practical tips to keep each type in top condition. Cleaning Tips analysis shows that following type-specific care routines substantially improves brush performance and longevity over time.
Where to clean paint brushes: options and locations
Location matters for safety, odor control, and waste disposal. For water-based paints, a utility sink or outdoor spigot at a dedicated washing station works well. Oil-based paints demand a ventilated area with a properly rated solvent and a container that won’t leak chemicals into the environment. If you’re in a small apartment, consider a portable cleaning setup with a tray, sealable container for solvents, and a plan for venting fumes. Always check local guidelines for solvent disposal and never pour solvent down the drain in large quantities.
Setting up a cleaning station: safety and environment
Create a clean, organized space that minimizes mess and exposure to fumes. Use gloves to protect hands, a long-handled brush for agitation, and a dedicated tray or basin. Keep a ventilation plan in place, especially when solvents are involved, and store cleaners away from children and pets. A simple guardrail or barrier to prevent splashes on countertops helps maintain safety and cleanliness. This step sets the tone for efficient cleaning and reduces post-project cleanup time.
Preparing your tools and cleaning solutions
Gather all necessary items before you start: mild dish soap for water-based cleaning, a suitable solvent for oil-based paints, old rags, a brush comb, a dedicated cleaning container, and a separate rinse container. Label containers to avoid cross-contamination, and use warm—not hot—water for rinsing to protect bristle integrity. When possible, opt for eco-friendly soaps and environmentally friendly solvents to reduce the impact on indoor air and wastewater.
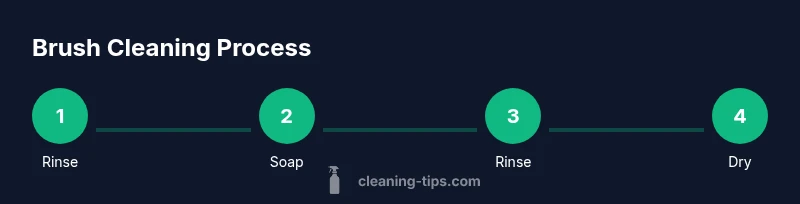
Step-by-step cleaning overview (high level)
Start with a thorough rinse to remove as much paint as possible, then apply soap to create a gentle lather. For oil-based paints, swap in the solvent before washing with soap and water. Rinse again, remove excess moisture with a clean towel, and reshape the bristles while wet. Finally, lay flat to dry or hang with bristles pointing downward to prevent water from seeping into the ferrule. This high-level approach keeps brushes in good shape across many projects.
Drying, storage, and long-term maintenance
Air-dry brushes completely before storing to prevent mildew and bristle softening. Reshape the tips and store brushes flat or with bristles pointing upward in a breathable container. Keep brushes away from direct sunlight and extreme heat, which can warp bristles. Regular maintenance, like combing out dried paint after each session, extends life and improves performance over years of use.
Common mistakes and how to avoid them
Avoid soaking brushes in solvent for too long, which can dry out bristles. Never store brushes while damp or with paint residue in the ferrule, as this promotes rust and bristle damage. Mixing different brush cleaners in one container can cause chemical reactions that degrade bristles. Follow the recommended method for each paint type and clean thoroughly to prevent color bleed on future projects.
Verdict: final cleaning best practices
The Cleaning Tips team recommends a clear, color-coded cleaning process: water-based brushes get a quick warm rinse and soap wash, while oil-based brushes get a dedicated solvent rinse followed by soap and water. Always dry thoroughly and store properly to maximize brush life and performance. Adhering to these best practices reduces waste and improves the quality of your painting over time.
Tools & Materials
- Plastic bucket or wash tray(Wide-mouth preferred for soaking larger brushes)
- Warm water(Not hot to avoid bristle damage)
- Mild dish soap or brush-safe detergent(Gentle formula to protect bristles)
- Appropriate solvent for oil-based paints(e.g., mineral spirits; ensure ventilation)
- Old toothbrush or brush-cleaning tool(For detailing and stiffness removal)
- Rags or paper towels(For blotting and drying)
- Gloves(Protection from cleaners and solvents)
- Brush comb or shaping tool(Shapes bristles post-clean)
- Separately labeled containers(One for water-based cleaners, one for solvents)
- Ventilation source (window fan)(Improves safety when solvents are used)
- Old towels or drying rack(Supports even drying)
Steps
Estimated time: 60-90 minutes
- 1
Prepare the workspace
Clear your area, gather brushes, and choose cleaning methods based on paint type. Set up containers for water-based and oil-based cleaning, and place rags within reach. This ensures a smooth, safe workflow and prevents cross-contamination.
Tip: Label each container clearly to avoid mixing cleaners. - 2
Rinse water-based brushes
Hold brushes under warm running water and gently flick bristles with your fingers to loosen pigment. Avoid hot water and aggressive scrubbing to protect bristles. Rinse until the water runs clear and most paint is removed.
Tip: Use the curved edge of a sink rather than a hard surface to avoid bristle damage. - 3
Wash with soap (water-based only)
Apply a small amount of mild dish soap and gently lather the bristles from base to tip. Rinse thoroughly and repeat if needed. This step helps remove soap residues that can degrade brush performance.
Tip: Avoid bending the brush to prevent ferrule loosening. - 4
Prepare oil-based brushes with solvent
Pour a small amount of the solvent into a separate container. Swirl the bristles in the solvent to lift dried paint, then gently comb through with a brush comb. Wipe excess solvent from the ferrule area.
Tip: Work in a well-ventilated area and keep containers closed when not in use. - 5
Finish with soap and water
After solvent treatment, wash the brushes with mild soap and warm water to remove residual solvent and pigment. Rinse thoroughly until clean and free of residue.
Tip: Rinse with the brush tilted to prevent water from seeping into the ferrule. - 6
Dry and reshape
Gently squeeze out excess water with a towel and reshape bristles to their original form. Lay flat or hang with bristles pointing downward in a well-ventilated area to dry completely.
Tip: Never store brushes while damp to avoid mold and bristle damage.
Questions & Answers
What is the best solvent for oil-based paints?
Use mineral spirits or another approved solvent in a well-ventilated area. Follow local regulations for disposal and never mix solvents indiscriminately with water-based cleaners.
Mineral spirits or an approved solvent in a well-ventilated space is best for oil-based paints. Dispose of leftovers according to local rules.
Can I clean brushes in a sink with a drain?
Yes for water-based paints in a clean utility sink. For oil-based paints, avoid sink drainage unless your local waste guidelines permit it and you have proper venting.
Water-based brushes can go in a utility sink; oil-based brushes require a dedicated container and ventilation.
Is it safe to clean brushes indoors?
Indoor cleaning is safe if you use proper ventilation and keep solvents away from children and pets. Work near a window or with a small fan to move fumes away.
Yes, with good ventilation and by keeping solvents out of reach of kids and pets.
How long do brushes take to dry?
Drying times vary with brush size and climate, typically taking several hours to a full day. Ensure bristles are fully dry before storing.
Most brushes dry within a few hours to a day depending on humidity; make sure they’re completely dry before storage.
How should I store brushes after cleaning?
Store brushes flat or with bristles pointing downward to avoid water seeping into the ferrule. Keep them in a dry, dust-free area.
Store brushes flat or bristles-down in a dry place to protect the bristles.
Can stencil brushes be cleaned the same way?
Stencil brushes can be cleaned using the same basic steps, but avoid soaking delicate bristles too long and reuse the brush specifically for stencil paint to prevent color transfer.
Yes, you can clean stencil brushes the same way, just handle delicate bristles gently.
Watch Video
The Essentials
- Choose the right cleaning method for paint type
- Set up a dedicated cleaning station
- Rinse, then soap or solvent as appropriate
- Dry brushes thoroughly and store properly