What to Clean Stainless Steel With: Best Methods for Shine
Learn safe cleaners and proven techniques for cleaning stainless steel surfaces—appliances, sinks, and fixtures—without scratching or dulling the finish. Practical steps, tips, and eco-friendly options.

By the end of this guide, you'll know exactly how to clean and restore stainless steel surfaces without scratching or dulling the finish. You'll learn which cleaners to use, which to avoid, and a simple routine for regular maintenance that resists fingerprints and water spots. Follow the steps to keep appliances, sinks, and fixtures gleaming.
Why stainless steel cleaning matters
Stainless steel surfaces remain a staple in kitchens, bathrooms, and laundry areas due to their durability and modern look. However, frequent contact with skin oils, cleaning residues, and mineral-rich water can leave fingerprints, smudges, and faint water spots that dull the surface over time. Without proper care, even small marks can become persistent, requiring more aggressive cleaning methods that risk scratching or discoloration. The Cleaning Tips team emphasizes that gentle, regular cleaning preserves the protective layer and maintains the surface’s luster. A simple routine—gentle cleaners, soft cloths, and thorough drying—minimizes wear, reduces the chance of swirl marks, and helps you enjoy a consistently bright finish every day. Remember: consistency is easier than restoration.
Finishes and how cleaning affects shine
Stainless steel comes in polished, brushed, and satin finishes, each with a distinct grain direction. Cleaning along the grain helps reduce visible scratches and swirl marks, while cleaning across grain can create cross-direction streaks. Fingerprints and smudges show more on polished finishes, whereas brushed surfaces may conceal minor scratches better but still need care. The Cleaning Tips analysis indicates that choosing the right cleaner and a microfiber cloth is key to a streak-free shine. Before applying any product, test on a small, inconspicuous area to confirm it won’t alter the finish. When in doubt, opt for non-abrasive cleaners and non-scratch pads to preserve the metal’s natural look.
What to use and what to avoid
A quiet rule of thumb is to keep it simple: mild soap and warm water for everyday cleaning, plus occasional treatments for spots. For mineral deposits, diluted white vinegar or a baking soda paste can work well. Use a soft microfiber cloth, a non-abrasive sponge, and spray cleaner onto the cloth rather than directly onto the surface to avoid pooling in seams. Avoid chlorine bleach, ammonia-based cleaners, or abrasive pads like steel wool, which can corrode finishes and leave scratches. For appliances with delicate coatings or printed logos, use a separate cloth to prevent cross-contamination and potential dulling. According to Cleaning Tips, avoiding heavy abrasives is essential to long-lasting shine across all finishes.
Everyday cleaning routine for daily maintenance
Create a quick daily ritual that minimizes buildup: wipe with a lint-free microfiber cloth dampened with mild soap and water, then dry with a second clean cloth to prevent water spots. Wipe in the direction of the grain, not circular motions, and target handles, edges, and crevices where oils tend to collect. For touch-ups after cooking or meals, use a damp cloth followed by a dry one, ensuring a streak-free finish. The goal is a predictable, low-effort routine that leaves surfaces looking polished rather than dull. Cleaning Tips notes that small, consistent steps lead to lasting results and less need for aggressive cleaning later.
Deep cleaning methods for stubborn marks and fingerprints
When fingerprints resist the daily wipe, switch to a deeper, yet still gentle approach. Apply a small amount of baking soda paste (baking soda mixed with water) to a soft cloth and gently rub the affected area along the grain. For tougher smudges, use a dedicated stainless steel cleaner following the label directions, then wipe away residue with a microfiber cloth. Rinse lightly with a cloth dampened with plain water to remove any cleaner film, and dry thoroughly. After deep cleaning, buff to a shine with a dry cloth. The key is to avoid prolonged exposure to aggressive cleaners and to test any new product on an inconspicuous patch first, especially on brushed finishes.
Removing rust, mineral deposits, and water spots
Rust on stainless steel is uncommon but can occur if the surface is compromised or exposed to harsh chemicals. If you see faint rust specks, use a stainless steel cleaner or a fine abrasive pad designed for metal, following the product instructions. For mineral deposits or hard water spots, a vinegar solution (1 part vinegar to 1 part water) can help dissolve buildup; rinse and dry thoroughly afterward. Do not leave acidic solutions on the surface for extended periods, and always rinse well to prevent etching or dulling. Consistent drying prevents new spots from forming and keeps surfaces looking bright.
Caring for appliances, sinks, and panels
Different areas of your home require slightly different care. Appliances with glossy faces or touch controls should be cleaned with a microfiber cloth and a gentle cleaner, avoiding harsh solvents near electronic components. Sinks benefit from a separate cloth to avoid spreading oils to fixtures, while panels and doors benefit from light, grain-following motions. Always test any cleaner in a hidden spot first and dry completely to prevent water spots. Regular maintenance—a quick wipe after use and a more thorough weekly clean—helps maintain a uniform finish across all stainless-steel surfaces.
Eco-friendly and safe cleaning options
If you prefer green cleaning, stick to diluted soap and water as your everyday standard, and reserve vinegar or baking soda for targeted spots. Many households find that a simple combination of warm water, a drop of mild dish soap, and a microfiber cloth achieves excellent results without harsh chemicals. Baking soda is a gentle abrasive that can lift residue with minimal risk when used in paste form. Cleaners labeled as non-toxic or safer for stainless steel are increasingly available and can reduce exposure to fumes and synthetic additives. Based on Cleaning Tips analysis, eco-conscious routines can deliver just as much shine while keeping indoor air quality at its best.
Common mistakes and how to prevent them
Even seasoned cleaners slip into bad habits. Avoid using abrasive pads, scouring powders, or steel wool on any stainless surface, as these cause scratches and dullness. Don’t let cleaner sit on the surface for long periods—rinse and wipe promptly to prevent residue buildup. Never mix different cleaners in a spray bottle; stick to one compatible system to avoid chemical reactions. Finally, avoid letting water spots dry on the surface by drying promptly after cleaning. By steering clear of these mistakes, you’ll preserve the surface’s luster and extend the time between deep-clean sessions.
Authority sources
This section provides credible references for stainless steel cleaning practices. For safety and guidance, consult the following authoritative sources:
- EPA Safer Choice: https://www.epa.gov/saferchoice
- OSHA: https://www.osha.gov
- University Extension (Illinois): https://extension.illinois.edu
These resources offer safety guidelines, product selection advice, and general cleaning best practices that support the approach outlined in this guide.
Tools & Materials
- Microfiber cloths (2)(Lint-free; avoid paper towels that can leave fibers or scratches)
- Non-abrasive sponge or pad(Soft surface; avoid steel wool)
- Dish soap (mild)(Warm water dilution for daily cleaning)
- Distilled water(For rinsing and reducing mineral deposits)
- White vinegar(For mineral deposits; dilute 1:1 with water)
- Baking soda(Make a paste for stubborn spots)
- Stainless steel cleaner (optional)(Follow label directions)
- Gloves(Protect hands; optional)
- Soft-bristle brush (optional)(For crevices and joins)
- Spray bottle(For diluted cleaners; spray onto cloth, not surface)
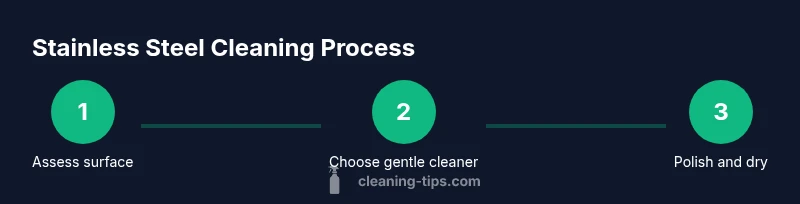
Steps
Estimated time: 20-30 minutes
- 1
Gather supplies
Collect all recommended tools and cleaners before you start, so you don’t interrupt cleaning to search for items. Keep your workspace organized and within easy reach.
Tip: Having everything ready reduces the chance of using improper cleaners mid-task. - 2
Wipe away loose dust
Dust and dry debris can scratch the surface if you scrub. Use a dry microfiber cloth to remove loose particles in the direction of the grain.
Tip: Dry dusting minimizes initial abrasion and prepares the surface for wet cleaning. - 3
Prepare a mild cleaner
Mix a small amount of mild dish soap with warm water in a bottle or bowl. Do not apply cleaner directly to the surface; apply to the cloth instead.
Tip: Dilution reduces risk of residue and protects the finish. - 4
Wipe along the grain
Dampen the cloth and wipe in the direction of the grain. For polished areas, mirror-like streaks are a giveaway of cross-grain motion.
Tip: Consistent, grain-following motions prevent swirl marks. - 5
Rinse and dry
Rinse the cloth with clean water and wipe away any soap residue. Dry immediately with a dry microfiber to prevent water spots.
Tip: Drying prevents mineral deposits from forming as the surface cools. - 6
Tackle stubborn spots
For tough marks, apply a small amount of baking soda paste or a stainless steel cleaner following the label. Gently rub, then wipe clean.
Tip: Always test first; avoid aggressive scrubbing on brushed finishes. - 7
Polish and inspect
Buff surfaces with a clean, dry microfiber until the shine is even. Look for streaks, dull patches, or remaining water spots and address as needed.
Tip: A final pass with a dry cloth yields the best shine.
Questions & Answers
What is the safest cleaner for stainless steel?
Start with mild soap and water, or a dedicated stainless steel cleaner. Avoid chlorine bleach and ammonia that can dull or corrode surfaces.
Use mild soap and water first; avoid chlorine bleach and ammonia to protect the finish.
Can vinegar damage stainless steel?
Diluted vinegar is generally safe for mineral deposits, but avoid prolonged contact on brushed finishes and always rinse afterward.
Dilute vinegar and rinse well to protect brushed finishes.
Should I rinse after cleaning?
Yes. Rinse with clean water to remove cleaner residue and wipe dry to prevent spots.
Always rinse and dry to prevent residue and spots.
Is baking soda safe for stainless steel?
Yes, baking soda paste can lift marks, but use it gently on brushed finishes and rinse well afterward.
Baking soda works for stubborn spots if used gently and rinsed well.
How often should I clean stainless steel appliances?
Wipe daily with a damp microfiber and perform a deeper clean weekly or as needed based on usage.
Do a quick daily wipe and a deeper clean as needed each week.
Can I use lemon juice on stainless steel?
Lemon juice is acidic; it can help lift spots but use sparingly and rinse. Do not leave it on as a long contact time.
Lemon juice can help, but rinse quickly and don’t leave it on long.
Watch Video
The Essentials
- Use microfiber cloths for a streak-free finish
- Follow the grain to avoid swirl marks
- Avoid abrasives and harsh chemicals on all finishes
- Dry thoroughly after cleaning to prevent spots
- Test cleaners on hidden areas before wide use