How to Clean a Dryer Vent: A Complete Guide
Learn how to clean a dryer vent safely with a practical, step-by-step guide. Prevent fires, improve drying efficiency, and extend your appliance’s life with pro tips.

By learning how to clean a dryer vent, you’ll reduce fire risk, boost dryer efficiency, and extend the life of your appliance. This quick guide shows essential steps, safety precautions, and the tools you’ll need to inspect and clear lint from the vent and exterior cover. You’ll complete the task with power off and steady, careful work.
Why cleaning a dryer vent matters
A clothes dryer moves hot air and moisture from your laundry to the outdoors. Over time, lint, dust, and fabric fibers build up inside the vent run and lint trap housing. This buildup restricts airflow, making the dryer work harder and longer to dry clothes. The extra heat and longer run times waste energy, raise utility bills, and shorten the life of the appliance. Most importantly, lint is highly flammable when accumulated, and a clogged vent is a leading cause of home dryer fires. Regular cleaning reduces fire risk, improves drying performance, and keeps your home safer.
Where lint hides is not always obvious. Inside the duct near the dryer, lint can collect behind joints and elbows. The exterior vent is another hotspot; leaves, bird nests, or snow can seal the vent opening, trapping warm air and lint inside. A professional survey may reveal hidden restrictions, but a simple inspection can catch the most common problems. If your clothes are taking longer to dry, or you feel heat coming from the vent cover after a cycle, plan a cleaning session. This section explains why both interior and exterior components matter and how routine maintenance supports better airflow and safer operation.
Safety first: Before you start
Power down: unplug the unit (or turn off the circuit breaker) to prevent shock during inspection and cleaning. If you have a gas dryer, ensure the gas supply is off according to local codes. Put on safety gloves and eye protection to handle sharp edges and lint. Work in a well-ventilated area; wear a dust mask if you’re sensitive to dust. Keep children and pets out of the workspace. Have a bucket or bag ready for lint and debris; do not allow lint to blow back toward living spaces. Finally, confirm the exterior vent is accessible and not blocked by snow, ice, or debris before you begin.
What the vent system looks like and what you’ll clean
A typical system consists of a heatsafe dryer exhaust duct inside the home, a transition duct at the dryer outlet, and an exterior vent cap with a flapper. Lint accumulates fastest in the first few feet of ductwork and inside the lint trap housing. You’ll address both inside and outside components to restore airflow. The goal is to reestablish a smooth, uninterrupted path for air to exit, while ensuring the vent remains securely fastened and sealed against the elements. This section sets expectations for what you’ll encounter and what to avoid during cleaning, such as forcing lint farther into the duct or using water in metal ducts, which can cause corrosion.
How to approach lint removal and airflow restoration (overview)
Plan to disassemble only what you need and avoid heavy hardware tasks unless necessary. Start with the lint trap and its housing, which should be cleaned monthly or with each load. Then proceed to access the duct near the dryer and work outward toward the exterior vent. Use a combination of a vacuum with crevice tool and vent brushes to pull or sweep lint from the duct walls. Stop if you encounter resistance or a bend that won’t clear; forcing lint can damage the duct or disconnect fittings. Finally, verify exterior vent clearance and proper operation of the flapper to ensure clean exhaust.
When to call a professional
If the vent run is longer than 25 feet, has multiple bends, or you notice persistent blockages despite cleaning, a professional technician can access hidden sections with specialized tools and camera inspection. If you smell burning electrical insulation or your dryer shuts off due to overheating, stop immediately and seek professional help. A professional can also assess duct material compatibility and seal integrity to prevent leaks and energy loss. Budget for this service as part of regular appliance maintenance rather than waiting for a breakdown.
Authority sources and further reading
For deeper, evidence-based guidance, consult official sources. The U.S. Consumer Product Safety Commission provides safety tips for clothes dryers and ventilation: https://www.cpsc.gov/safety-education/small-appliances/clothes-dryer-safety. The Environmental Protection Agency covers indoor air quality considerations and best practices for reducing household dust: https://www.epa.gov/indoor-air-quality. The National Fire Protection Association offers comprehensive fire-safety resources related to ignition sources and vent maintenance: https://www.nfpa.org.
Quick checklist before you finish
- Verify the exterior vent cap opens freely and is free of debris
- Reconnect ducts securely and avoid kinks
- Wipe down lint trap housing and surrounding area
- Plug in the dryer and run a short test cycle to verify airflow
Tools & Materials
- Vacuum with hose attachment(Crevice tool for ducts; HEPA preferred)
- Flexible dryer vent brush(Length should match duct run; use gentle, steady strokes)
- Lint screen brush or microfiber cloth(Clean lint trap housing and screen edges)
- Screwdriver (Phillips and flathead)(To loosen vent clamps and access panels)
- Safety gloves(Protect hands from sharp edges)
- Dust mask(Reduces inhalation of lint and dust)
- Flashlight(Inspect dark ducts and joints)
- Step ladder (optional)(Access exterior vent if needed)
Steps
Estimated time: 60-90 minutes
- 1
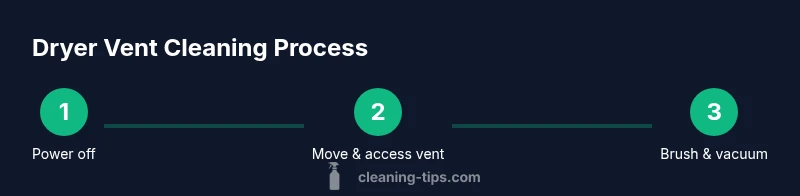
Power down and prep
Unplug the dryer or switch off the circuit. If you smell gas or have a gas dryer, follow safety codes and shut off gas if required. Put on PPE and confirm the workspace is clear.
Tip: Double-check power and gas lines before touching wiring or vents. - 2
Move and expose vent area
Gently pull the dryer away from the wall to access the rear vent. Clear the area of obstacles and place a sheet or tarp to catch lint.
Tip: Have a helper to keep the dryer steady and prevent wall damage. - 3
Inspect lint trap housing
Remove the lint screen and vacuum the housing. Wipe edges with a damp cloth to remove residual lint. This step reduces debris that can fall into the duct.
Tip: Take a quick photo of the housing for reassembly reference. - 4
Detach interior duct at the dryer
Loosen clamps or screws and slide the transition duct away from the dryer outlet. Do not yank; support the duct to prevent damaging joints.
Tip: Handle joints gently to avoid tearing duct material. - 5
Clean interior duct and elbows
Use the vacuum and vent brush to sweep lint from the interior walls toward the exterior. Work slowly, especially around bends, and avoid pushing lint deeper into the duct.
Tip: Use short, controlled brushing strokes to prevent kinking. - 6
Inspect exterior vent and cap
Go outside to check the vent cap and flap. Remove leaves or snow as needed and ensure the flap opens with airflow. Re-seat the cap if it's loose.
Tip: Test the flap by blowing air toward the exterior with your hand. - 7
Reconnect and secure
Reattach the interior duct and clamps, ensuring a tight seal with no gaps. Move the dryer back into place and reconnect power.
Tip: Run a short test cycle to confirm airflow and listen for unusual noises. - 8
Test and finalize
Run an empty dryer cycle to verify proper exhaust and heat levels. Check for reduced drying times and absence of burning odors before returning to normal use.
Tip: Keep the area well-ventilated during the test.
Questions & Answers
Why should I clean a dryer vent?
Regular vent cleaning reduces fire risk and improves drying efficiency by restoring airflow. It’s a key part of safe laundry practices.
Cleaning the vent reduces fire risk and keeps your dryer running efficiently.
How often should I clean my dryer vent?
Most homes benefit from cleaning at least once a year, more often with heavy use or pets. Monitor drying times and heat for signs it’s time to clean.
Aim to clean at least once a year, or more if you use the dryer heavily.
DIY or hire a professional?
Simple, shorter duct runs can be cleaned safely by homeowners with the right tools. Long, complex, or hidden runs are best handled by a professional.
DIY works for simple setups, but call a pro for long or difficult ducts.
What tools do I need?
You’ll need a vacuum with a crevice tool, a flexible vent brush, basic hand tools, gloves, and a mask. Having a flashlight helps inspect dark ducts.
A vacuum, vent brush, basic tools, gloves, and a mask will cover most jobs.
What safety precautions are essential?
Always unplug the dryer, avoid water on ducts, and wear eye protection. If you smell burning or see signs of damage, stop and consult a pro.
Power off, protect your eyes, and avoid water on ducts.
What if lint is stubborn outside?
If exterior lint remains after brushing, consider professional cleaning. Stubborn lint can indicate duct damage or improper ventilation.
Stubborn outside lint may require a pro to prevent issues.
Watch Video
The Essentials
- Vacuum and brush both indoor and exterior vents
- Unplug the dryer before starting and test airflow afterward
- Use proper vent brushes; avoid forcing lint through bends
- Call a pro for long or complex duct runs
- Incorporate vent cleaning into annual maintenance