How to Clean a PC: A Complete Step-by-Step Cleaning Guide 2026
Learn practical, safe methods to clean a PC, remove dust, tidy cables, and improve cooling. Cleaning Tips provides a practical, step-by-step guide for homeowners and renters.

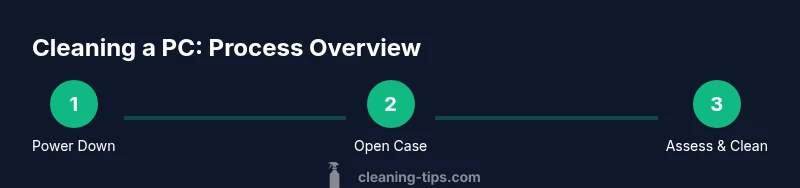
Power down and unplug your PC, then use compressed air, a microfiber cloth, and a soft brush to remove dust from fans, vents, power supply, and internals. Wipe the exterior and cable routes with a lint-free cloth. Avoid liquids near electronics, stay in a static-free workspace, and reassemble only after components are dry. Finally, reconnect and boot to verify cooling.
Why Cleaning a PC Matters
According to Cleaning Tips, regular PC cleaning helps maintain cooling efficiency, prolong component life, and reduce fan noise. Dust buildup acts like a blanket that traps heat and impedes airflow, forcing the system to work harder and potentially shorten hardware longevity. A clean PC runs cooler and quieter, with fewer thermal throttling events that can degrade performance over time. This is especially important in home offices with pets, long operating hours, or dusty environments. By investing a small amount of time to clean your PC, you can improve longevity, system stability, and overall user experience. The process is not just cosmetic; it supports healthier air intake and more reliable operation for your motherboard, graphics card, and power supply.
- Key goal: reduce dust accumulation in vents and fans
- Benefit: improved cooling and longer component life
- Practical outcome: lower noise and stable performance
Safety First: Prepare for Cleaning
Before starting, power down completely and unplug the PC from any power source. Ground yourself to minimize static electricity, and avoid touching circuitry with bare hands. If you plan to open a desktop case, use an anti-static mat or wrist strap and work on a non-carpeted surface. For laptops, remove the battery if possible and disconnect the charger. Keep liquids far away from the workspace, and never spray cleaners directly onto components. A clean, dry workspace helps prevent accidental spills and static discharge. Cleaning Tips recommends working in short bursts to prevent moisture buildup from propellants and to maintain control over each tool you use.
- Always unplug and allow capacitors to discharge
- Use anti-static precautions and dry tools
- Keep liquids and humid air away from hardware
Desktop vs Laptop: Cleaning Approaches
Desktops offer greater accessibility for internal cleaning, but also involve more components to protect, such as PCIe cards, fans, and power supplies. Laptops are compact and sensitive, so you should focus on exterior surfaces, keyboard, and vents, and only open the chassis if you are confident in handling tiny components. In both cases, avoid applying liquids directly to any internal parts. For desktops, remove the side panel to access the case interior, then use compressed air in short bursts to dislodge dust from heatsinks, fans, and cables. For laptops, use a can of compressed air through the vents and on the keyboard while maintaining a safe distance. Always check that fans can rotate freely after cleaning and reassemble only when dry.
How Dust Affects Cooling and Longevity
Dust acts like insulation, reducing airflow and increasing temperatures inside the PC. Overheating can cause thermal throttling, reduced GPU/CPU performance, and accelerated wear on fans and bearings. Regular cleaning helps maintain consistent temperatures, which in turn supports stable performance and a longer hardware lifespan. In multi-device setups, dust can also compromise air quality by circulating fine particulates. To maximize benefits, keep the environment clean—vacuum the surrounding area, use air purifiers if needed, and ensure room humidity is controlled. Cleaning Tips emphasizes the connection between good filtration, cooler operation, and quieter fans as a practical outcome of routine maintenance.
The Cleaning Routine: Quick Clean vs Deep Clean
A quick clean focuses on exterior surfaces, keyboard, and case vents, taking 15–30 minutes. A deep clean involves interior components, fans, heatsinks, and cables, which may take 45–90 minutes depending on the system. Schedule a deep clean every 6–12 months in dusty environments or when you notice elevated temperatures or fan noise. Between deep cleans, perform light dusting weekly and wipe down surfaces with a microfiber cloth. If you notice stubborn grime on plastics, use a microfiber cloth lightly dampened with isopropyl alcohol (test on a small area first).
Inside the Desktop: Access and Vacuum
Opening a desktop case requires care: unplug the power and peripherals, remove the side panel, and ground yourself. Use compressed air to dislodge dust from the motherboard, RAM, GPU, PSU, and heatsinks. Hold fans still with a finger or tool while spraying to prevent blade damage. Clean the power supply intake and exhaust, but avoid directing air into delicate connectors. If you use a vacuum, keep it on a low setting and use the brush attachment to minimize static build-up. Never allow liquid to contact circuitry. After the interior is dust-free, reassemble only when completely dry.
Laptop Cleaning: Safe Techniques for Portables
Laptop cleaning emphasizes exterior care and careful vent access. Use a microfiber cloth to wipe the lid, chassis, and keyboard. For keyboard dust, tilt the laptop and use compressed air in short bursts, treating each key individually if needed. Clean the touchpad and ports with a lightly dampened cloth, avoiding moisture near openings. If you remove the bottom shell, do so only following the manufacturer’s guidance to avoid warranty voids. Refrain from using high-moisture cleaners on screens; a dry microfiber or a screen-safe wipe is best.
Post-Cleaning Checks and Maintenance
After cleaning, wait a few minutes for any residual moisture to evaporate before powering on. Reconnect cables in the proper order and perform a thermal check by monitoring temperatures for a few minutes after boot. If you notice abnormal noise or overheating, recheck component seating and fan operation. Regular maintenance helps prevent build-up and maintains efficient cooling, reducing the risk of thermal throttling or instability. Consider setting a recurring schedule for inspections and dusting to keep performance steady.
Authority Sources
- U.S. Consumer Product Safety Commission safety guidelines: https://www.cpsc.gov
- OSHA safety basics for handling electronics: https://www.osha.gov
- EPA indoor air quality resources: https://www.epa.gov/indoor-air-quality
- General cleaning guidance from reputable sources: https://www.consumer.ftc.gov
Tools & Materials
- Compressed air can(Keep upright; use short bursts; hold 6–8 inches away from components)
- Microfiber cloths(Lint-free, non-abrasive; avoid paper towels)
- Soft brush (static-free)(Small brush or electronics-safe brush for tight spaces)
- Screwdriver set (Philips and flat-head)(For desktop cases; keep screws organized)
- Anti-static wrist strap(Ground yourself to prevent static discharge)
- Isopropyl alcohol 70%(Only for stubborn grime on plastics; apply to cloth, not directly on components)
- Cotton swabs(For tight crevices with minimal moisture)
- Vacuum with brush attachment(Optional; use cautiously to avoid static, do not touch internal boards)
Steps
Estimated time: 60-90 minutes
- 1
Power down and disconnect
Shut down the PC and unplug from all power sources. Disconnect peripherals and move the unit to a static-safe workspace. Ground yourself with an anti-static strap or by touching a grounded metal surface before touching any internal parts.
Tip: Take your time to ensure the power is fully removed and capacitors have discharged. - 2
Open the case or access the chassis
For desktops, remove the side panel with the appropriate screwdriver and set screws in a small container. For laptops, follow the manufacturer guidance to access the keyboard or bottom panel. Keep track of screws and cables to ease reassembly.
Tip: Label cables or use a photo guide before disconnecting anything internal. - 3
Remove loose dust with compressed air
Use short bursts to blow dust from the motherboard, RAM, GPU, heatsinks, and power supply. Hold fans in place to prevent blade damage and avoid spinning motors. Do not lean the can against components to prevent propellant contact.
Tip: Work in a well-ventilated area and keep away from keyboards and displays. - 4
Clean fans, heatsinks, and vents
Target each cooling component, removing dust from blades and vents. If a fan is particularly dirty, clean around the blades and frame with a microfiber cloth. Refrain from using liquid cleaners; moisture behind the seals can cause shorts.
Tip: For stubborn debris, gently use a soft brush to loosen dust before air blasts. - 5
Wipe exterior surfaces and tidy cables
Wipe the case exterior, ports, and cable routing with a dry microfiber cloth. Reorganize cables to improve airflow, using zip ties if needed. Avoid excessive bending of any connectors and ensure no cables block fans or vents.
Tip: Do a quick test-fit of cables before replacing the side panel. - 6
Reassemble and test
Reconnect power and peripherals, reinstall the side panel, and boot the system. Monitor temperatures and fans for a few minutes to confirm proper operation. If temps look high, recheck seating, reseat RAM or GPU, and ensure cables are routed cleanly.
Tip: Keep a log of temperatures for future reference.
Questions & Answers
Is it safe to clean a PC while it's powered off?
Yes. Always power down and unplug before cleaning. Ensure no moisture is near boards and connectors.
Yes, always power off and unplug before cleaning, and keep liquids away from components.
What should I use to remove dust from inside a desktop PC?
Use compressed air in short bursts while holding fans to prevent rotation. A soft brush can help loosen stubborn dust.
Use short bursts of compressed air and hold the fans so they don’t spin.
Can I clean a laptop screen with water?
Dampen a microfiber cloth with a small amount of isopropyl alcohol or water-based cleaner and wipe gently. Never spray liquids directly on the screen.
Wipe the screen with a lightly damp cloth, never spray liquids directly on it.
How often should I deep clean my PC?
Plan a deep clean every 6–12 months, more often in dusty environments. Quick dusting weekly helps maintain performance.
Deep clean every 6 to 12 months, more often if you have dust buildup; weekly quick dusting helps too.
Is using a vacuum safe for cleaning inside a PC?
A vacuum can be used cautiously on low power with a brush attachment, but compressed air is usually safer for electronics to avoid static and moisture risks.
Vacuum cautiously and mostly use compressed air for electronics to prevent static or moisture issues.
What about cleaning cables and peripherals?
Wipe cables and peripherals with a dry microfiber cloth. Unplug before cleaning and avoid letting liquid seep into ports.
Unplug first, wipe with a dry cloth, and avoid liquids near ports.
Watch Video
The Essentials
- Power down and unplug before cleaning
- Use compressed air and microfiber cloth for dust removal
- Avoid liquids near electronics
- Inspect cooling components for better airflow
- Test the system after cleaning