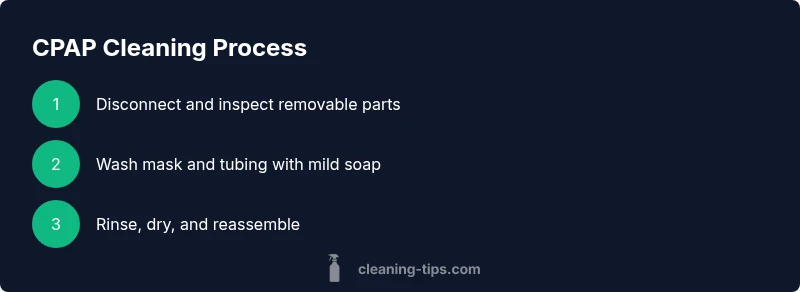
How to clean machine for cpap: A practical step-by-step guide
Learn to clean machine for cpap safely with a step-by-step routine for CPAP masks, tubing, and humidifier chambers. Practical tips, tools, and a maintenance plan from Cleaning Tips to keep therapy hygienic and effective.

Learn how to clean machine for cpap safely with a simple, repeatable routine. This quick answer outlines the essential daily, weekly, and monthly actions, plus component-specific care to reduce contamination and preserve performance. By following manufacturer guidelines and Cleaning Tips' recommendations, you can maintain hygienic equipment and improve therapy quality.
Why cleaning a CPAP matters
Regular cleaning of CPAP equipment is essential for comfort, hygiene, and effective therapy. According to Cleaning Tips, routine cleaning reduces the risk of skin irritation, eye irritation, and mold growth, while helping maintain consistent airflow. The CPAP humidifier chamber, mask, and tubing can accumulate oils, skin cells, and moisture that become a breeding ground for bacteria and mold if left neglected. A clean CPAP setup not only feels fresher but also minimizes breakout flare-ups and infection risk, which supports better treatment outcomes. Prioritizing a clean machine for cpap helps you breathe easier at night and prolongs the life of your gear. Consistency matters: a small daily habit compounds into fewer problems over time and fewer interruptions to your therapy.
As you build your routine, keep the principle in mind: treat CPAP cleaning as preventive care, not a one-off chore. The Cleaning Tips team emphasizes that simple, repeatable steps performed regularly deliver the best results in real-world homes.
Safety and maintenance foundations
Before you begin any cleaning, ensure safety and protect the device. Always unplug the CPAP machine and remove it from the power source. Do not immerse the main unit or its motor in water; only components designed for immersion should be cleaned according to the manufacturer. Use mild soap and warm water, and avoid harsh chemicals, bleach, or abrasive scrubbers that could degrade plastics or seals. Dry hands and clean, dry surfaces reduce the chance of recontamination. If your model includes a heated humidifier, follow specific guidance for the water chamber to avoid warping or damage. By keeping safety at the forefront, you’ll preserve device integrity and your own health when you clean machine for cpap.
Daily, weekly, and monthly cleaning routines
A practical cleaning schedule helps you stay on top of hygiene without feeling overwhelmed. Here’s a clear framework you can adopt:
- Daily:
- Wipe the mask with mild soap and warm water after use, then air-dry on a clean surface.
- Rinse the mask and any soft parts thoroughly to remove soap residue.
- Weekly:
- Clean the tubing with warm water and mild soap; rinse until the water runs clear.
- Wipe down the CPAP housing exterior and the water chamber’s exterior, then allow to air-dry.
- Monthly:
- Check and replace the disposable filters if your model uses them.
- Disinfect the water chamber if your manufacturer approves a cleaning solution, then rinse thoroughly and air-dry completely before reassembly.
Consistency matters. Set reminders or pair cleaning with a regular bedtime routine to ensure no component is neglected over time.
Cleaning components: mask, tubing, humidifier chamber, and filters
When you clean machine for cpap, break the task into its main parts. Each has its optimal care method:
- Mask: Detach and wash the cushion, frame, and headgear separately using mild soap and warm water. Rinse well and air-dry completely before reassembly.
- Tubing: Wash with mild soap and warm water; follow with a thorough rinse. Shake out excess water and hang to dry before reconnecting.
- Humidifier chamber: Empty, rinse, and dry the chamber. If the chamber has visible residue, use a mild soap solution and rinse until completely clear.
- Filters: If your unit has a replaceable filter, check and replace per the manufacturer’s schedule.
Following component-specific care reduces residue and scent buildup, supporting better airflow and user comfort.
Cleaning solutions and methods
Choose cleaning methods that are gentle to CPAP materials while effectively removing oil and residue. Use mild, unscented dish soap and warm water for most parts. Avoid bleach, alcohol-based wipes, or abrasive cleaners that can degrade plastics or seals. If your model permits, some CPAP cleaners offer manufacturer-approved solutions; always read the user manual before using any chemical. For the humidifier chamber, distilled water is recommended to minimize mineral buildup. After washing, ensure all parts are rinsed thoroughly to prevent soap residue that can irritate skin or lungs. Proper drying is essential before reassembly to prevent microbial growth.
Drying and reassembly: essential steps
Drying is as critical as washing. After rinsing, lay each component on a clean towel in a well-ventilated area. Do not use heat sources like hair dryers that could warp plastics. Reassemble only when every part is completely dry, then reconnect to power and test for leaks and comfort. Keeping a tidy, dry workspace reduces the risk of contamination and makes reassembly quicker next time.
Troubleshooting common issues
If you notice a musty odor, sour taste, or visible residue after cleaning, rewash the affected parts using fresh soap and water, ensuring thorough rinsing. Any persistent scent or residue could indicate inadequate drying or mineral buildup in the humidifier chamber. If leaks occur after reassembly, double-check seals and connectors, and ensure parts are fully dry before use.
Regular maintenance plan and checklist
Create a simple one-page plan you can print or save to your phone. Include the cleaning frequency for each component, a reminder for filter replacement, and a note to inspect seals and connectors monthly. A consistent maintenance checklist helps you stay on track and minimizes therapy interruptions. Cleaning Tips recommends tailoring a plan to your device model and your home routine so cleaning becomes a predictable part of nightly life.
What to do if you suspect contamination
If you suspect contamination or exposure to a moldy or damp environment, pause CPAP use until you have re-cleaned and dried all parts. Consider replacing the humidifier chamber if it shows signs of cracking or residue that doesn’t come off with cleaning. When in doubt, contact your clinician or the manufacturer for model-specific guidance.
Tools & Materials
- Mild dish soap(Fragrance-free preferred; avoid harsh detergents)
- Warm water(For washing components)
- Distilled water(For humidifier chamber when filling)
- Soft cloth or microfiber towel(Pat dry and wipe surfaces)
- Soft brush or toothbrush(Gently clean tiny crevices)
- CPAP cleaning wipes (optional)(For quick daily freshening)
- Replacement filter (if applicable)(Replace per model schedule)
- Small basin or bowl(Large enough for submerging parts except the main unit)
Steps
Estimated time: 40-60 minutes
- 1
Power down and disconnect
Unplug the CPAP machine and remove it from the power source. Disconnect hoses and detach removable accessories to expose all washable parts. This prevents electric shock and makes cleaning components safer and more effective.
Tip: Keep a labeled bin for parts to avoid losing any pieces during disassembly. - 2
Disassemble removable parts
Separate the mask cushion, frame, headgear, tubing, and humidifier chamber from the main unit. Do not force or bend connectors; refer to your model’s manual for disassembly guidance. A clean workspace helps keep parts organized.
Tip: Take photos during disassembly to simplify reassembly later. - 3
Prepare cleaning solution
Fill a basin with warm water and add a small amount of mild dish soap. Stir gently to create a light soapy solution. Avoid hot water or strong chemicals that can deform plastics or degrade seals.
Tip: Test a hidden spot on a non-visible area first if you’re unsure about material sensitivity. - 4
Wash mask and headgear
Submerge and wash the mask cushion, frame, and headgear in the soapy solution. Use your fingers to gently remove oils and residue. Rinse thoroughly under clean running water to remove all suds.
Tip: Do not scrub vigorously on the silicone cushion; gentleness preserves seal integrity. - 5
Clean tubing
Rinse tubing with warm, soapy water. If there’s stubborn buildup, use a soft brush to loosen it. Rinse again until clear, then shake gently to remove excess water.
Tip: Hang tubing in a well-ventilated area to air-dry completely. - 6
Clean humidifier chamber
Empty the chamber, rinse with soapy water, and scrub lightly if needed. Rinse until no soap remains and allow to air-dry away from direct heat.
Tip: If your model allows, wipe the exterior with a damp cloth while avoiding the interior connectors. - 7
Rinse thoroughly and air-dry
Rinse all components with clean water until no soap residue remains. Lay parts on a clean towel in a dust-free area and allow to dry completely before reassembling.
Tip: Inspect seals for dryness; damp seals can harbor mold when reassembled. - 8
Reassemble and test
Once completely dry, reattach tubing, mask, and humidifier chamber to the main unit. Power on and check for leaks and proper airflow. If you notice any issues, consult your manual.
Tip: Keep a maintenance log to track when you cleaned and inspected each part.
Questions & Answers
How often should I clean my CPAP equipment?
Aim for daily cleaning of the mask and humidifier chamber exterior, weekly cleaning of tubing, and periodic cleaning of other components according to your model. Replace filters per the manufacturer’s schedule. Establishing a routine minimizes contamination and keeps therapy comfortable.
Clean the mask daily and the humidifier exterior; tube and other parts weekly. Replace filters as directed by the manufacturer. A regular routine helps keep therapy comfortable and hygienic.
Can I use vinegar or bleach to clean CPAP parts?
Bleach and strong solvents are generally not recommended for CPAP parts as they can degrade materials. Mild soap and water are safest for most components. If you use any cleaner, verify it is approved by the manufacturer for CPAP equipment.
Bleach and strong cleaners aren’t usually recommended for CPAP parts. Use mild soap and water, and check your manufacturer’s guidance for approved cleaners.
Is it safe to submerge the CPAP device itself?
No. The main CPAP unit should never be submerged in water. Clean only the detachable parts as directed by the manufacturer, and avoid getting moisture into the electronic components.
No. Do not submerge the CPAP machine itself; clean only the removable parts and keep the electronics dry.
What should I do if there’s a musty smell after cleaning?
Rewash the parts with fresh soap and water, ensure thorough rinsing, and dry completely before reusing. A persistent odor may indicate moisture remains or mineral buildup in the humidifier chamber.
If you smell mustiness, rewash with fresh soap, rinse well, and dry completely. If it continues, check for moisture in the humidifier chamber.
Can I travel with CPAP cleaning supplies?
Yes, but pack compact, travel-friendly cleaning wipes and ensure you have access to water for rinsing. Review airline security rules for liquids and cleaners, and carry a printed care guide for quick reference.
You can travel with CPAP cleaners, but keep to travel-sized supplies and follow airline rules for liquids. Carry a care guide for quick reference.
How do I dry CPAP parts properly after cleaning?
Air-dry all parts on a clean, lint-free surface in a well-ventilated area. Avoid direct heat. Ensure no moisture remains before reassembly to prevent mold and bacteria growth.
Air-dry the parts completely in a clean, ventilated area; avoid heat. Make sure there’s no moisture before reassembling.
Watch Video
The Essentials
- Schedule regular CPAP cleaning for hygiene and performance.
- Use mild soap and warm water for most parts.
- Dry all components thoroughly before reassembly.
- Follow manufacturer guidance for humidifier chambers and filters.
- If in doubt, consult the device manual or manufacturer.