General Electric Oven Self Clean: A Practical How-To
Learn how to safely use the General Electric oven self-clean cycle with prep, execution, and post-clean care. This step-by-step guide from Cleaning Tips covers safety, racks, odors, and troubleshooting for homeowners and renters.

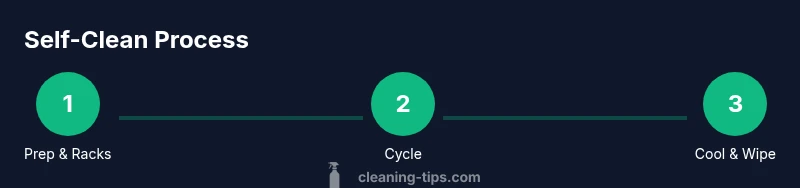
You can safely use the GE oven self-clean cycle by prepping the interior, removing racks, and starting the cycle as directed in the manual. This guide explains when to use it, how to monitor the cycle, and how to wipe away ash afterward. Cleaning Tips emphasizes safety and proper venting for best results.
Why general electric oven self clean matters
According to Cleaning Tips, the self-clean cycle on a GE oven is designed to burn off food residue at extremely high temperatures, converting it to ash that you wipe away later. Using this feature correctly helps maintain uniform heat, reduces baked-on stains, and prolongs oven life. This section explains why the cycle matters, what it does to the interior lining, and how to decide when it's the right choice for your kitchen routine. Homeowners and renters benefit from understanding that self-cleaning is not a substitute for regular wipe-downs after cooking; rather, it complements routine maintenance. The general electric oven self clean feature works best on modest spillovers and dry, baked-on messes. Before you start, confirm your oven model supports self-clean, read the user manual, and follow safety precautions to minimize odors and potential smoke. Cleaning Tips stresses using proper ventilation and avoiding chemical cleaners inside the cavity.
How the self-clean cycle works on GE ovens
GE ovens use a high-temperature cycle to carbonize food residues, turning them into a small amount of ash that can be wiped away after the cycle completes. In practice, the door remains locked during the cycle, and the interior heats to extreme temperatures. The exact cycle duration varies by model, but the principle is the same across many GE units: heat, burn-off, cool-down, and ash removal. As Cleaning Tips notes, this is not a quick cleaning method; it is a deep-clean option intended for baked-on residue. Understanding this process helps set expectations: you may notice a slight odor or smoke at the start, especially if the oven is particularly dirty. If you have a premium model with a two-stage cycle, you may see a two-step process: a long burn-off followed by a rapid cooldown.
Safety and prep before starting the self-clean cycle
Before initiating the self-clean cycle, ensure the kitchen is well-ventilated by opening a window or turning on an exhaust fan. Remove heavy pans, aluminum foil, and any plastic items from inside. Check that the door seal is intact and that there are no broken racks left in the cavity that could snag during the cycle. Place old towels on the floor to catch any ash and to protect flooring from heat exposure. The Cleaning Tips team recommends wearing heat-resistant gloves and avoiding the use of any cleaners inside the oven—these cycles are designed to work without added chemicals. Finally, verify your oven is level and stable; a tilted unit can cause uneven heating in the cycle.
Tools and materials you’ll need
While the self-clean cycle itself is chemical-free, having the right tools helps you prepare and finish safely. Gather:
- Oven racks: remove and set aside (essential)
- Heat-resistant gloves (essential)
- Damp cloth or sponge (essential)
- Old towels or protective mat (essential)
- Vacuum with hose or small brush (optional)
- Mild, non-abrasive cleaner for the door exterior after cooling (optional)
- A flashlight to inspect the oven interior after it cools
Step-by-step overview before you start
Before you engage the self-clean cycle, take a quick mental walk-through of these prep steps: remove the racks, clear the interior, check for any loose objects, and confirm ventilation is active. This overview helps prevent interruptions once the cycle begins. If you’re unsure about your model’s controls, consult the GE manual or the manufacturer’s support site. Clean only with the cycle designed for this purpose; avoid adding cleaners that can release harmful fumes once the interior heats up. Cleaning Tips recommends having a plan for post-cleaning ash disposal and rack reinsertion.
Start with proper preparation
Prepare your workspace and the oven interior. Remove all racks and utensils, wipe loose debris, and run a quick exterior wipe to remove surface spills. Check the oven door for any visible gaps or damage and ensure the oven is on a level surface. Turn on adequate ventilation, such as a kitchen vent or window. This step minimizes smoke buildup and helps you monitor odors during the cleaning process. Remember: the self-clean cycle heats the interior to very high temperatures, so safety gear is essential.
Removing racks and interior inspection
Take out all racks and any trays; place them on a heat-resistant surface to cool. Inspect the interior walls for any rough spots or buildup that could cause scraping noises when the cycle begins. Do not reinsert or place racks back inside during the self-clean cycle. By removing racks, you reduce the risk of damage and ensure the ash created can be wiped away easily after cooling. If you notice damage to the door seal or gasket, contact a service professional before running the cycle.
Running the self-clean cycle safely
Close the oven door securely and select the Self-Clean option on your GE control panel. If your model offers cycle length options, choose the default or longer setting for heavier buildup. Do not use any additional cleaners or spray bottles inside the cavity. Keep children and pets away, and ensure the kitchen exhaust is venting to the outside. Stay nearby but avoid opening the door during the cycle, as the interior will be extremely hot and pressurized.
Cooling and interior cleaning after cycle
When the cycle ends, allow the oven to cool completely before opening the door. The interior will be hot and may emit smoke or a strong odor that will dissipate with time. After cooling, wipe the interior walls with a damp cloth to remove ash. Do not scrub aggressively, which could damage the enamel. If ash remains stubborn, repeat a brief cycle or use a non-abrasive scrubber with water on the exterior of the door only. Always recheck that the door latch is functioning after cleaning.
Cleaning the racks after the cycle and post-care
Once the oven has cooled, reinsert the racks after scrubbing them with a mild detergent and warm water, then dry thoroughly. If discoloration remains on the racks or door trim, you can wipe with a gentle cleaner suitable for stainless steel, following the product’s instructions. Inspect the door seal and hinges; clean any soot around the gasket with a soft cloth. Finally, run a quick test by placing a shallow dish of water inside and running a short cycle to ensure there are no unusual noises or smoke before resuming regular cooking.
Troubleshooting common issues
If the self-clean cycle fails to start, check that the oven is properly connected, the door is locking, and the control panel is responsive. If you detect excessive smoke or a burning smell beyond normal, turn off the cycle and ventilate the area, then contact GE support. For light ash that remains after a cycle, a second short cycle can help; if persistent buildup remains, there may be underlying enamel damage or misalignment that requires service. Always follow the manual’s troubleshooting steps before scheduling service.
Authoritative sources
For safety and best practices, consult these reputable sources:
- U.S. Consumer Product Safety Commission: https://www.cpsc.gov
- Extension services (educational resources): https://extension.psu.edu
- Consumer Reports and product safety reviews: https://www.consumerreports.org These sources provide general guidelines on appliance maintenance, heat exposure, and safe cleaning practices that complement the GE manual.
Tips from Cleaning Tips
As the Cleaning Tips team notes, always prioritize ventilation and do not use chemical cleaners inside the cavity during the self-clean cycle. Pre-wipe loose debris and remove racks as a standard precaution. After cleaning, wipe the interior with a damp cloth while still warm but not hot to reduce ash residue, and store your oven in a clean, dry environment to prevent future buildup.
Tools & Materials
- Oven racks(Remove and set aside; they may discolor or warp if left inside during the cycle)
- Heat-resistant gloves(Protect hands during removal and post-cycle handling)
- Damp cloth or sponge(Use for interior wipe after ash forms)
- Old towels or protective mat(Protect floor from ash and heat during the cooldown)
- Vacuum with hose (optional)(Useful for cleaning ash from the bottom after cooling)
- Mild, non-abrasive cleaner for exterior (optional)(Only for door exterior after interior cleaning)
- Flashlight(Inspect interior corners after cooling)
Steps
Estimated time: Total time: 2-4 hours (including cooldown and rack reassembly)
- 1
Check model suitability
Identify your GE oven model and confirm it has a self-clean function. Read the user manual for model-specific instructions and safety warnings before proceeding.
Tip: If in doubt, verify cycle availability on the control panel and consult GE support. - 2
Clear the area and ventilate
Open a window or turn on the kitchen exhaust fan to vent odors and potential smoke. Remove nearby items that could burn or melt during the cycle.
Tip: Ventilation reduces fumes and improves air quality during the burn-off. - 3
Remove oven racks
Take out all racks and any trays from the oven cavity and place them on a heat-resistant surface to cool separately.
Tip: Racks can discolor; cleaning them after the cycle is easier when they’re removed. - 4
Wipe loose debris
Use a damp cloth to wipe away loose crumbs from the interior walls, leaving a clean surface for the cycle.
Tip: Removing loose debris helps ash collect more predictably. - 5
Set the Self-Clean cycle
Close the door and select the Self-Clean option on the control panel. If available, choose the default duration or a longer setting for heavy buildup.
Tip: Avoid adding any cleaners; the cycle is designed to operate without chemicals. - 6
Monitor and wait
Allow the cycle to run while keeping children and pets away. Do not open the door during the burn-off.
Tip: Expect heat and temporary odor; this is normal and part of carbonizing residue. - 7
Cool and wipe inside
Let the oven cool completely, then wipe the interior with a damp cloth to remove ash.
Tip: Do not scrub aggressively; enamel can be damaged if scrubbed while hot or dirty. - 8
Clean racks and reassemble
Wash the racks with mild detergent, dry thoroughly, then reinsert them once the interior is clean and dry.
Tip: Place racks back only after interior has cooled to avoid warping.
Questions & Answers
Does every GE oven model have a self-clean function?
Most GE ovens offer a self-clean option, but features vary by model. Check your control panel and the user manual to confirm availability before attempting the cycle.
Most GE ovens have self-clean, but verify your model on the control panel or manual before starting.
Should racks be removed before starting self-clean?
Yes. Remove all racks and trays before starting the cycle. This prevents heat damage and ash from sticking to metal racks.
Yes, remove racks before starting the cycle to prevent damage and ash sticking.
What if I smell smoke during the cycle?
A brief odor or smoke can occur as residues burn off. If the smell is strong or persistent, pause ventilation and contact GE support if needed.
A temporary odor is common; ensure ventilation and contact support if it worsens.
Can I run self-clean on a gas GE oven?
Some gas GE ovens offer self-clean options, but check your model’s manual. If unsupported, avoid forcing a cycle and use manual cleaning methods for safety.
Check your model’s manual, as some gas ovens don’t support self-clean cycles.
Why does the cleaning cycle take so long?
Self-clean cycles run longer to burn off residues safely. Duration varies by model and buildup; follow the manual's guidelines rather than guessing.
The cycle is long on purpose to safely burn off residue; follow your manual.
What should I do if the door won’t unlock after cleaning?
Wait for the interior to cool, then attempt to reopen per the manual. If the door remains locked, contact GE support for guidance.
If it stays locked after cooling, consult the manual or GE support.
Watch Video
The Essentials
- Prepare workspace and ventilate before starting.
- Remove racks; interior cleaning relies on ash formation.
- Do not use cleaners inside the oven during the cycle.
- Allow full cooldown, then wipe ash and reinsert racks.
- Consult GE manual for model-specific steps and safety notes.