What to Do When Self-Clean Oven: A Practical Guide
Learn a detailed, step-by-step approach to safely handle a self-clean oven after a cycle, including safety checks, ventilation, residue removal, and preventive maintenance for healthier kitchens.

What you’ll accomplish: safely respond after a self-clean oven cycle by performing essential safety checks, ventilating the kitchen, removing ash, and inspecting for damage. You’ll learn which steps to take first, how to reset expectations, and when to seek professional help. According to Cleaning Tips, following these steps protects your appliance and home.
Why Self-Clean Ovens Aren't Foolproof
Self-cleaning ovens rely on extremely high heat to burn away food residue, turning spills into ash that can be wiped away later. While this feature is convenient, it isn’t a guarantee against all messes or odors. In practice, doors, gaskets, and electronic controls can suffer wear over time if the post-cycle care isn’t done correctly. The Cleaning Tips team has observed that many common issues—odors, light smoke, lingering residue, or uneven baking results—stem from incomplete cooling, inadequate ventilation, or aggressive cleaning right after the cycle. By understanding what can go wrong and how to address it, you can extend the life of your appliance and keep your kitchen safer and more pleasant. This section lays the groundwork for a safer, more effective follow-up after a self-clean cycle, with practical steps you can take today. Remember, the oven remains extremely hot during the first minutes after the cycle ends, so approach with caution and use proper protective gear. According to Cleaning Tips, a calm, methodical approach reduces risk and simplifies cleanup.
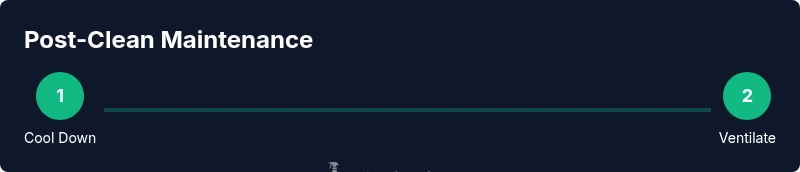
Immediate Safety Checks After the Cycle
After the self-clean cycle finishes and the oven begins its natural cooldown, perform these checks before touching any interior surfaces. First, verify the oven is off and cool to the touch. If you see smoke or notice a strong odor, keep a safe distance and increase ventilation. Then, inspect the exterior for heat damage or warping around the door and control panel. Do not attempt to operate the oven if you see melted seals, frayed wiring, or anything unusual—these are signs you should stop and seek professional service. According to Cleaning Tips, documenting what you observe and avoiding improvisation reduces risk. Secure pets and children away from the kitchen during this inspection. If you cannot reach the oven safely, wait until a family member can assist, or postpone further checks. Finally, gather your cleaning supplies so you can address residues properly without scrambling mid-process.
Ventilation Strategy: Airing Out Odors Effectively
Ventilation is your best ally after a self-clean cycle. Open nearby windows and switch on the range hood or exhaust fan to pull heat and fumes out of the kitchen. If possible, keep the kitchen door ajar to improve cross-ventilation. Use a standing fan to direct air toward an open window, which helps carry odors outside rather than through living spaces. Avoid running ceiling fans that can circulate smoke within the room. For deodorizing, place a shallow bowl of distilled white vinegar or baking soda on the counter to absorb lingering odors, but don’t place liquids inside the oven itself. Cleaning Tips recommends repeating this process for 15–30 minutes, then reassessing. If odors persist after air circulation, take a short break, recheck the oven’s temperature, and continue ventilating until your kitchen feels normal again.
Inspecting the Interior for Residue and Discoloration
Once the oven is safely cooled and ventilated, remove the racks carefully and set them aside for separate cleaning. Put on gloves to avoid sharp edges and to protect against ash. Use a flashlight to inspect the interior walls, ceiling, and the bottom for ash or discoloration. A damp microfiber cloth works well for wiping away ash from enamel surfaces; for stubborn spots, sprinkle a little baking soda on the cloth and gently scrub. Do not use abrasive pads that can scratch the enamel. If you see charring on the ceiling around the vent or near the broil element, take an extra moment to wipe with a vinegar-water solution and dry immediately. This avoids smearing that ash across surfaces later. Document any areas that require repeated cleaning, as recurring spots may indicate a deeper issue with insulation or sealing that a professional should assess.
Handling Ash, Carbon, and Crumbs Safely
After cooling, scoop out loose ash and crumbs with a plastic spatula or dustpan. Transfer debris to a trash bag, sealed if possible, to prevent spreading dust. Use a vacuum with a narrow nozzle to capture dust in crevices around the gasket and vent areas, taking care not to dislodge any wiring or insulation. Wipe the interior with a damp cloth and a mild soap solution, then dry with a clean towel. Avoid using steam or moisture around heating elements. If you notice white powdery residue that won’t wipe away, it may be mineral ash from high heat—this can be cleaned with a gentle baking soda paste. Always wear gloves and eye protection during this process.
Checking the Door Gasket, Racks, and Heating Elements
Inspect the door gasket for cracks, tears, or deformations since a compromised seal can allow heat to escape and odors to escape. Gently run your finger along the gasket to feel for stiffness or gaps. Remove and wash the racks in warm, soapy water, then dry completely before reinserting. Inspect heating elements for any visible damage or warping; if you see any discoloration that suggests overheating, stop using the appliance and contact a technician. Do not attempt to bend or reposition heating elements yourself; they can cause electric shock or fire hazards. The goal is to confirm the oven’s sealing and structure are intact and that no debris is compromising airflow.
Exterior Cleaning and Vent Openings
With the interior handled, focus on the exterior to minimize fingerprints and smoke stains. Wipe the door exterior, control panel, and handle with a damp cloth and mild detergent. Avoid harsh cleaners that can degrade plastic or stainless-steel finishes. Clean around the control knobs and vent openings with a soft brush to remove dust. If the range hood used during ventilation collected grease, wipe its exterior as well. Dry surfaces with a clean towel. This step helps your oven look and function like new, and it reduces the chance that fumes will linger near electric components.
Electrical and Control Panel Considerations
Many self-clean cycles involve high heat near delicate electronics. After cooling, test the oven’s control panel by turning on a light bake cycle to ensure buttons respond normally. If you notice unresponsive keys, flickering displays, or error codes, consult the manual or contact a technician. Never spray cleaners directly onto the control panel or into the vent; use a damp cloth and a dry cloth to finish. If the oven has a removable back panel, avoid tampering with wiring or fuses; temperature fluctuations can damage components and void warranties. Always follow manufacturer recommendations for maintenance and if in doubt, call for professional service.
When to Call a Technician or Consider Replacement
Persistent odors, recurring smoke, unusual heat, or burning smells that return after cleaning are signals that deeper issues exist. A professional technician can diagnose faulty seals, wiring damage, or control-board problems that aren’t safe to fix yourself. If your oven is older or the heating elements show signs of wear beyond repair, replacement may be more cost-effective than ongoing repairs. Cleaning Tips suggests obtaining a written estimate and comparing with the cost of a new unit. If your unit is under warranty, contact the manufacturer for covered service.
Preventive Maintenance: A Proactive Cleaning Plan
To minimize issues with self-clean cycles, implement a simple preventive plan. Schedule a quarterly inspection of door seals, racks, and vent openings for wear or buildup. Wipe any spills promptly after cooking to reduce fuel for the self-clean cycle. After each cycle, allow the oven to cool completely before wiping ash and debris. Keep a dedicated cleaning kit handy with microfiber cloths, mild detergents, baking soda, and a small brush. Consider a maintenance log to track problems, repairs, and warranty dates. Following these steps helps maintain performance, reduce odors, and extend the life of your oven.
Tools & Materials
- Heat-safe gloves(Protect hands when handling racks or hot surfaces)
- Soft microfiber cloths(For wiping interior surfaces and glass)
- Non-abrasive sponge(Gentle scrubbing on exterior enamel)
- Plastic or silicone spatula(Scrape ash without scratching enamel)
- Dish soap(Mild detergent for exterior cleaning)
- Baking soda(Deodorizing and gentle scouring agent)
- Distilled white vinegar(Deodorizer and cleaner for tough spots)
- Bucket or bowl(Mix cleaning solutions and rinse cloths)
- Vacuum with crevice tool(Remove loose debris from tight areas)
- Old towels or towels(Protect floor and catch drips)
- Flashlight(Illuminates corners and heating elements)
- Soft-bristle brush(Clean gasket and crevices)
Steps
Estimated time: 60-90 minutes
- 1
Power down and ensure safety
If safe to reach, turn off the oven and unplug from the wall. Allow the appliance to cool completely before touching interior surfaces. This reduces the risk of burns or electric shock and gives you a stable starting point.
Tip: Always wear heat-resistant gloves when handling hot racks or near hot surfaces. - 2
Ventilate the area
Open windows and switch on the range hood to vent heat and fumes. Cross-ventilation speeds up odor dissipation and helps clear air before you begin cleaning.
Tip: Place a fan pointing toward an open window to maximize airflow. - 3
Gather and organize tools
Set out your cleaning kit and lay towels to catch drips. Having everything ready prevents last-minute scrambles and keeps the process efficient.
Tip: Verify you have baking soda and vinegar on hand for deodorizing. - 4
Remove racks for separate cleaning
Carefully slide out the racks and place them on a towel. Rinse with warm, soapy water, then dry completely before reinstalling.
Tip: Avoid rust by drying racks promptly after washing. - 5
Wipe the interior ash
Use a plastic spatula to lift loose ash, then wipe remaining surfaces with a damp microfiber cloth. For stubborn spots, make a light baking soda paste and scrub gently.
Tip: Never spray cleaners directly on heating elements. - 6
Clean the interior with care
Wipe the walls, ceiling, and bottom with a vinegar-water solution, then dry thoroughly. Avoid abrasive pads that could scratch enamel.
Tip: Use a flashlight to inspect hard-to-see corners. - 7
Check door gasket and seals
Inspect seals for cracks or gaps. A compromised gasket wastes energy and can cause odors to escape during subsequent cycles.
Tip: If you spot damage, consider replacing the gasket rather than attempting DIY fixes. - 8
Tidy the exterior and vents
Wipe the exterior surfaces and around vents with a mild detergent. Clear any built-up grease near the vent openings.
Tip: Dry all exterior surfaces to prevent streaks. - 9
Test controls after cooling
After the oven is fully dry, run a brief bake cycle to confirm the control panel responds normally and there are no error codes.
Tip: If controls are unresponsive, consult the user manual before attempting repairs. - 10
Plan preventive maintenance
Record observations and schedule quarterly checks for seals, racks, and vents to reduce future issues.
Tip: Keep a dedicated kit handy for quick post-cycle cleanups.
Questions & Answers
Is it safe to open the oven door immediately after a self-clean cycle?
No. The oven is extremely hot right after the cycle ends, and opening the door too soon can release heat and fumes into the room. Wait until the oven cools to a safe temperature before inspecting or touching interior components.
Wait for the oven to cool before opening the door, then inspect safely.
Why does my oven sometimes smoke during or after a self-clean cycle?
Light smoke can occur from residues burning off, which is normal in small amounts. Persistent or dense smoke, unusual smells, or smoke near wiring means you should stop and seek professional service.
Smoke can be normal briefly, but persistent smoke needs a technician.
Can I use water to cool the oven during the cycle?
No. Do not introduce liquids during or inside the oven while it’s hot. Let it cool completely first, then wipe with damp cloths as needed.
Don’t use water while it’s hot; wait until it’s cool.
Should I remove the racks before running a self-cleaning cycle?
Many manufacturers advise removing the racks because they can discolor or warp during the cycle. If you must leave racks in place, ensure they’re metal and non-coated to avoid damage.
Racks are usually best removed before the cycle.
What should I do if the self-clean light stays on or an error code appears?
If the light stays on or you see an error code, turn off the oven and unplug if safe. Consult the manual or contact a technician, especially if the error persists after a restart.
If the light won’t reset, check the manual or call service.
How often should I service a self-cleaning oven?
Routine professional service isn’t necessary for every cycle, but have an appliance technician inspect seals, wiring, and controls every few years or if you notice repeated issues.
Have it checked every few years or if you notice issues.
Watch Video
The Essentials
- Ventilate thoroughly after cleaning.
- Inspect seals and components for wear.
- Handle ash safely and promptly.
- Maintain a preventive cleaning plan.
- Seek professional help for persistent issues.